Author: cmsbychs

  • 15 Curly Bob Hairstyles Worth Trying in 2026

    15 Curly Bob Hairstyles Worth Trying in 2026

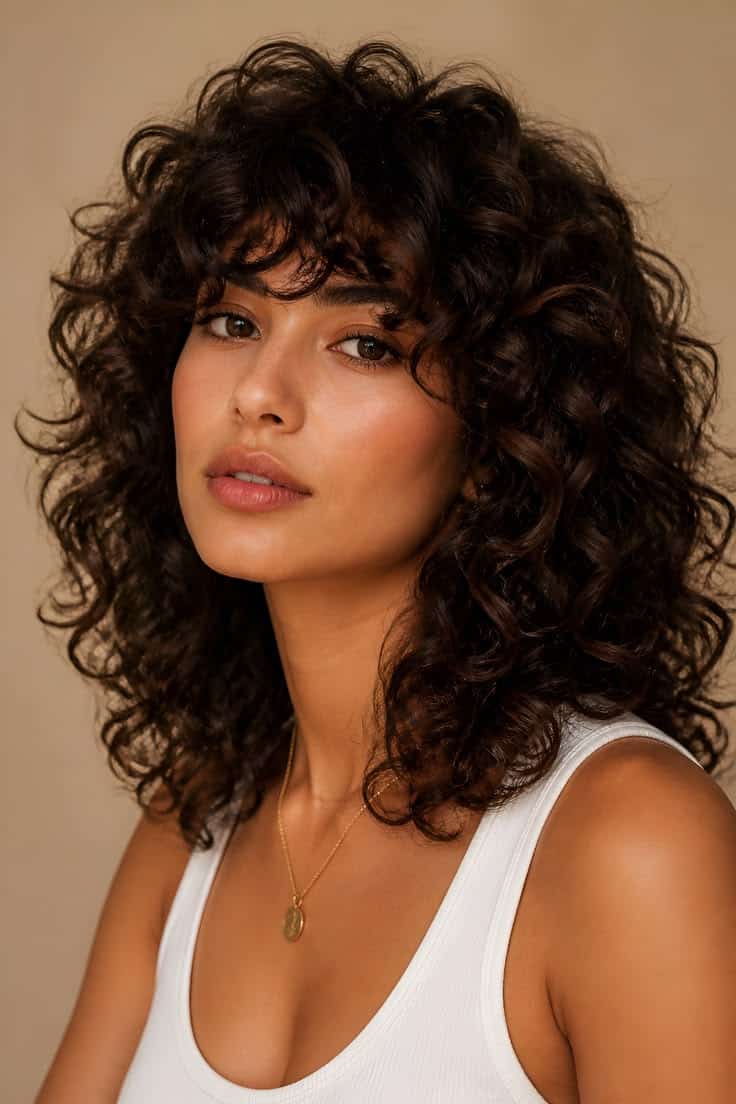
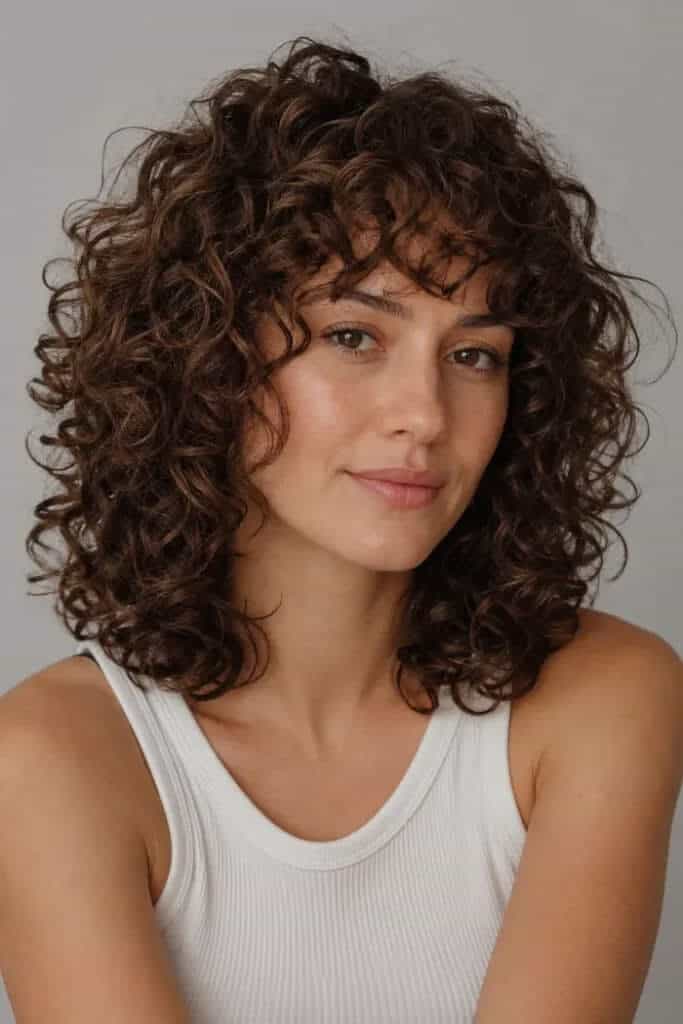
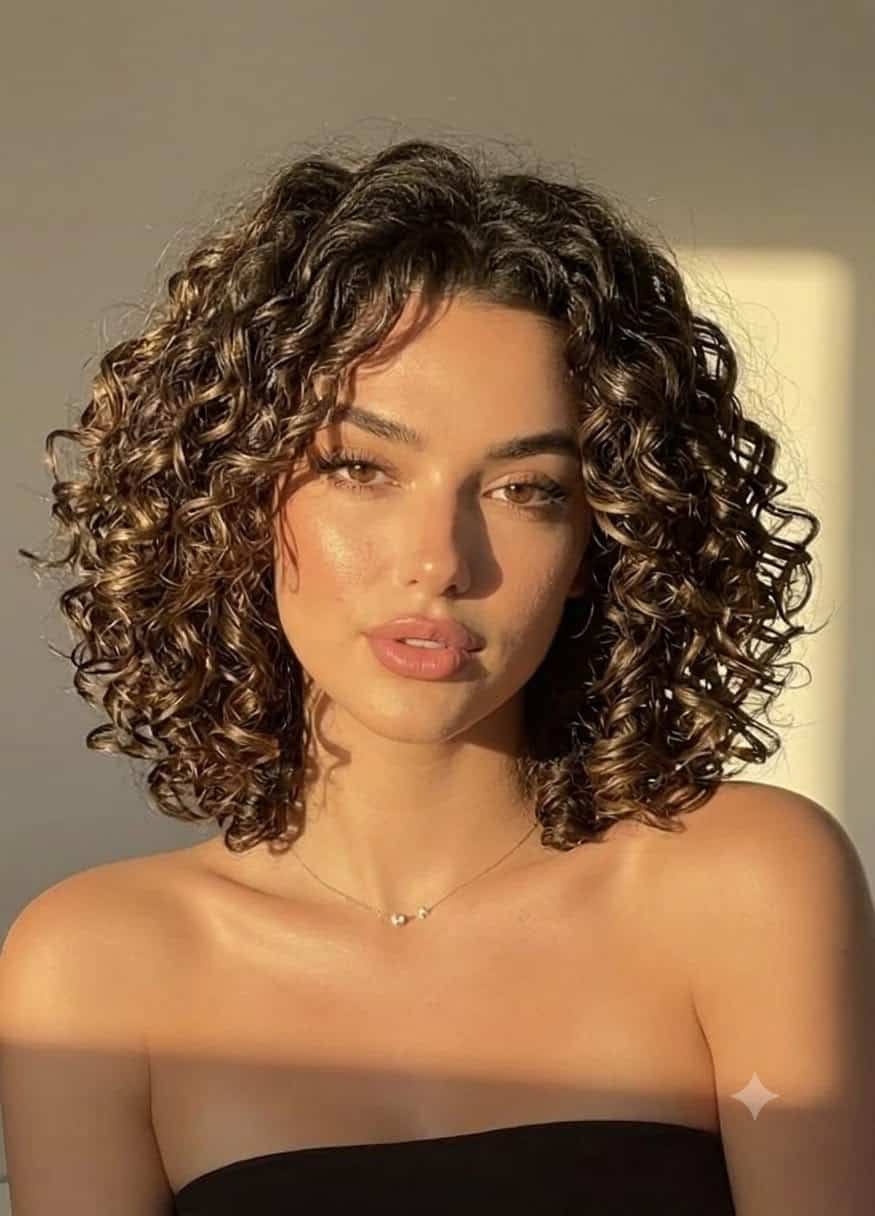
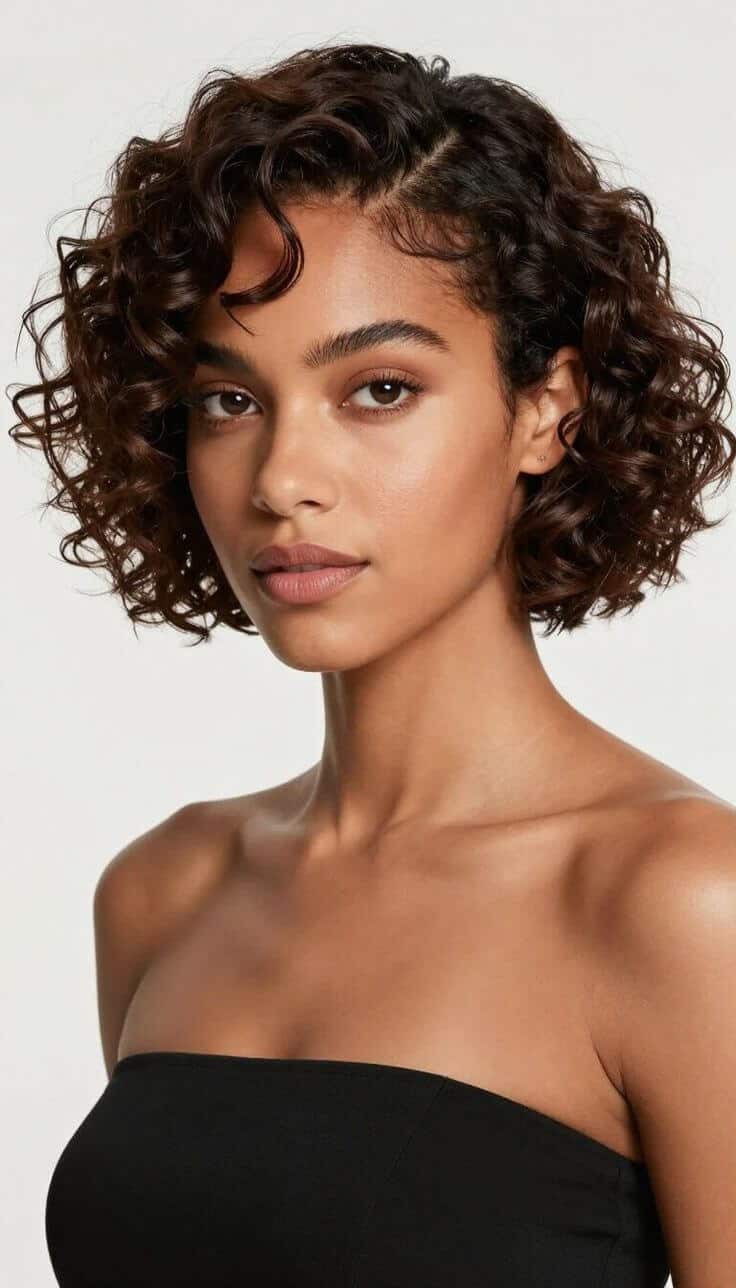
    The curly bob sits at that magical intersection where low-maintenance meets high-impact style. It’s short enough to air-dry in reasonable time, long enough to avoid awkward grow-out phases, and versatile enough to flatter face shapes from oval to round. Whether you’re rocking loose waves or tight coils, there’s a bob variation that works with your texture rather than against it.

    Why the Curly Bob Works for Every Texture

    The Shape That Celebrates Natural Volume

    Unlike straight hair that can fall limp in a bob, curls bring automatic dimension and movement to shorter lengths. The strategic layering techniques that define a good curly bob create natural lift at the crown and balanced volume throughout, working with your hair’s tendency to spring upward rather than fighting it. This built-in body means you’re not relying on hot tools or volumizing products to achieve a polished look.

    The bob length also reduces the weight that pulls looser curl patterns straight. Many people with wavy or Type 3A hair notice their curls become more defined and springy when they cut off those heavy mid-back inches. The physics are simple: less hair means less gravity working against your curl formation.
    Length Sweet Spot: Shoulder to Chin

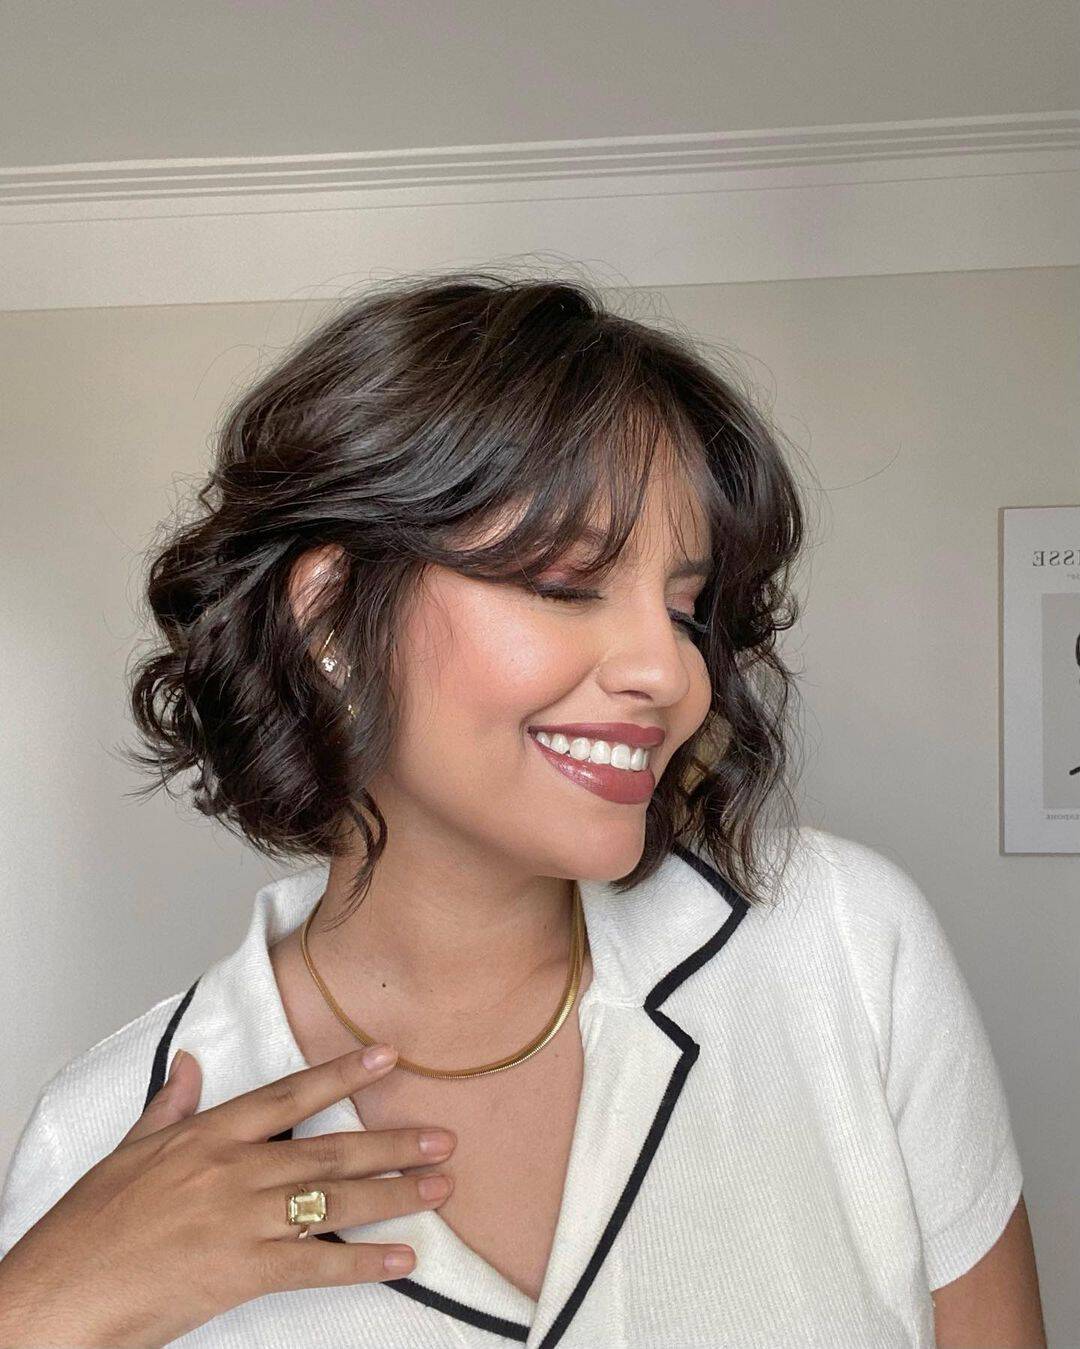
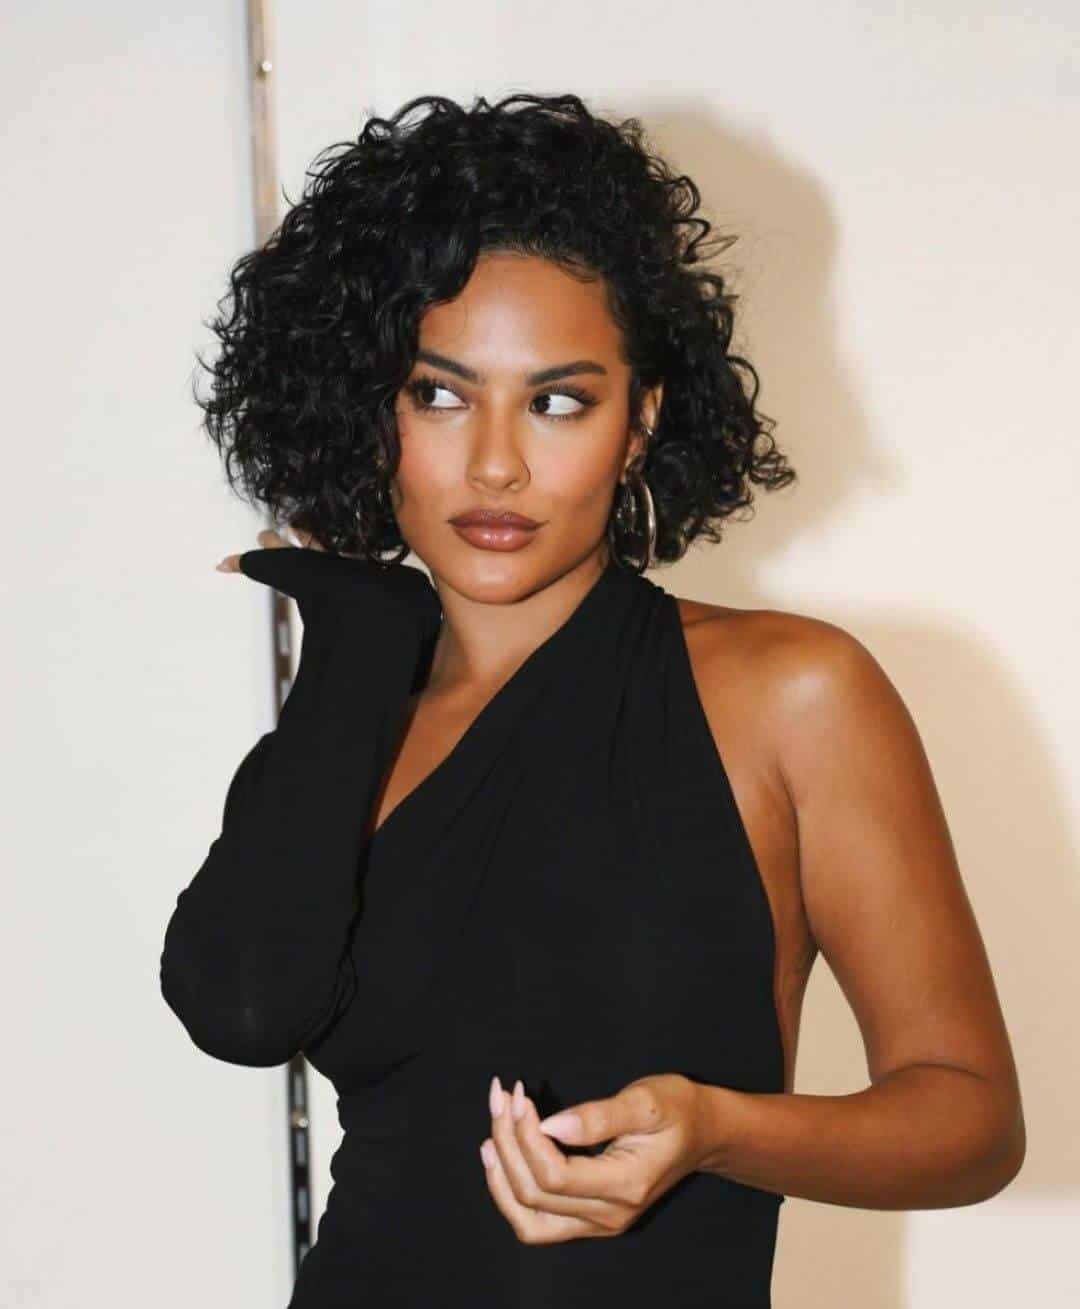
    Most curly bobs fall somewhere between chin-length and shoulder-grazing when styled, though shrinkage means your wet hair will measure considerably longer. This range gives you enough length to pull back into a low ponytail on high-humidity days while staying short enough to dry in under an hour with a diffuser. For anyone who’s spent 3+ hours air-drying long curls, this time savings alone justifies the cut.

    The shoulder-to-chin zone also offers styling flexibility. You can tuck one side behind your ear for asymmetry, add a headband for polish, or wear it completely down without hair constantly falling in your face during video calls. It’s professional enough for conservative workplaces yet edgy enough to feel current.
    Maintenance Reality Check

    Here’s the honest truth: a curly bob requires regular trims every 6-8 weeks to maintain its shape. As curls grow, they can lose the structural balance that makes a bob flattering, creating that dreaded triangle silhouette. Budget for more frequent salon visits than you would with long hair, but balance that against reduced sulfate-free shampoo usage and faster styling times.

    Product consumption drops significantly with shorter hair. That $28 gel that lasted six weeks suddenly stretches to three months. Your hydrating leave-in goes further. Over time, these savings partially offset the increased trim frequency, though your primary motivation should be loving the style itself rather than expecting massive cost reductions.
    Best Curly Bob Cuts by Hair Type

    Type 2A-2C: The Textured Wavy Bob

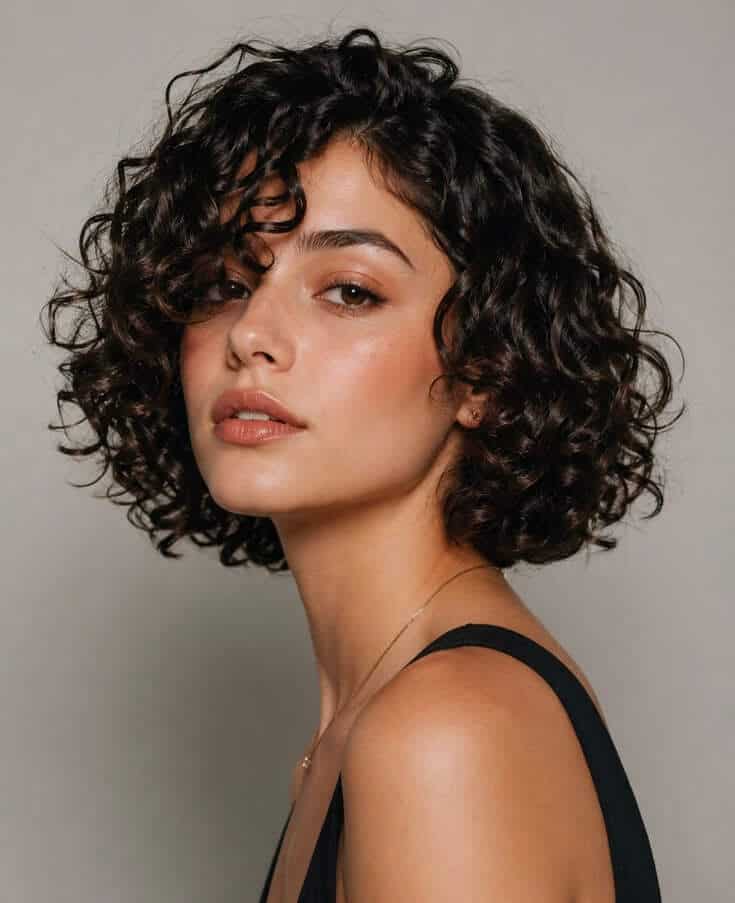
    Wavy hair thrives in a bob that emphasizes texture over uniformity. For type 2A hair care specifically, request subtle face-framing layers that start around cheekbone level. These create movement without removing so much length that your waves lose their S-bend pattern. Avoid heavy blunt cuts that can make fine wavy hair look blocky.

    Type 2B benefits from a wavy hair maintenance approach that includes slightly more aggressive layering, particularly around the crown where this pattern tends to fall flat. Ask your stylist for interior layers that remove bulk without creating visible choppy ends. The goal is airy bounce rather than dense weight.

    For defined wave care in Type 2C hair, consider a long bob (lob) that grazes the collarbone. This texture has enough definition to support slightly longer lengths without looking weighed down, and the extra inches give you more styling options. Razoring the ends can enhance the piecey, beachy texture that Type 2C does naturally.
    Type 3A-3C: The Layered Spiral Bob

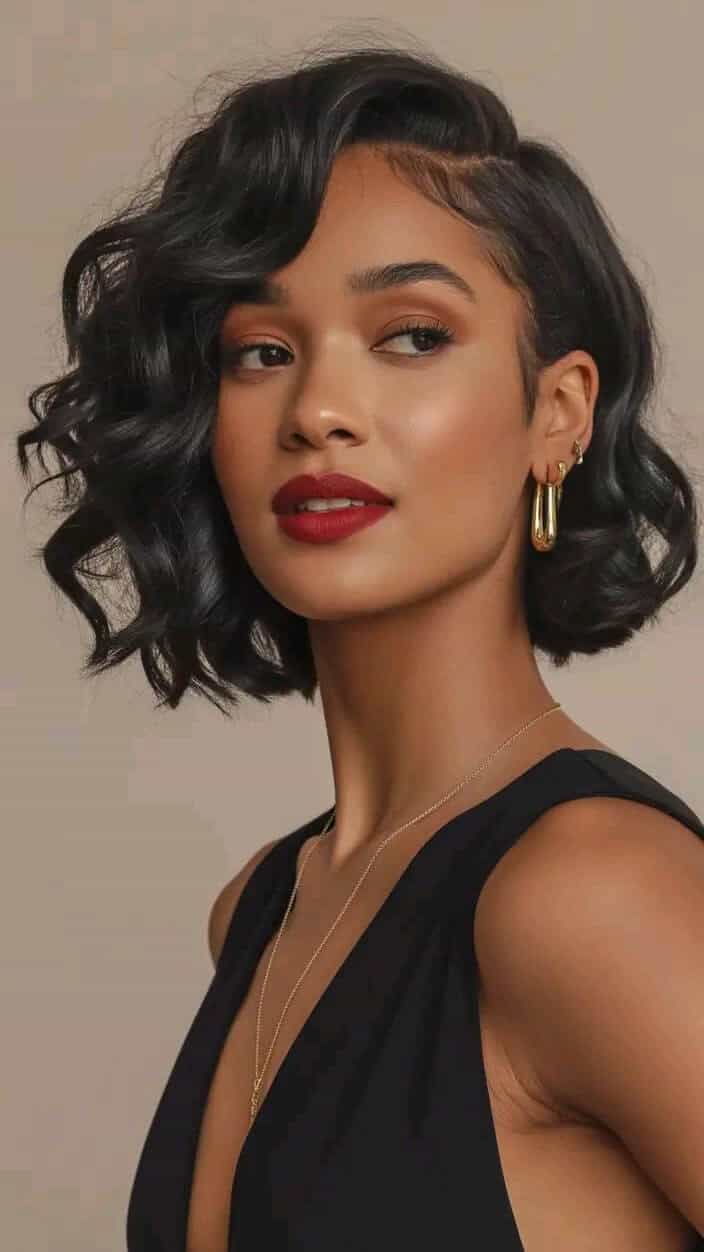
    Springy curls need substantial layering to avoid the pyramid effect. Type 3A works beautifully with a heavily layered bob where the shortest pieces at the crown are 2-3 inches shorter than the longest perimeter pieces. This creates stacked volume on top while the longer underlayers provide width balance at the bottom. Expect significant shrinkage with this pattern, often 3-4 inches between wet and dry length.

    Type 3B curls have enough natural spring to support an inverted bob where the back is shorter than the front. This trendy shape looks intentionally styled even on second and third-day hair. The key is dry cutting by a specialist who understands understanding your curl pattern and cuts each ringlet individually to create a cohesive shape.

    For Type 3C, request a rounded, graduated shape rather than A-line or asymmetrical cuts. This tighter curl pattern creates so much natural volume that severe angles can look unbalanced. Conservative layering works better here, removing just enough weight to prevent bottom-heaviness while preserving density.
    Type 4A-4C: The Tapered Coily Bob

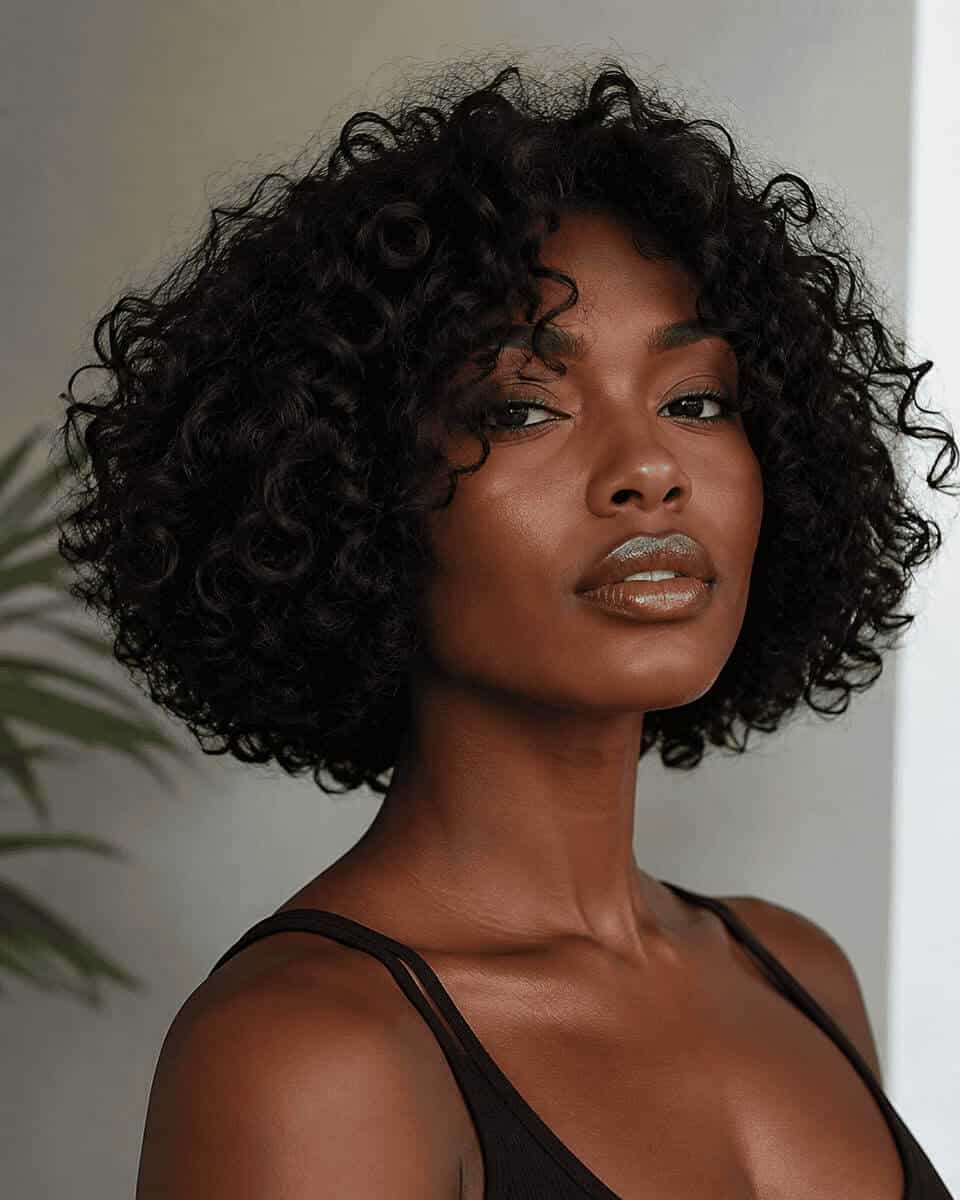
    Coily hair allows for dramatic shape creativity in a bob. Type 4A hair characteristics include a defined curl pattern that responds well to tapered cuts where the nape and sides are closely cropped while the top maintains 3-4 inches of length. This creates a modern silhouette that’s easy to maintain between salon visits since the short sections can be trimmed at home or at a barber.

    Type 4B and 4C textures shine in bobs with textured, non-uniform perimeters. Avoid blunt one-length cuts that can emphasize shrinkage in unflattering ways. Instead, work with a stylist who can create subtle interior layering that maintains density (crucial for these textures) while allowing the hair to form a flattering rounded shape rather than a perfect square.

    Many coily bob wearers incorporate undercuts or shaved designs at the nape, which serve both aesthetic and practical purposes. These reduce bulk in high-heat areas, minimize tangles, and add edge to an otherwise classic cut.
    Considering Your Density and Face Shape

    High-density hair needs more aggressive layering regardless of curl type. Without sufficient weight removal, thick curly hair in a bob becomes a horizontal mass that adds unwanted width. Ask for “channel cutting” or “slide cutting” techniques that remove bulk from the interior without affecting the outer silhouette.

    Face shape matters less with curly bobs than you might think because the texture itself softens angular features. That said, heart-shaped faces look particularly good with chin-length bobs that add width at the jawline, while round faces can elongate their appearance with asymmetrical bobs that include longer front pieces angled toward the collarbone.
    15 Curly Bob Variations to Inspire Your Next Cut

    Classic Chin-Length Curly Bob

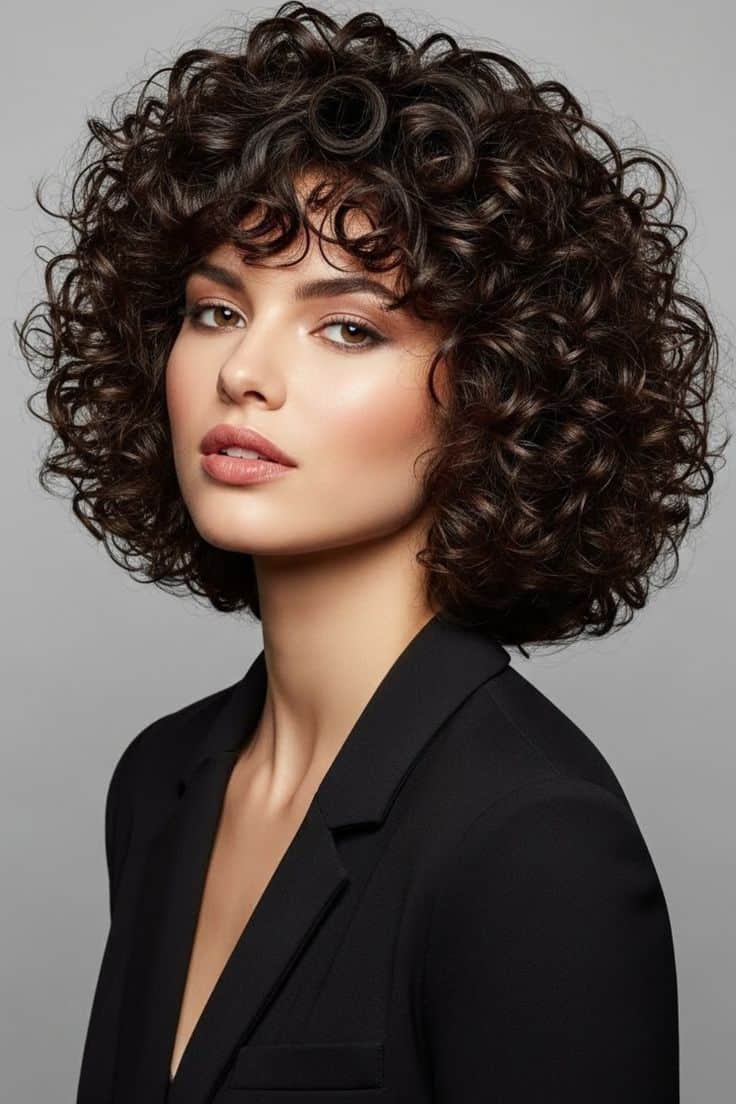
    The Classic Bob: One-length perimeter that hits right at the jawbone, with minimal layering. Best for Type 3A-3B curls with medium density. This timeless shape requires precision cutting but delivers that polished, “I have my life together” aesthetic.
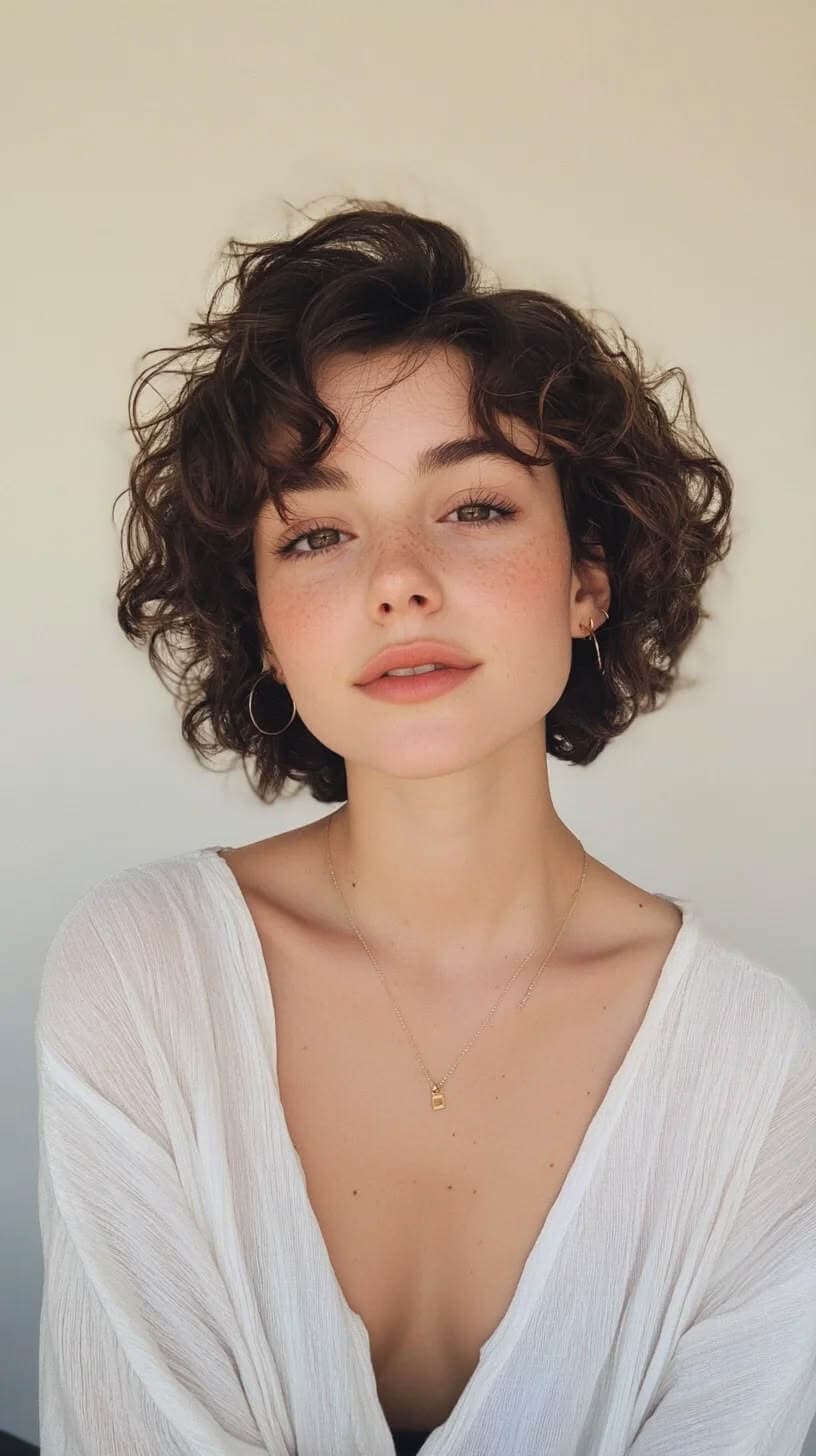
    The French Bob: Shorter variation that ends above the jawline, often with eye-skimming bangs. Works surprisingly well on Type 2C-3A hair when you want maximum face exposure. Requires daily styling but makes a serious style statement.
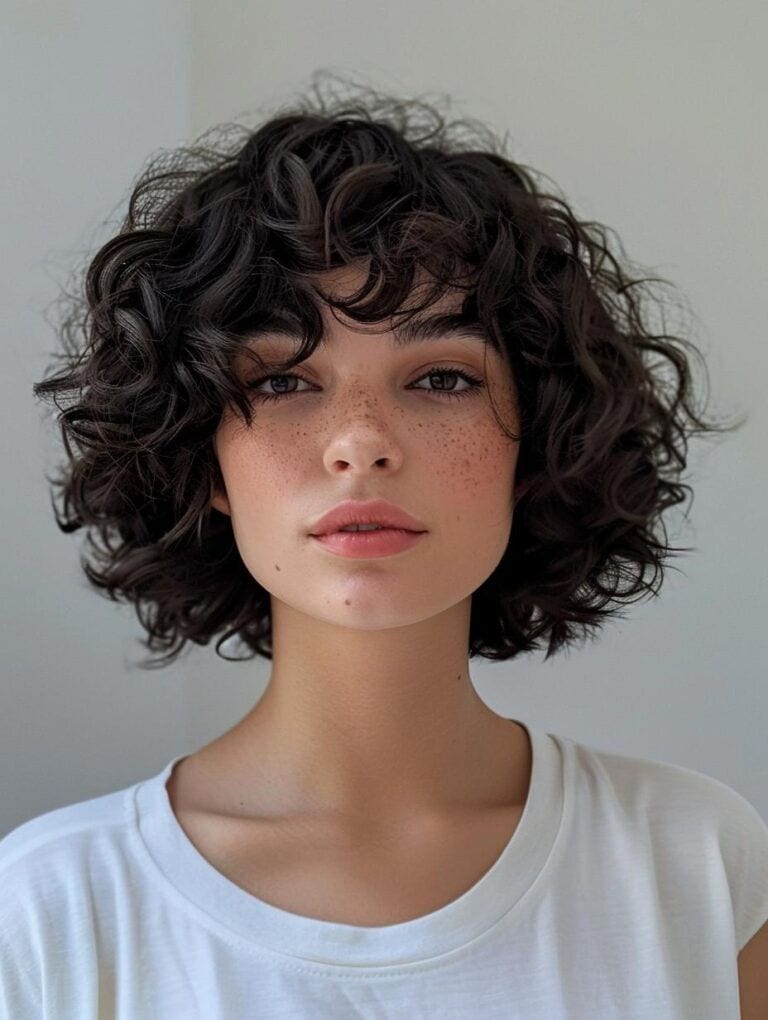
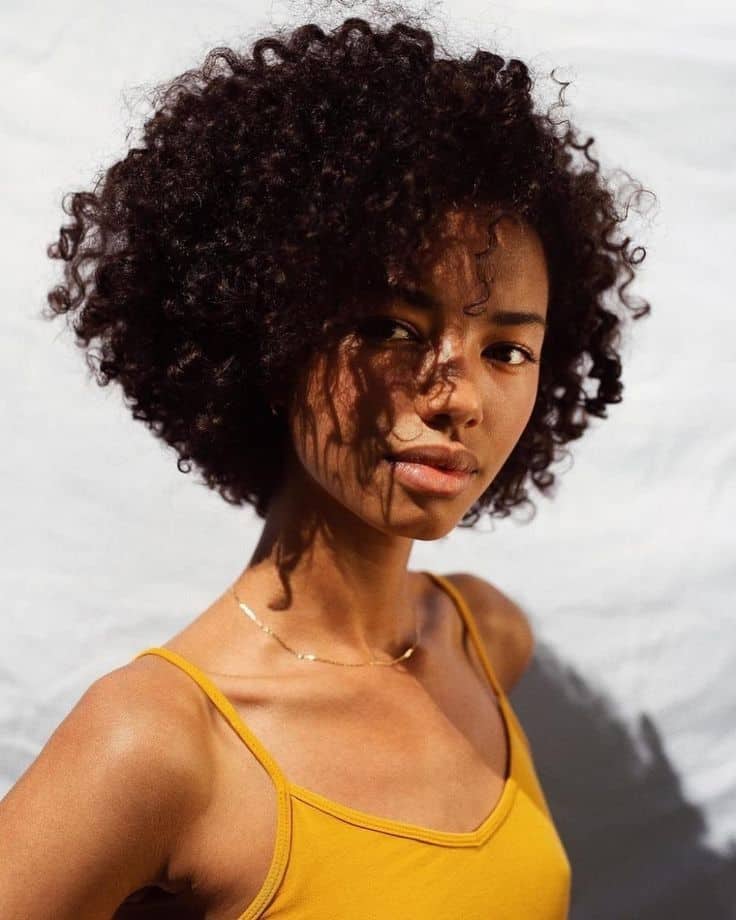
    The Rounded Bob: Heavily layered throughout to create a globe-shaped silhouette. Perfect for Type 4A-4C hair, this cut celebrates natural volume rather than trying to tame it. The rounded shape looks intentional and fashion-forward.
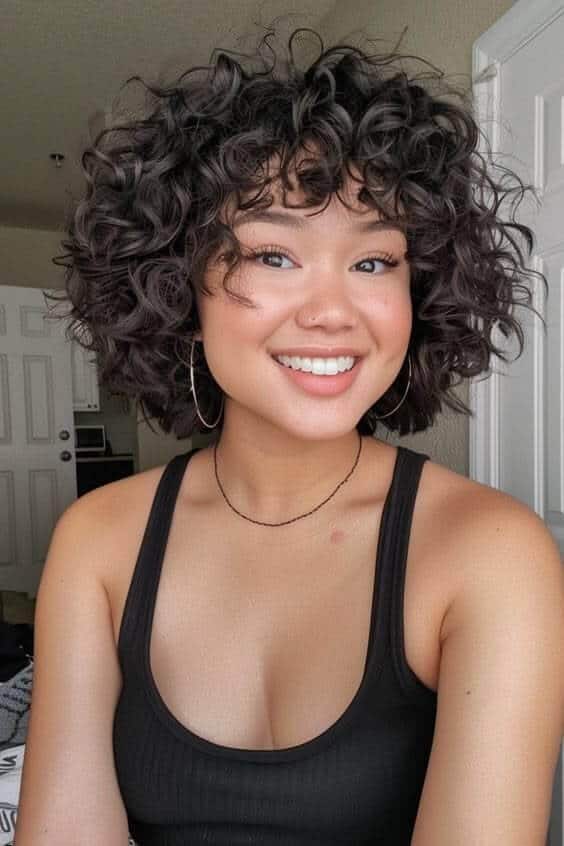
    Asymmetrical and Angled Bobs

    The Side-Swept Asymmetrical: Dramatically longer on one side, sometimes by 2-3 inches. This works on any curl type but shines on Type 2B-3A where the length difference is clearly visible. Style the longer side forward over one shoulder for maximum impact.
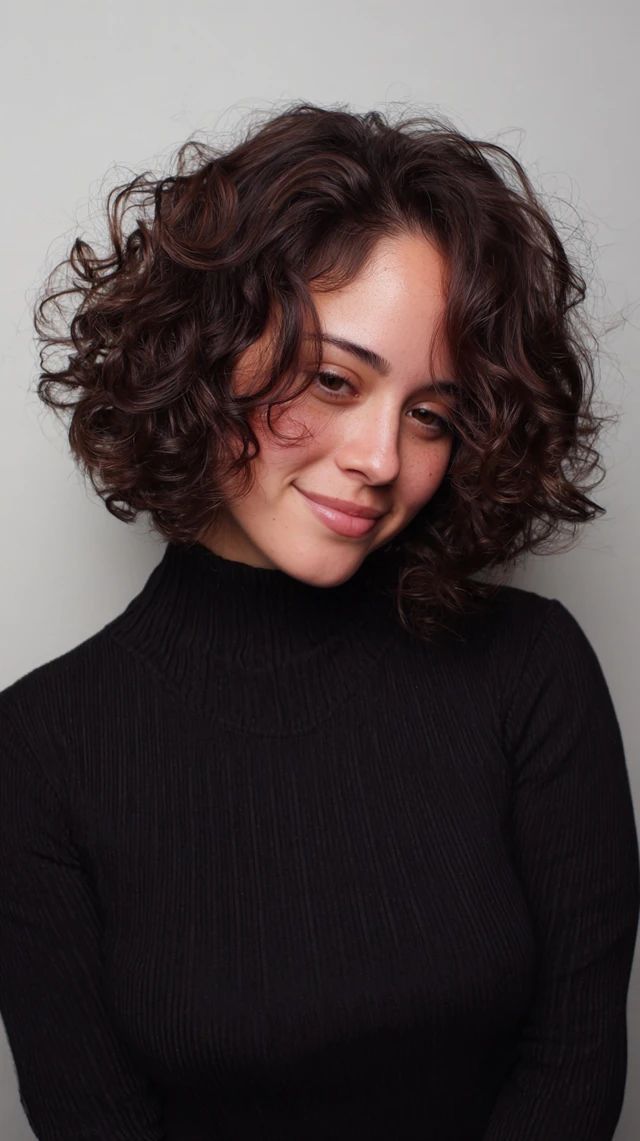
    The Graduated Angle: Front pieces that angle from shorter back to longer front in a subtle slope. Flatters everyone but particularly elongates round faces. The angle should follow your natural curl direction for the most cohesive look.
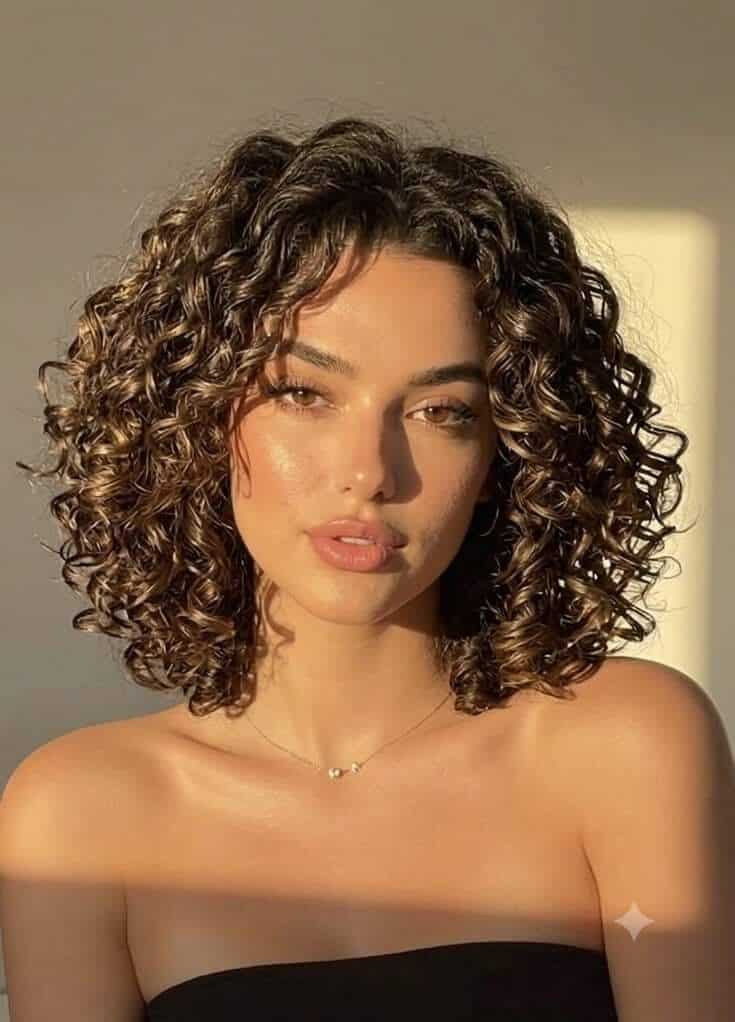
    The Extreme Asymmetrical: One side buzzed or closely cropped, the other side maintaining bob length. This high-contrast look requires regular maintenance but delivers serious edge. Best on confident personalities with Type 3B-4C hair that can support the dramatic volume difference.
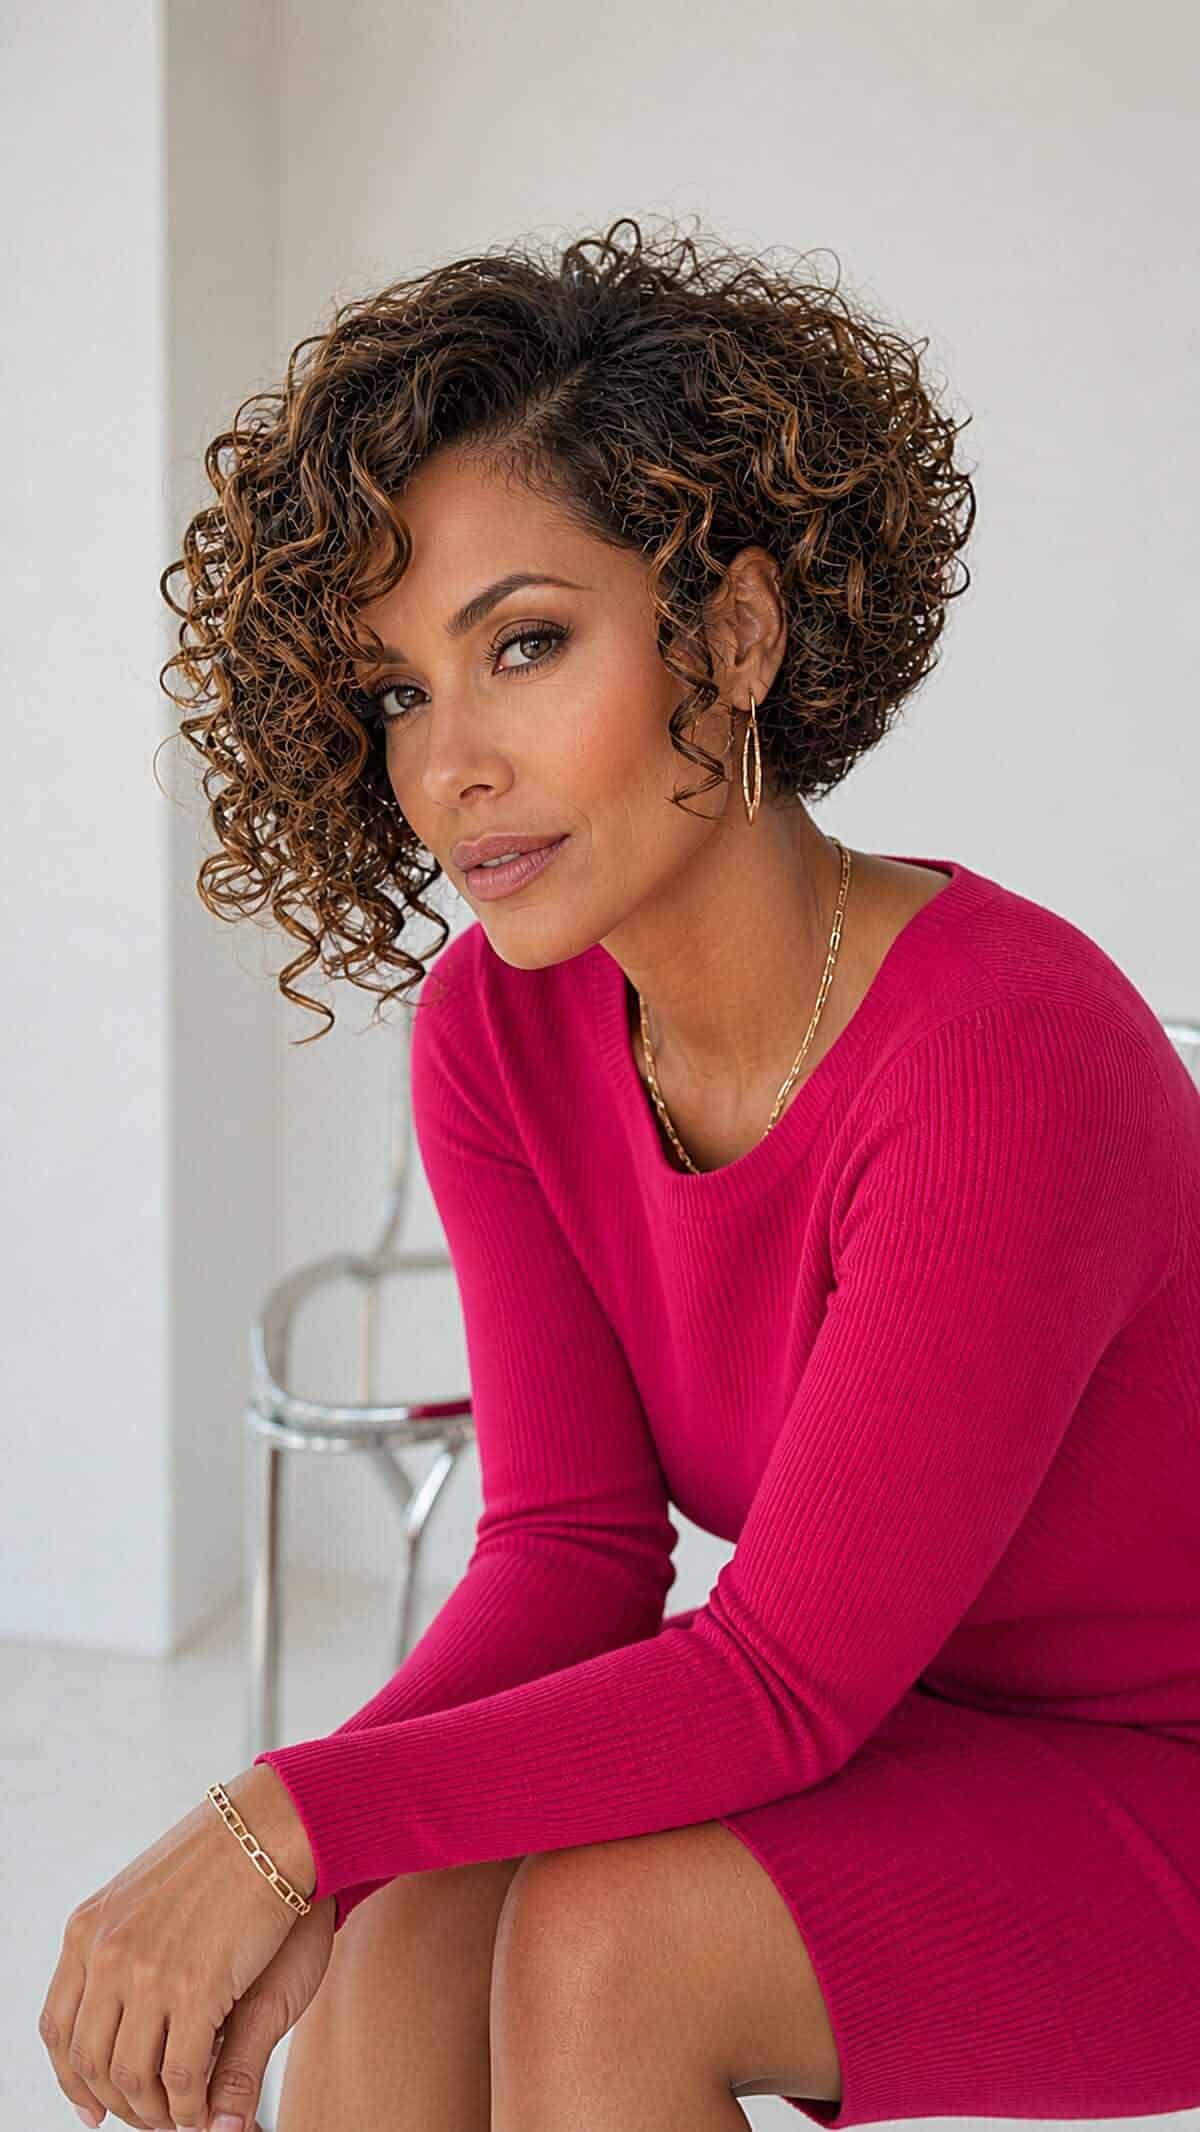
    Stacked and Inverted Options

    The Stacked Bob: Shorter layers concentrated at the back crown, creating lift and volume there while the sides remain longer. Combats flat-back-of-head syndrome and works beautifully on Type 2C-3B curls. Requires back-view photos during your consultation to ensure proper stacking.
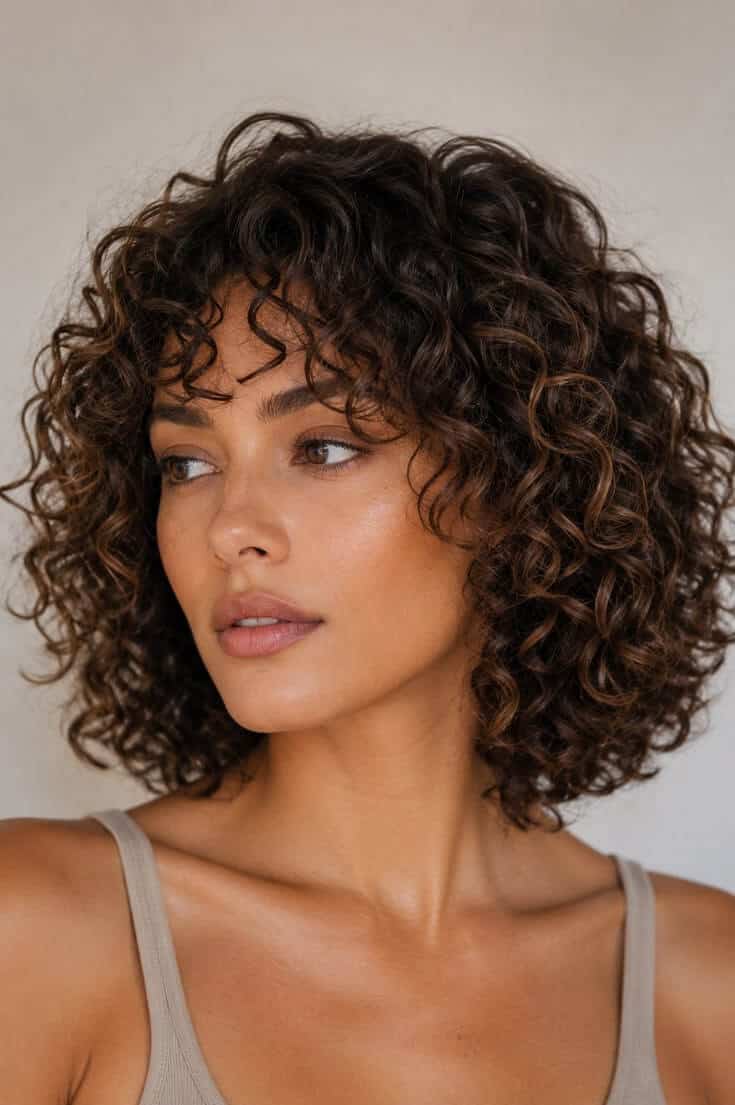
    The Inverted Bob: Back is significantly shorter than front, sometimes by 4-5 inches when measured straight. The front pieces can reach collarbone length while the back sits at nape level. This creates natural face-framing and works across all curl types, though it requires skilled cutting to avoid lopsidedness.
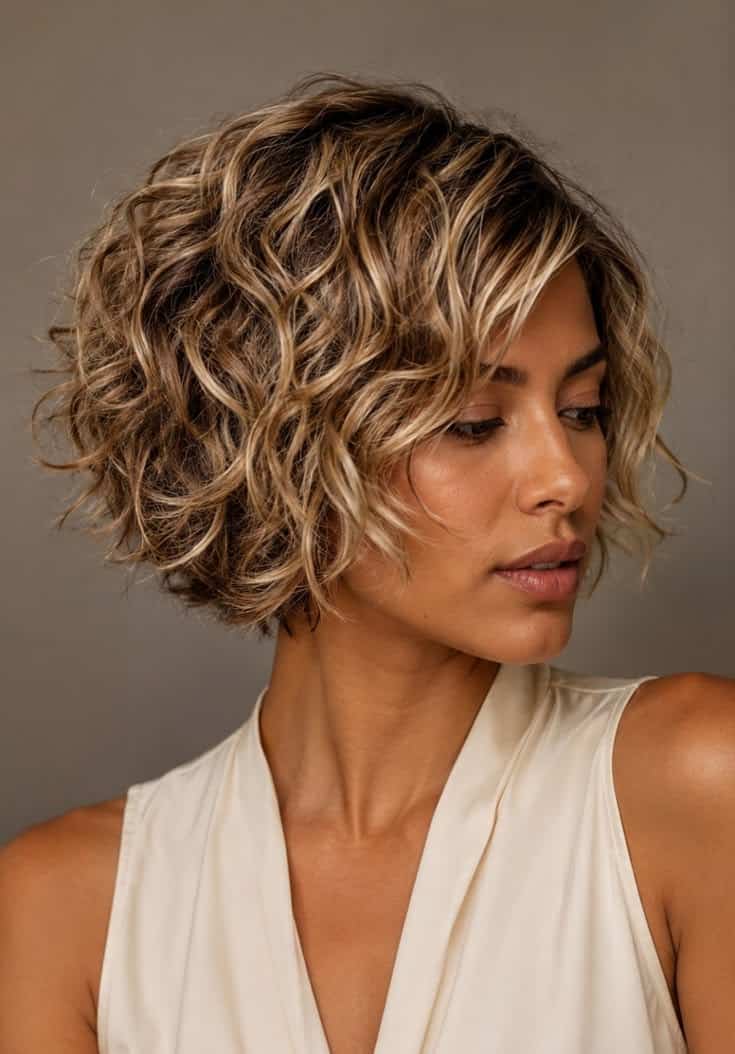
    Shaggy and Layered Styles

    The Modern Shag Bob: Heavy, choppy layers throughout with particular emphasis on crown volume. Think 1970s Stevie Nicks but updated for 2025. This suits Type 2A-3A curls and delivers that effortlessly cool, just-back-from-the-beach vibe. Pair with lightweight mousse for separated, piecey definition.
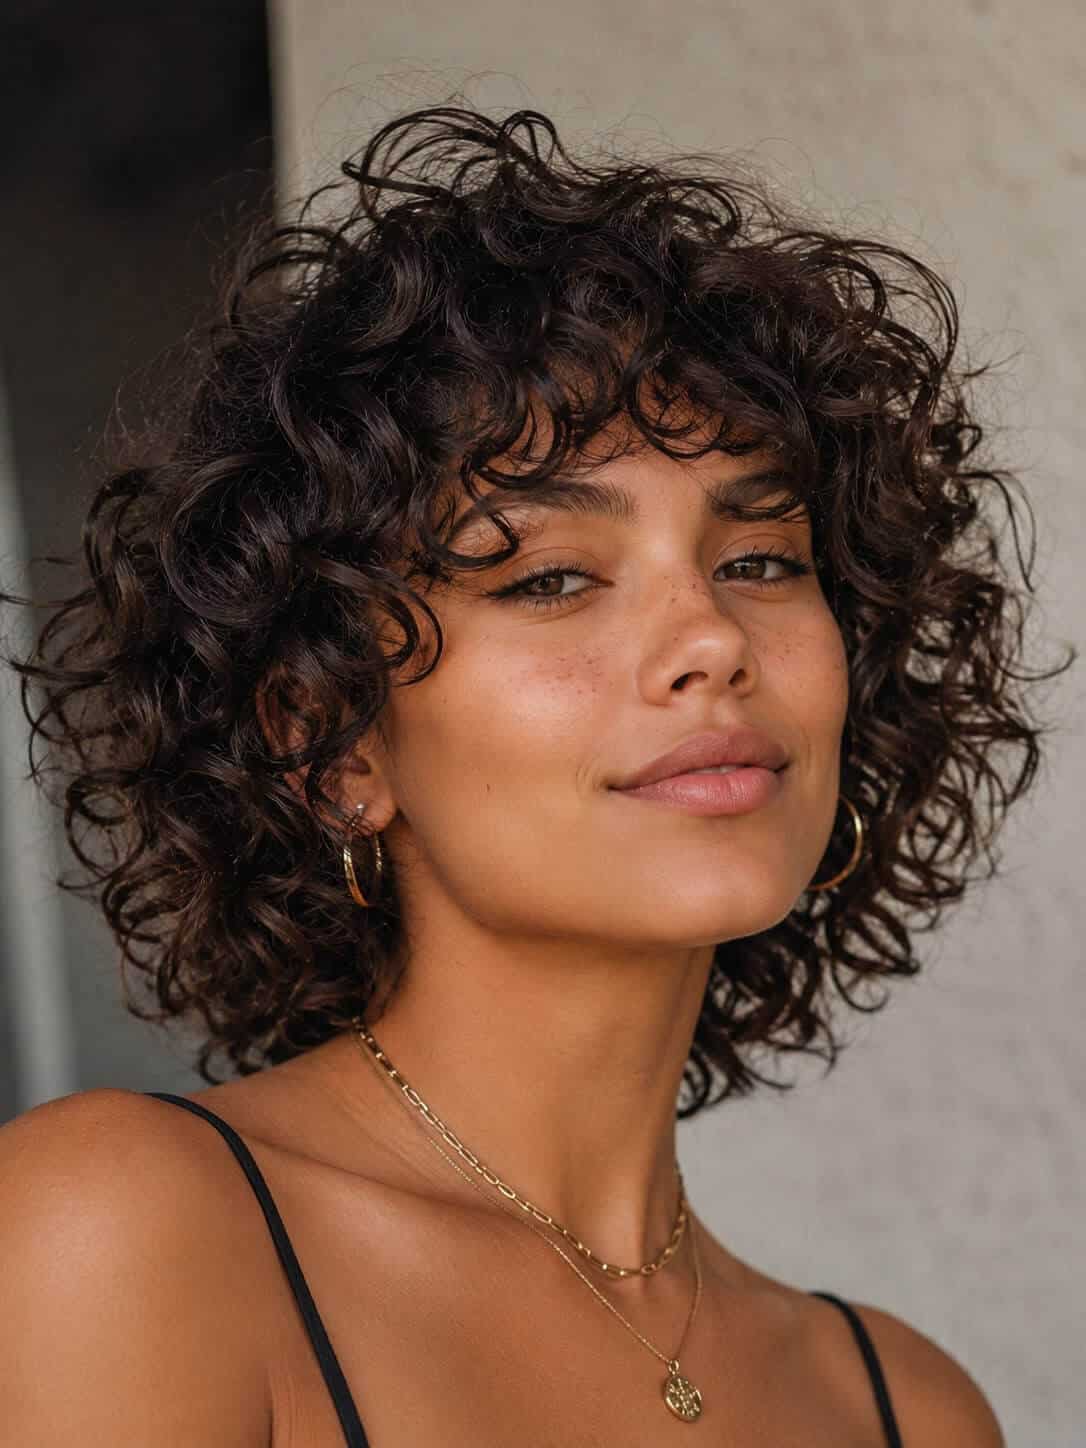
    The Layered Lob: Longer bob (lob) hitting between chin and shoulder with substantial layering. This versatile cut works across curl types and offers the most styling flexibility. You can wear it sleek with gel, voluminous with mousse, or textured with sea salt spray.
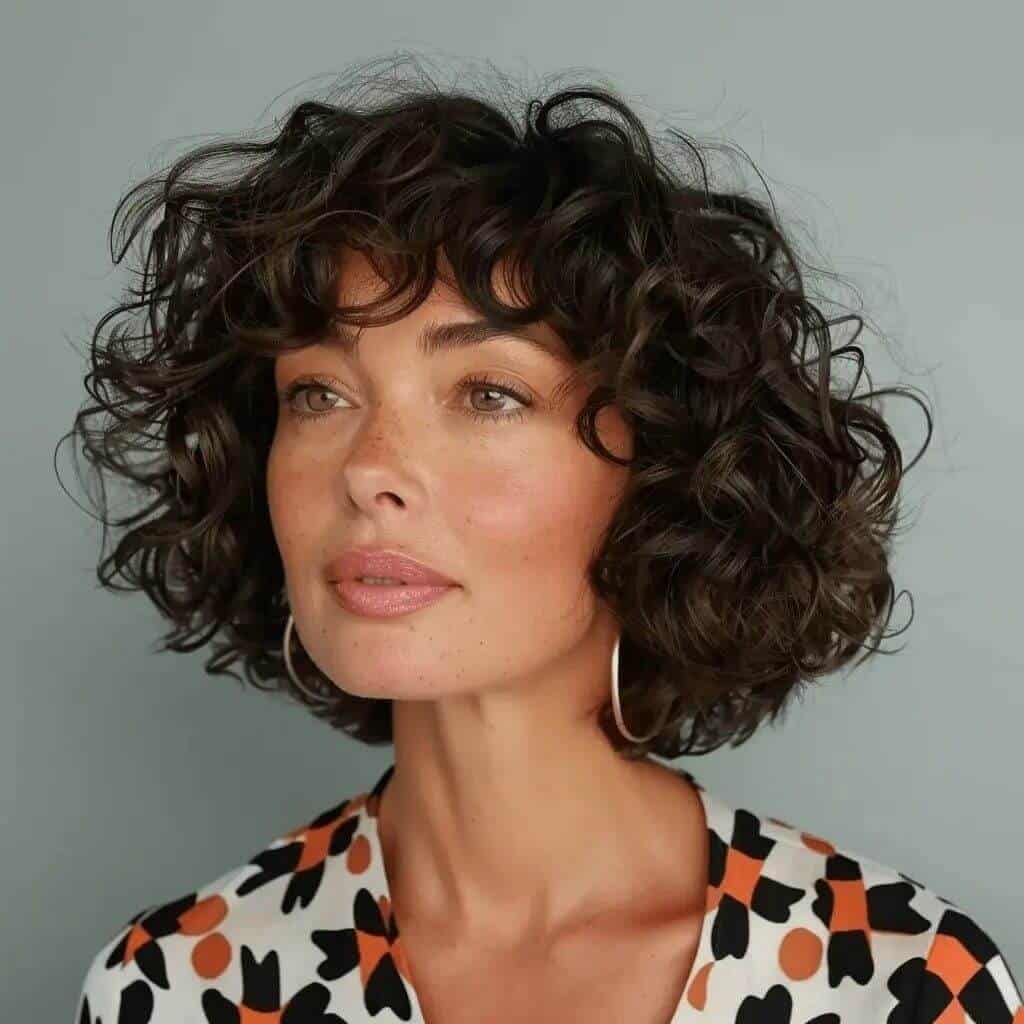
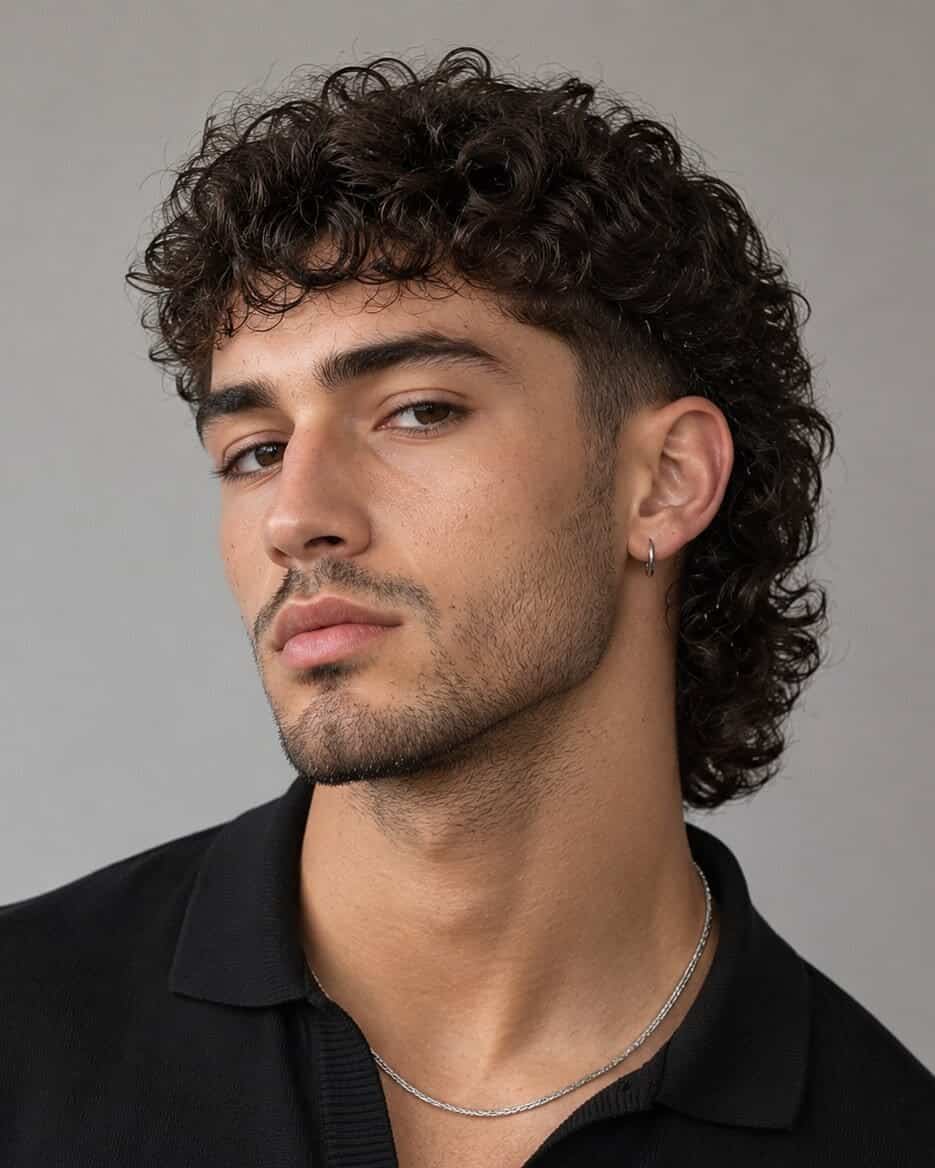
    The Curly Mullet Bob: Shorter around the face and crown with deliberately longer pieces at the nape. This fashion-forward take on the bob has gained traction in 2024-2025, particularly among Type 3-4 hair wearers who want something unconventional. Not for the style-shy, but undeniably cool when executed well.
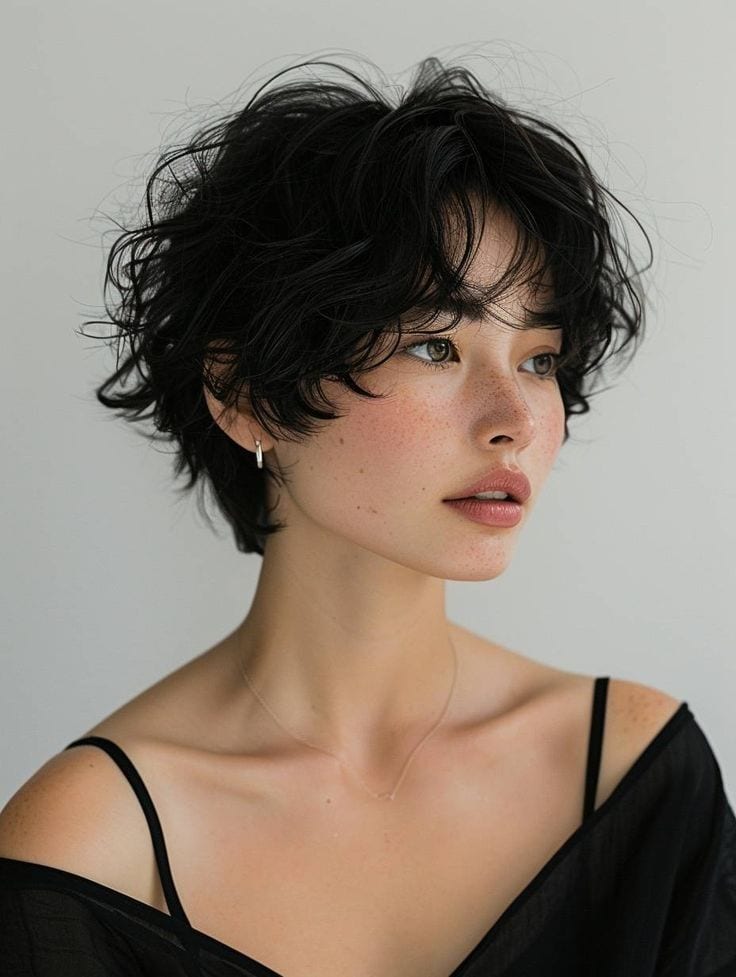
    Bobs with Undercuts or Tapered Napes

    The Tapered Bob: Classic bob shape on top with closely tapered or faded sides and nape. Reduces bulk significantly and creates a striking profile view. Particularly popular among Type 4 hair wearers and those in hot climates. Requires barber maintenance every 2-3 weeks for the shaved sections.
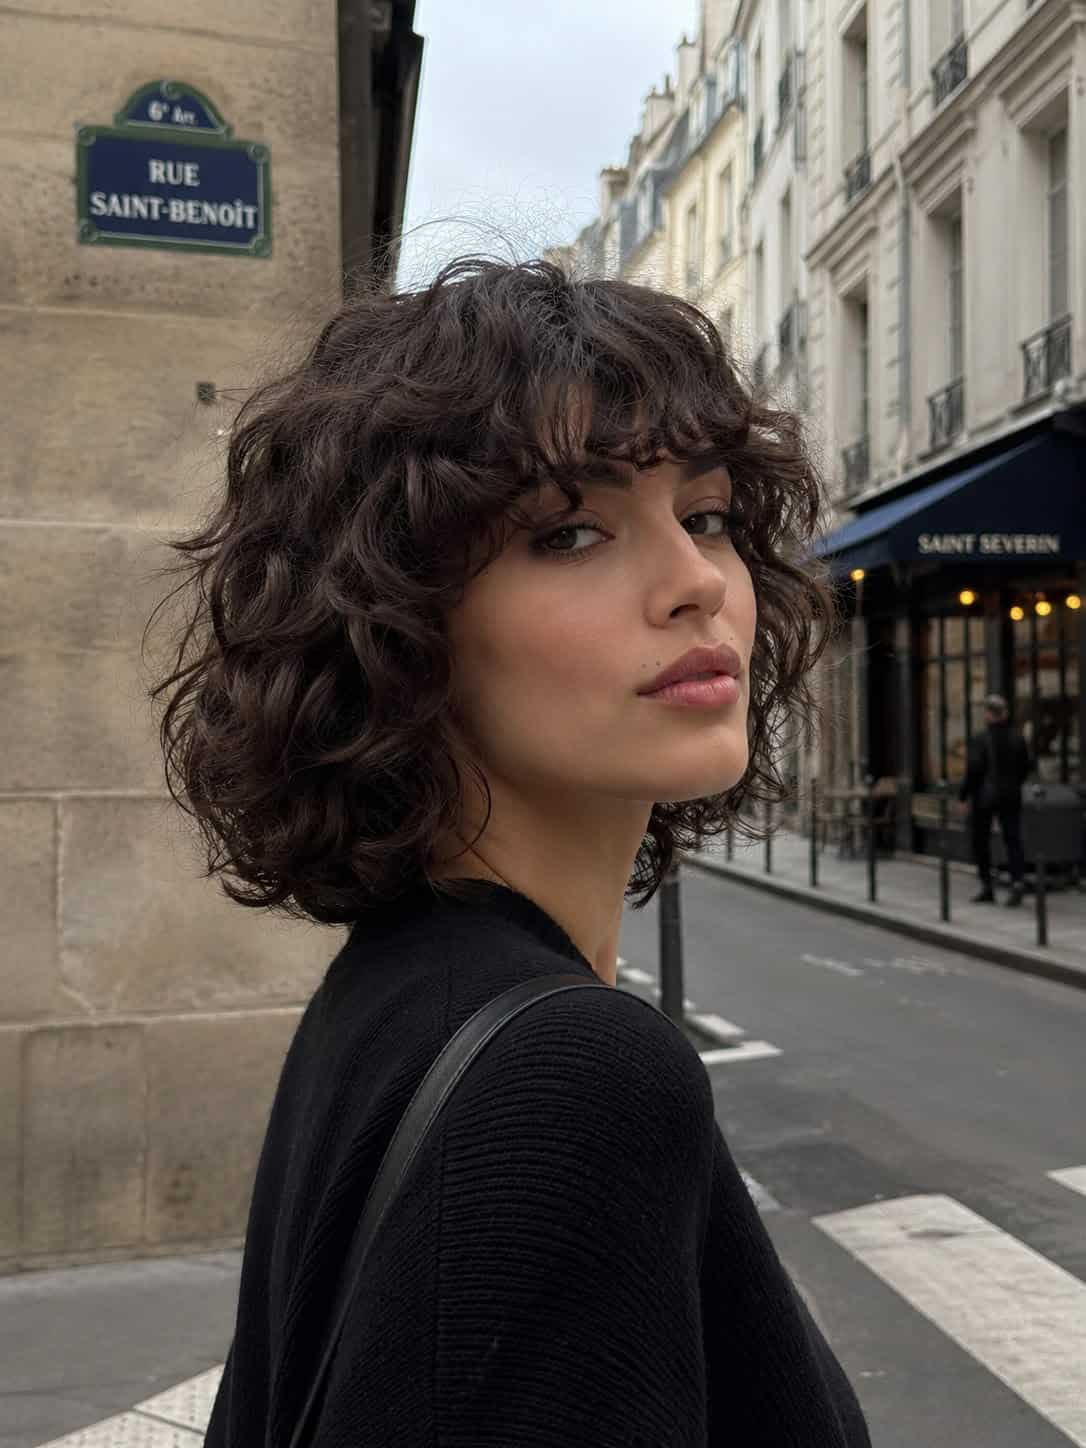
    The Undercut Bob: Hidden undercut beneath the top layers, visible only when you pull your hair up. Offers temperature regulation and reduces drying time without committing to a fully visible shaved section. Works across all curl types and reverses easily by letting the undercut grow out.
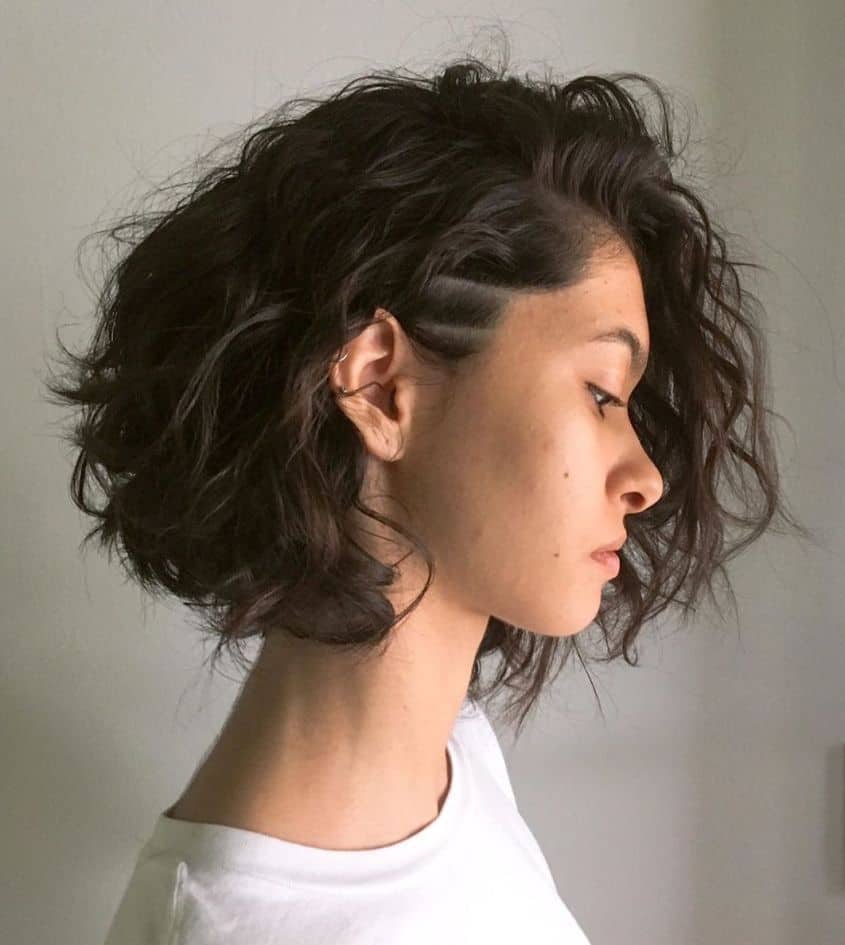
    The Design-Detail Bob: Incorporates shaved patterns, lines, or designs into tapered sections. This artistic approach works best on Type 4 hair where the contrast between shaved and textured sections is most dramatic. Think of it as wearable art that requires a skilled barber-stylist collaboration.
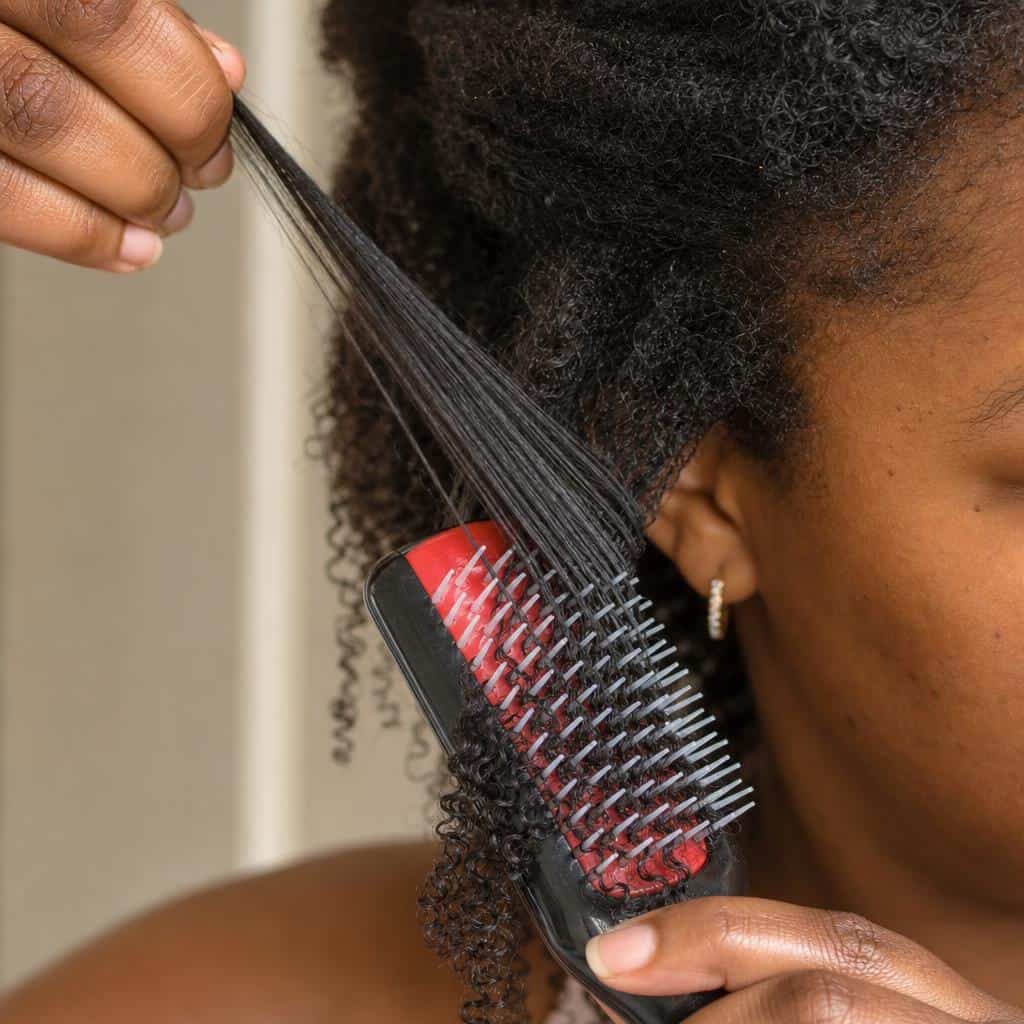
    Cutting Techniques That Make or Break Your Bob

    Dry Cutting vs. Wet Cutting for Curls

    Dry cutting has become the gold standard for curly bobs because it allows the stylist to see exactly how each curl will behave in its natural state. They can cut curl by curl, ensuring proper weight distribution and shape. This technique works particularly well for Type 3-4 hair where shrinkage can reach 50-70% of wet length. Cutting wet hair at these curl types often results in surprisingly short results when dry.

    However, wet cutting still has its place for wavy hair (Type 2A-2C) where shrinkage is minimal and the priority is creating a clean perimeter line. Some stylists use a hybrid approach, doing the initial shape wet and then refining dry. Ask potential stylists about their preferred method for your specific curl type before booking.

    Strategic Layering for Shape and Bounce

    The difference between a flattering curly bob and a triangle-shaped disaster often comes down to layer placement. Interior layers should remove bulk without creating gaps in the outer silhouette. Channel cutting and point cutting are gentler techniques than traditional horizontal layering, which can leave obvious choppy lines in curly hair.

    Crown layers should generally be shorter to create lift, but not so short that they stick up awkwardly. A good rule of thumb is ensuring crown layers are at least 2-3 inches long when pulled straight, giving them enough weight to bend into your curl pattern rather than standing perpendicular to your head.

    Finding a Curl-Specialized Stylist

    Not every great hairstylist is a great curl specialist. Look for certifications in specific curl cutting methods like DevaCurl, Ouidad, or Rezo Cut. Check Instagram portfolios specifically for bobs on curl types similar to yours. A stylist who posts mostly straight-hair transformations may not have the curl expertise you need, regardless of their general skill level.

    During consultations, ask about their approach to shrinkage, how they determine layer placement for different curl patterns, and whether they cut wet or dry. Their answers will quickly reveal their curl competency. Be willing to travel or pay more for a true specialist, particularly for your initial cut. Maintenance trims can sometimes be done by less specialized stylists once the shape is established.

    How to Style Your Curly Bob at Home

    Wash Day Routine for Maximum Definition

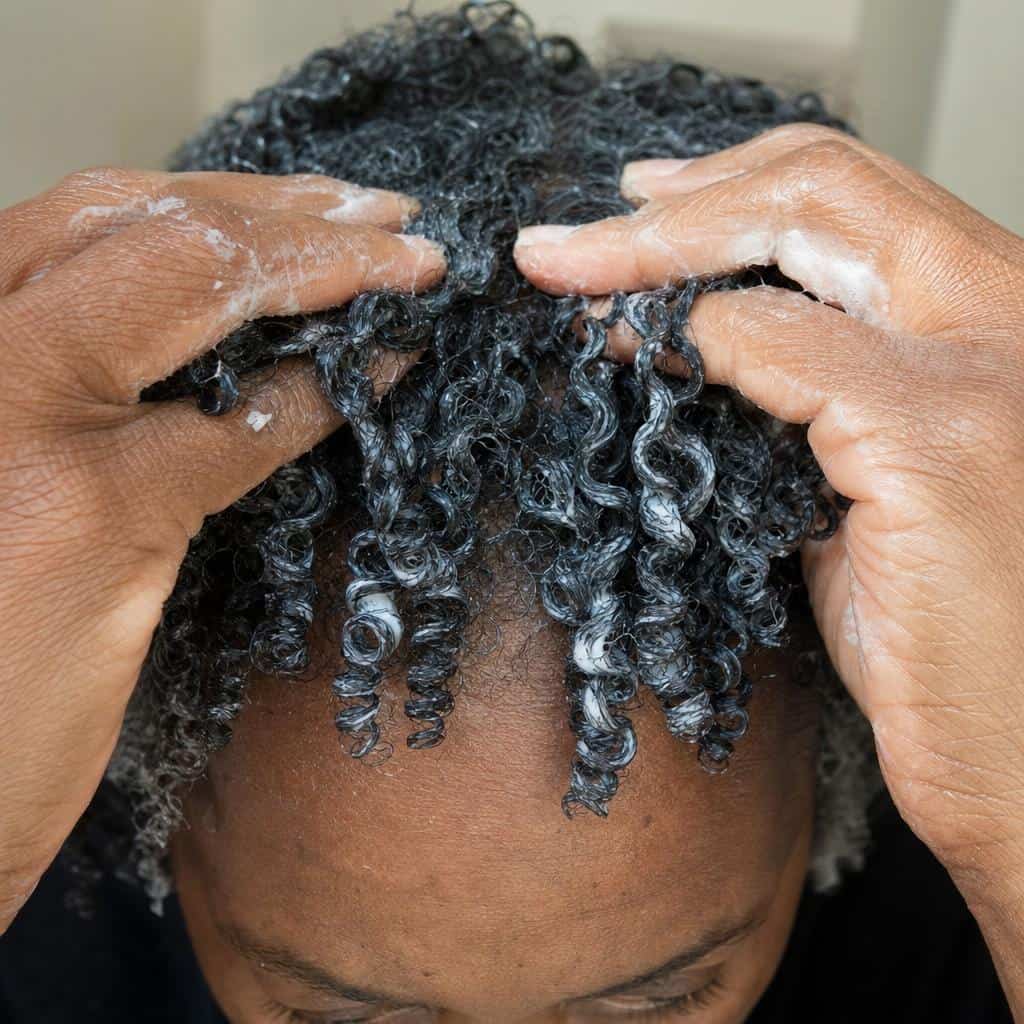
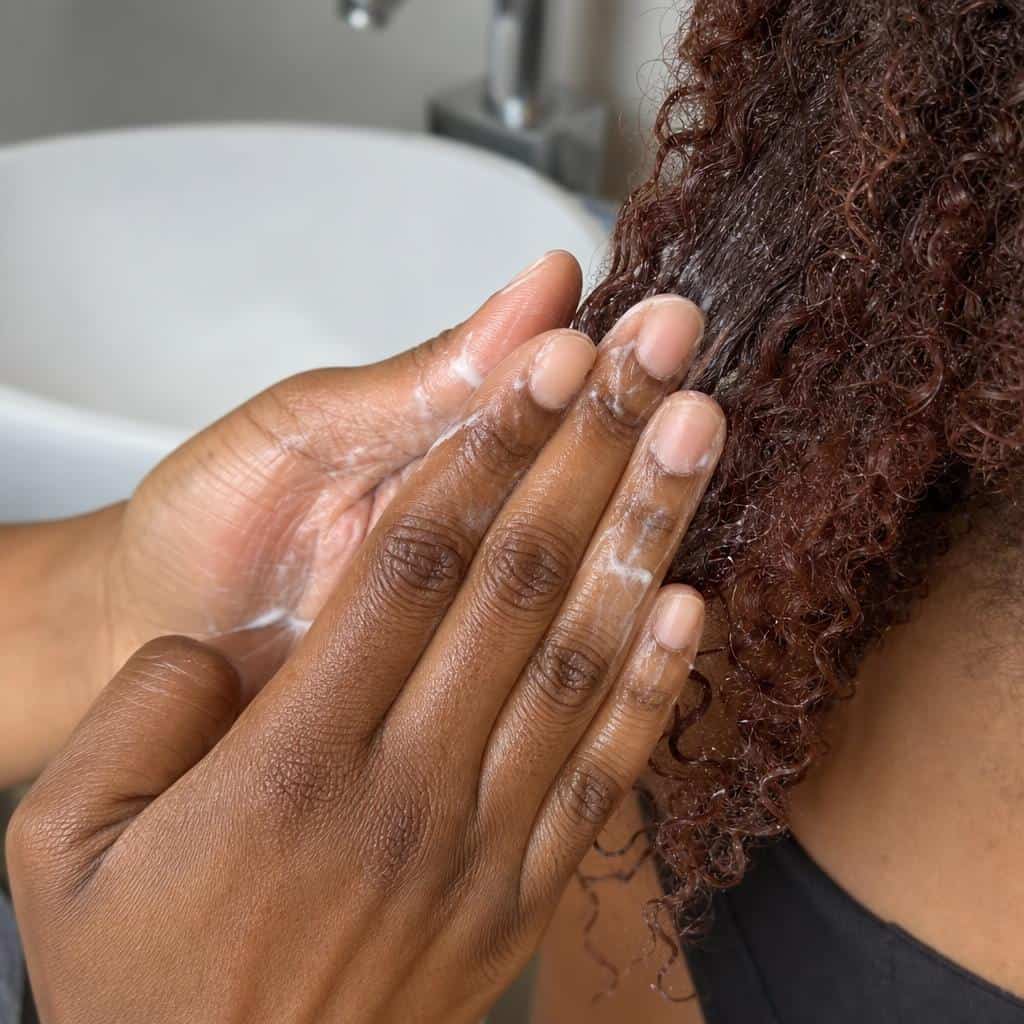
    Start with scalp-focused cleansing using gentle cleansing options that won’t strip natural oils. With bob-length hair, you don’t need to shampoo lengths, just let the rinse water cleanse them. This prevents unnecessary dryness while keeping your scalp clean.

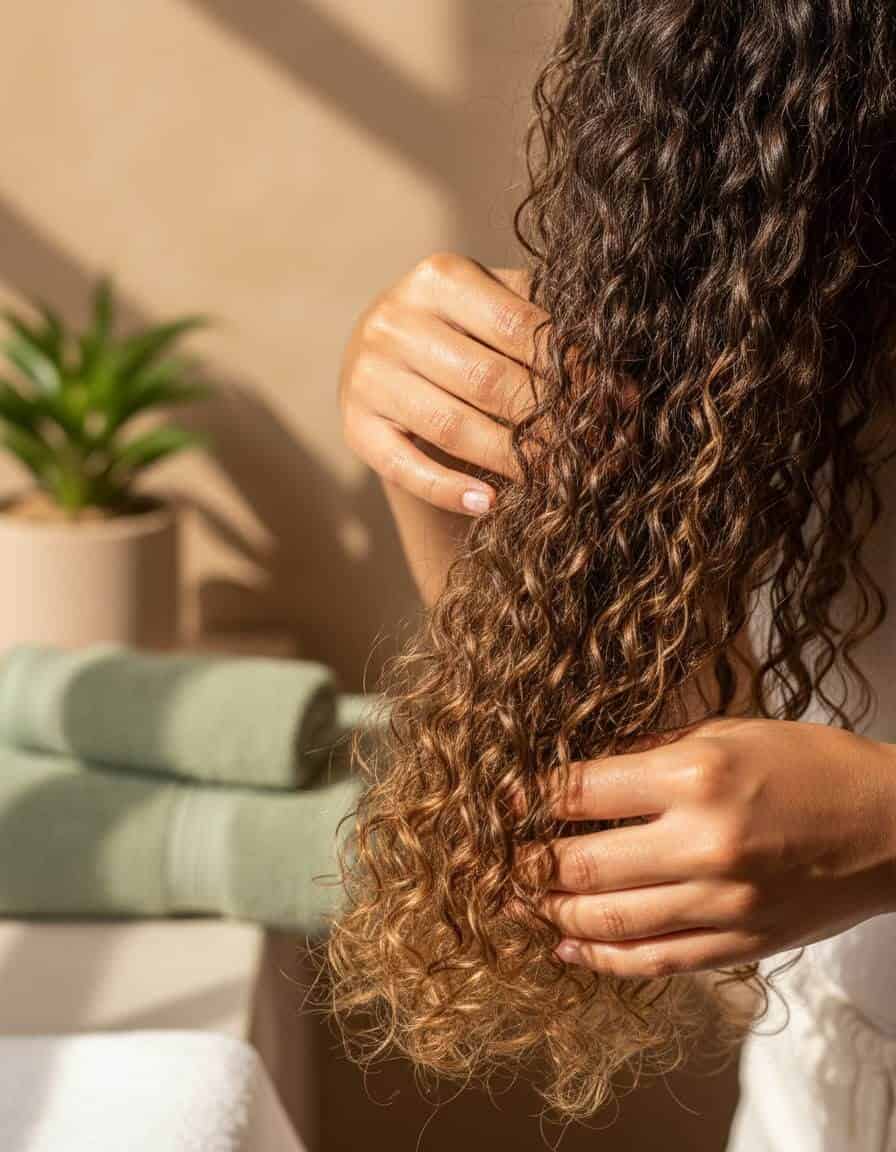
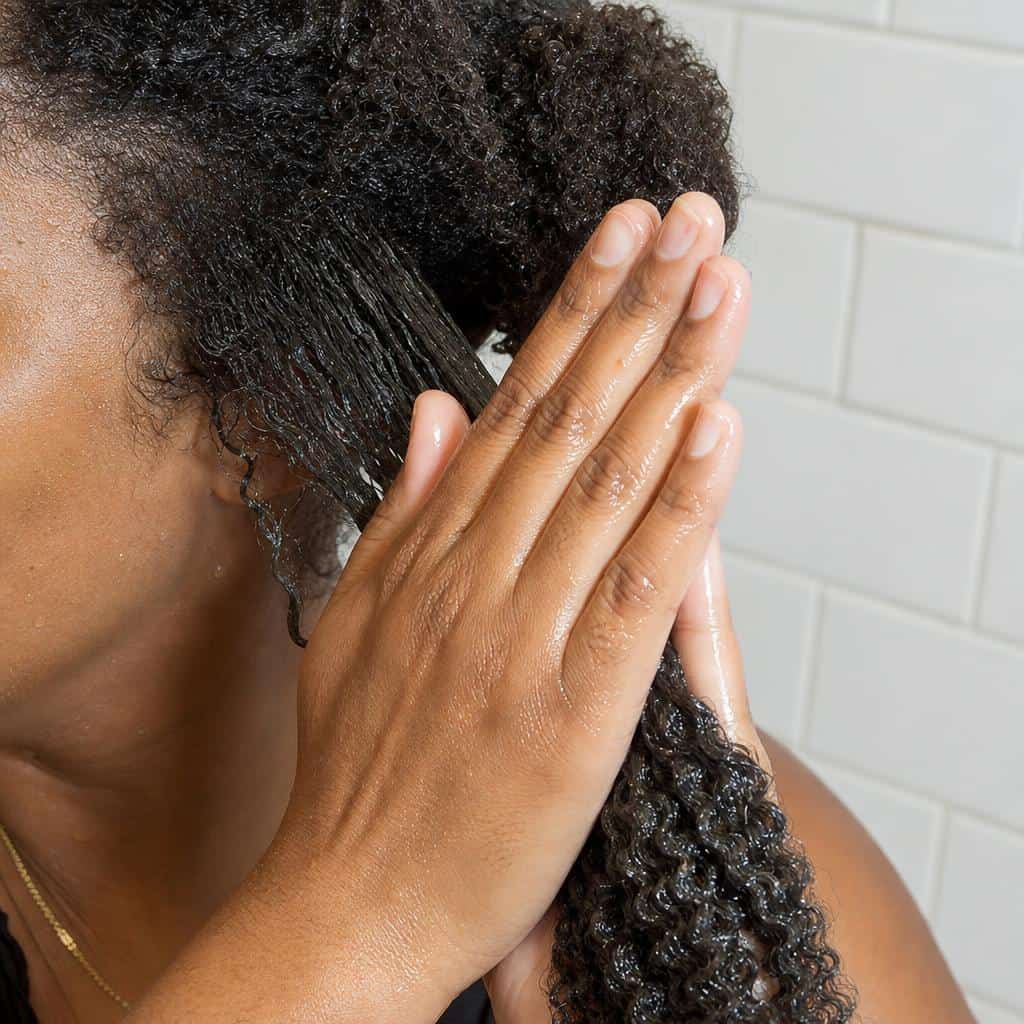
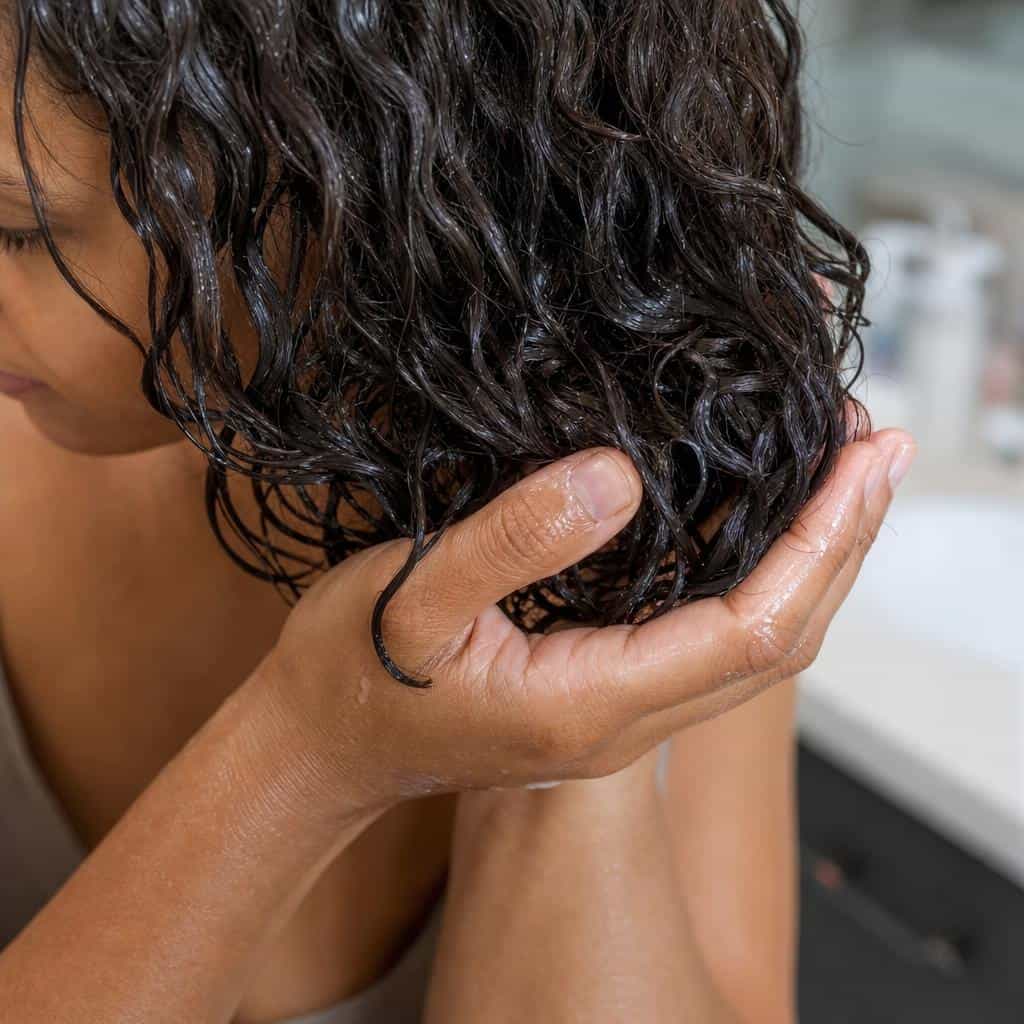
    Apply your moisture retention products while hair is soaking wet, using praying hands or scrunching motions depending on your curl type. Type 2 hair often does better with praying hands to maintain wave pattern, while Type 3-4 responds well to scrunching. Some people achieve excellent results with the Denman brush technique on shorter lengths, though this requires practice to avoid over-defining.

    Product Cocktailing for Your Length

    Shorter hair needs less product than you’re used to, but you might need different product types. A common combination for curly bobs is lightweight leave-in plus gel or curl-defining mousse. The leave-in provides moisture, while the styler creates hold and definition.

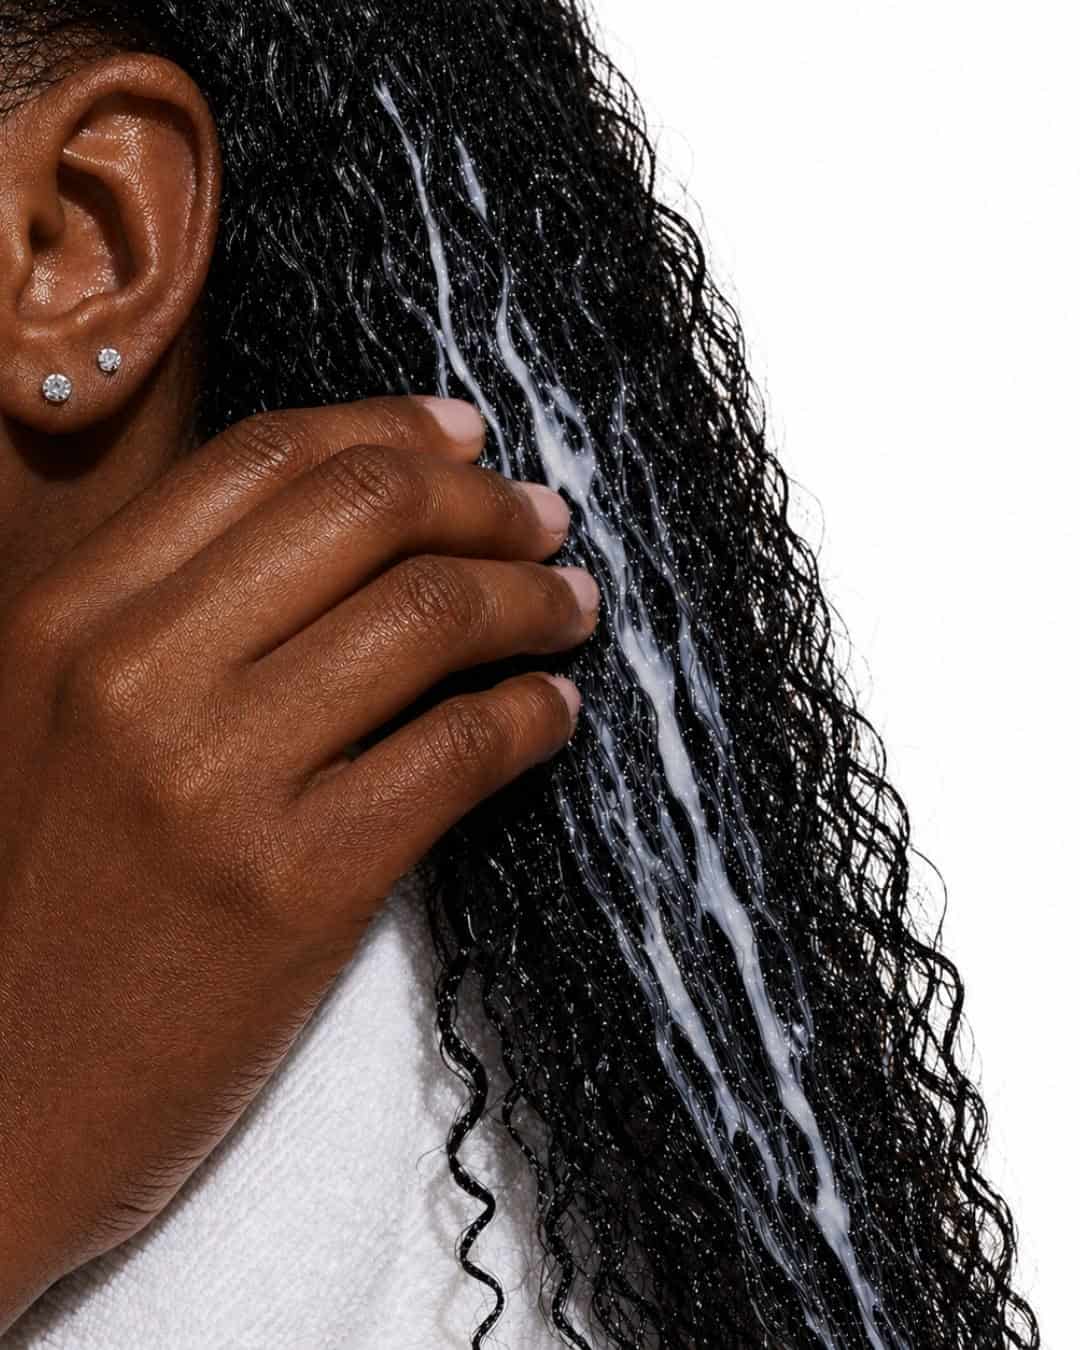
    Apply products in sections for even distribution. With a bob, you can easily reach all areas yourself, unlike with long hair where the back becomes a struggle. Use quarter-sized amounts per section for Type 2-3A, nickel-sized for Type 3B-4C depending on density. You can always add more but removing excess product requires re-wetting.

    Diffusing Techniques for Volume Without Frizz

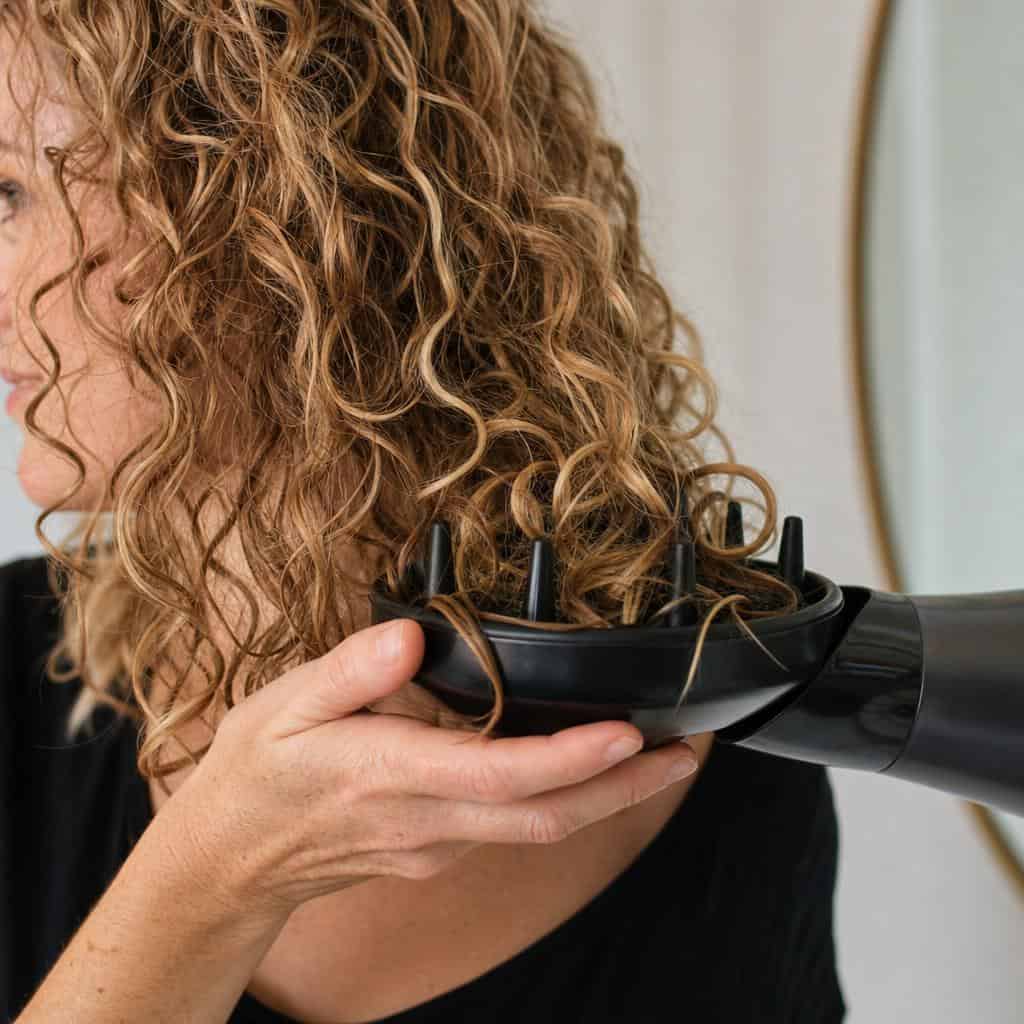
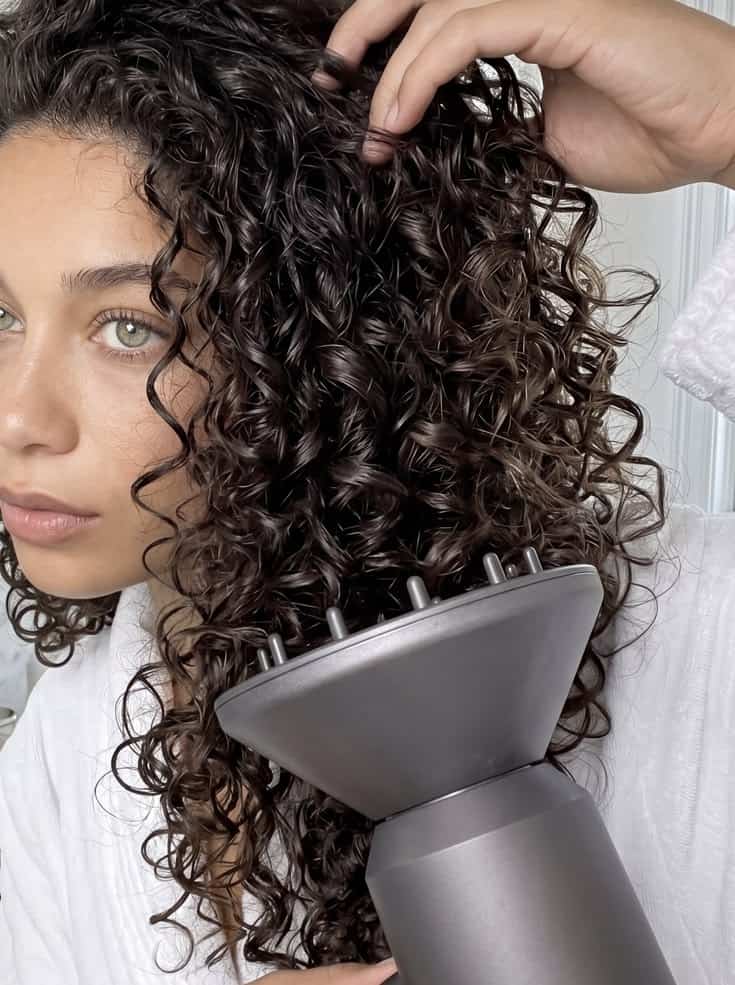
    The pixie diffuse method works beautifully on bobs. Start with the diffuser cup at your scalp, let curls pile into it, hold for 30-60 seconds on medium heat, then move to the next section. This creates volume at the roots while encouraging curl formation.

    Alternatively, hover diffuse by holding the diffuser 2-3 inches from your head without touching hair. This gentler method takes longer but minimizes frizz for those with easily disrupted curl patterns. With bob-length hair, total diffusing time rarely exceeds 20-30 minutes, compared to 45+ minutes for longer hair.

    Refresh Methods Between Washes

    Short curly hair often holds definition longer than long hair because there’s less weight pulling curls apart overnight. For Type 2-3A bobs, a simple water spray and scrunch often suffices for day-two refresh. Type 3B-4C may need diluted leave-in or refresh spray.

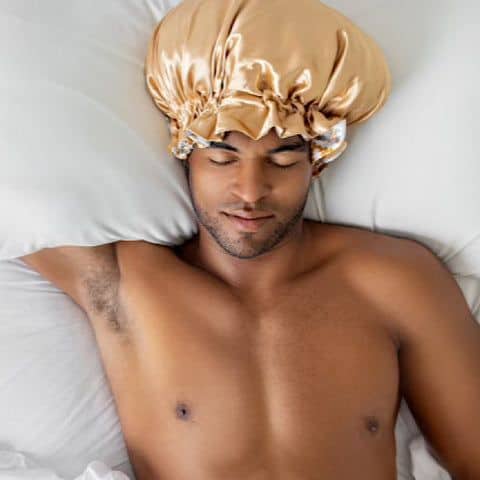
    The pineapple method (high loose ponytail) works less reliably on bobs since the hair may be too short to stay secured. Instead, try a satin or silk pillowcase to reduce friction and preserve curls. Some bob wearers achieve better results by wetting and restyling sections that got flat rather than trying to refresh all hair.

    Common Curly Bob Challenges and Solutions

    Managing Triangle Shape

    The dreaded triangle happens when the top of your bob is too flat and the bottom too wide. Prevention starts with proper cutting, specifically ensuring adequate crown layers. If you’re already experiencing triangle shape, strategic root clipping while diffusing can create lift at the crown. Place small clips at the roots in 1-inch sections around your crown, diffuse completely dry, then remove clips.

    Product placement also matters. Apply lighter products at the crown (just leave-in) and save heavier gels for mid-lengths and ends. This prevents weighing down the top while still controlling the bottom. Some people find that flipping their head upside down while diffusing the crown area creates more volume there, counterbalancing the natural width at the perimeter.

    Dealing with Shrinkage and Length Perception

    Shrinkage frustrates many curly bob wearers who feel their hair looks “too short” when dry. Remember that your stylist should cut based on dry, styled length rather than wet length. If you’re consistently unhappy with how short your bob looks when dry, communicate this clearly at your next appointment and request slightly longer lengths.

    That said, embracing shrinkage often leads to better curl health. Constantly stretching curls to show length causes heat damage and defeats the purpose of wearing your natural texture. If you occasionally want more length visibility for special events, consider twist-outs or braid-outs that gently elongate curls without heat.

    Preventing Flat Roots

    Flat roots plague many curly bob wearers, particularly those with fine or medium density hair. Root clipping remains the most effective solution, though it requires 10-15 extra minutes in your routine. Apply clips while hair is very wet after styling products, diffuse until completely dry (crucial step), then remove clips and gently fluff.

    Another approach involves strategic parting. If you always part your hair in the same place, roots flatten there over time. Switch up your part location every few washes. Some people eliminate parts entirely by diffusing hair away from the scalp in all directions, creating all-over volume rather than directional volume.

    Growth-Out Strategy

    Growing out a curly bob requires patience and strategic trimming. Rather than avoiding cuts entirely (which leads to straggly ends and loss of shape), schedule trims every 10-12 weeks instead of every 6-8 weeks. Ask your stylist to maintain the overall shape while gradually allowing the perimeter to lengthen.

    The awkward grow-out phase typically hits around month 4-6 when your bob has lost its intentional shape but hasn’t yet reached true lob length. During this phase, experiment with other short wavy styles like half-up styles, headbands, or strategic pinning to manage the in-between length. Accept that you may have 2-3 months of less-than-perfect hair days, but on the other side lies your desired length.

    Frequently Asked Questions

    How short will my curly bob actually be when dry?

    Expect significant shrinkage depending on your curl type. Type 2 hair shrinks about 10-20%, so a shoulder-length wet cut will sit near your collarbone when dry. Type 3 shrinks 30-50%, meaning that same wet length might hit mid-neck. Type 4 can shrink 50-75%, so shoulder-length wet could become chin-length or even shorter when dry. Always discuss dry length goals with your stylist, and ask to see the hair dry during your appointment to ensure you’re happy with the final result before leaving the salon.

    Can I get a curly bob if I have thin, fine hair?

    Absolutely. A curly bob often makes thin hair appear fuller because the shorter length creates more volume. Request layers that start relatively low (around chin level rather than crown level) to maintain density, and avoid heavy thinning or texturizing that removes too much hair. A blunter perimeter with subtle interior layering works better for fine hair than heavily choppy, shaggy cuts. The right curly bob styling techniques can make fine curly hair look surprisingly voluminous.

    How often do I really need to trim a curly bob?

    Realistically, every 6-8 weeks for optimal shape maintenance. Curly bobs lose their intentional structure faster than longer styles because even half an inch of growth significantly changes the proportions. That said, you can stretch to 10-12 weeks if budget or schedule demands it, though you’ll likely notice the shape becoming less defined. Some people alternate between full cuts and “dusting” appointments where only minimal length is removed to maintain shape between major cuts.

    What’s the best way to sleep on a curly bob?

    The traditional pineapple method often doesn’t work well on bob-length hair since it’s too short to secure on top of your head. Instead, try a satin or silk pillowcase to reduce friction. Some bob wearers prefer the “medusa” method, making 4-6 small pineapples all over their head with small scrunchies. Others accept that day-two refresh will require wetting and restyling certain sections, which is faster on short hair anyway. Experiment to find what preserves your particular curl pattern best.

    Should I cut my own curly bob bangs at home?

    Probably not, especially for your first time adding bangs. Curly bangs require precise cutting that accounts for shrinkage and curl direction. What looks perfect wet can become too short or oddly shaped when dry. Once you have professionally cut curly bangs, you might be able to maintain them at home with careful point-cutting, but the initial cut should be done by someone who understands how your specific curl type will behave. The risk of too-short bangs outweighs the cost of a salon visit.

    Will a curly bob work with my professional job?

    Modern workplaces increasingly accept natural texture as professional. A well-cut curly bob actually looks quite polished and put-together, often more so than poorly straightened long hair or undefined curls. If you work in a particularly conservative environment, opt for a classic chin-length bob with moderate layering rather than asymmetrical or undercut variations. The key is keeping your cut fresh with regular trims and your curls well-defined with appropriate products. A defined, intentional curly bob reads as professional in virtually any workplace.

    Conclusion

    The curly bob remains one of the most versatile, flattering options for textured hair precisely because it adapts to your unique curl pattern rather than demanding you conform to a single rigid shape. Whether you land on a classic chin-length cut, an edgy asymmetrical variation, or something with tapered details, the right bob should make your daily routine easier while making you feel confident. The investment in finding a curl-specialized stylist and maintaining regular trims pays dividends in consistently good hair days.

    If you’ve been considering a curly bob, bring reference photos to a consultation with a curl specialist this week. Discuss your specific texture, density, and lifestyle needs to determine which of these 15 variations will work best for you. The difference between loving and regretting your bob comes down to proper cutting technique and realistic expectations about styling commitment. With the right cut and more curly bob inspiration, you’ll wonder why you didn’t make this change sooner. Your curls deserve a shape that celebrates their natural movement, and few cuts deliver that better than a well-executed bob.
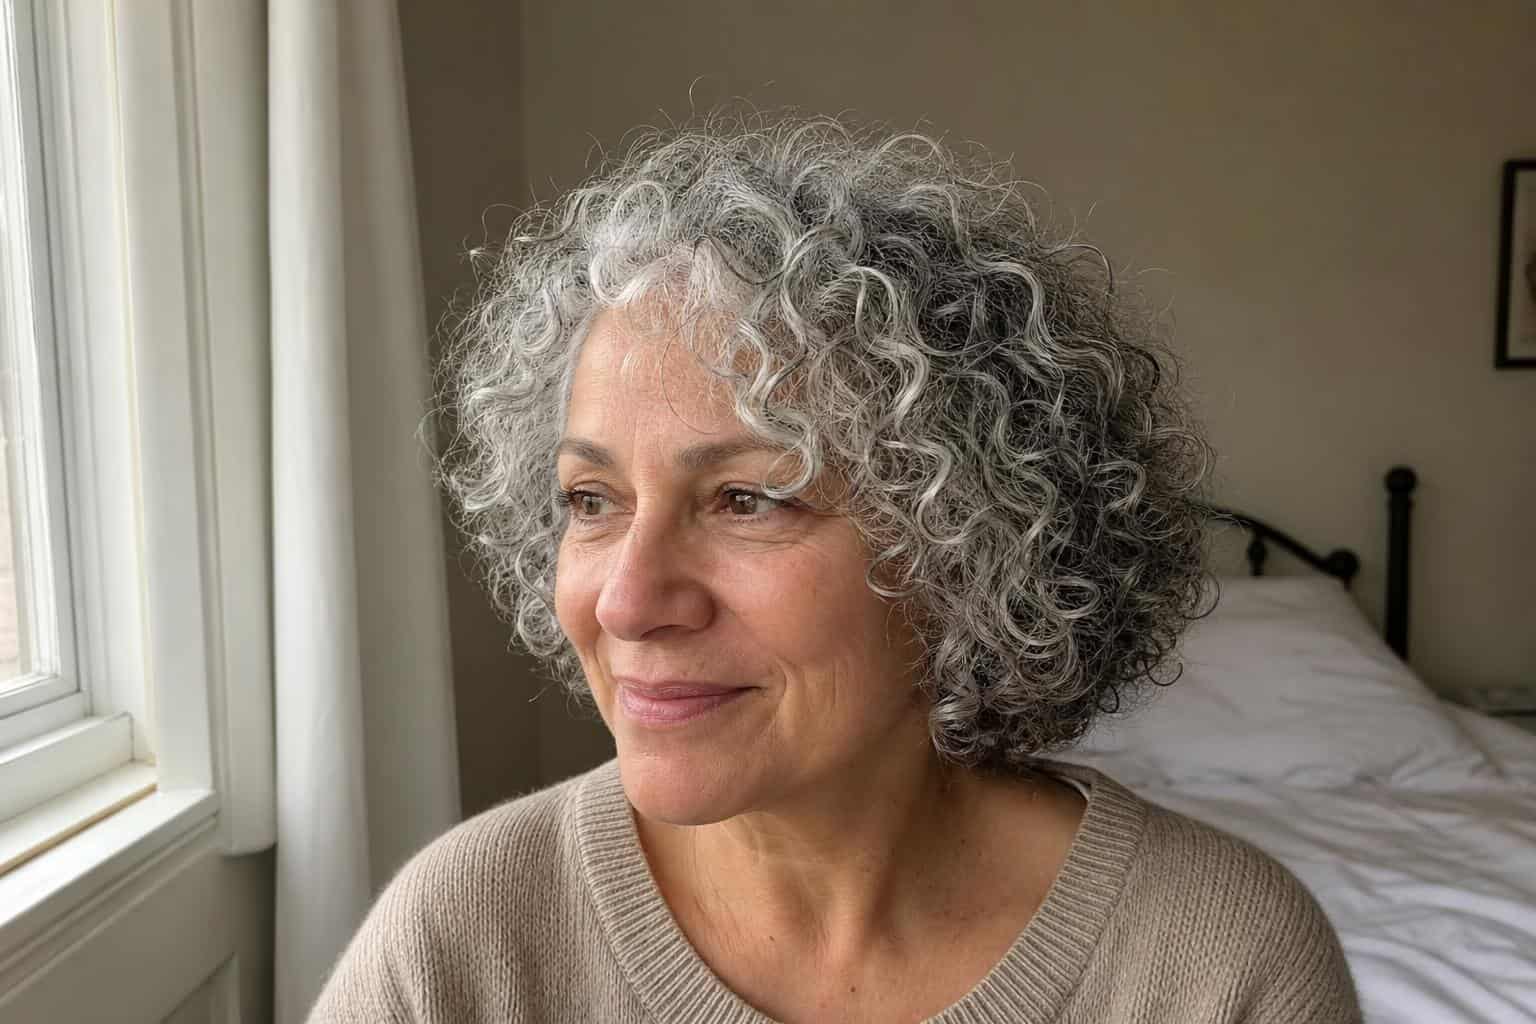
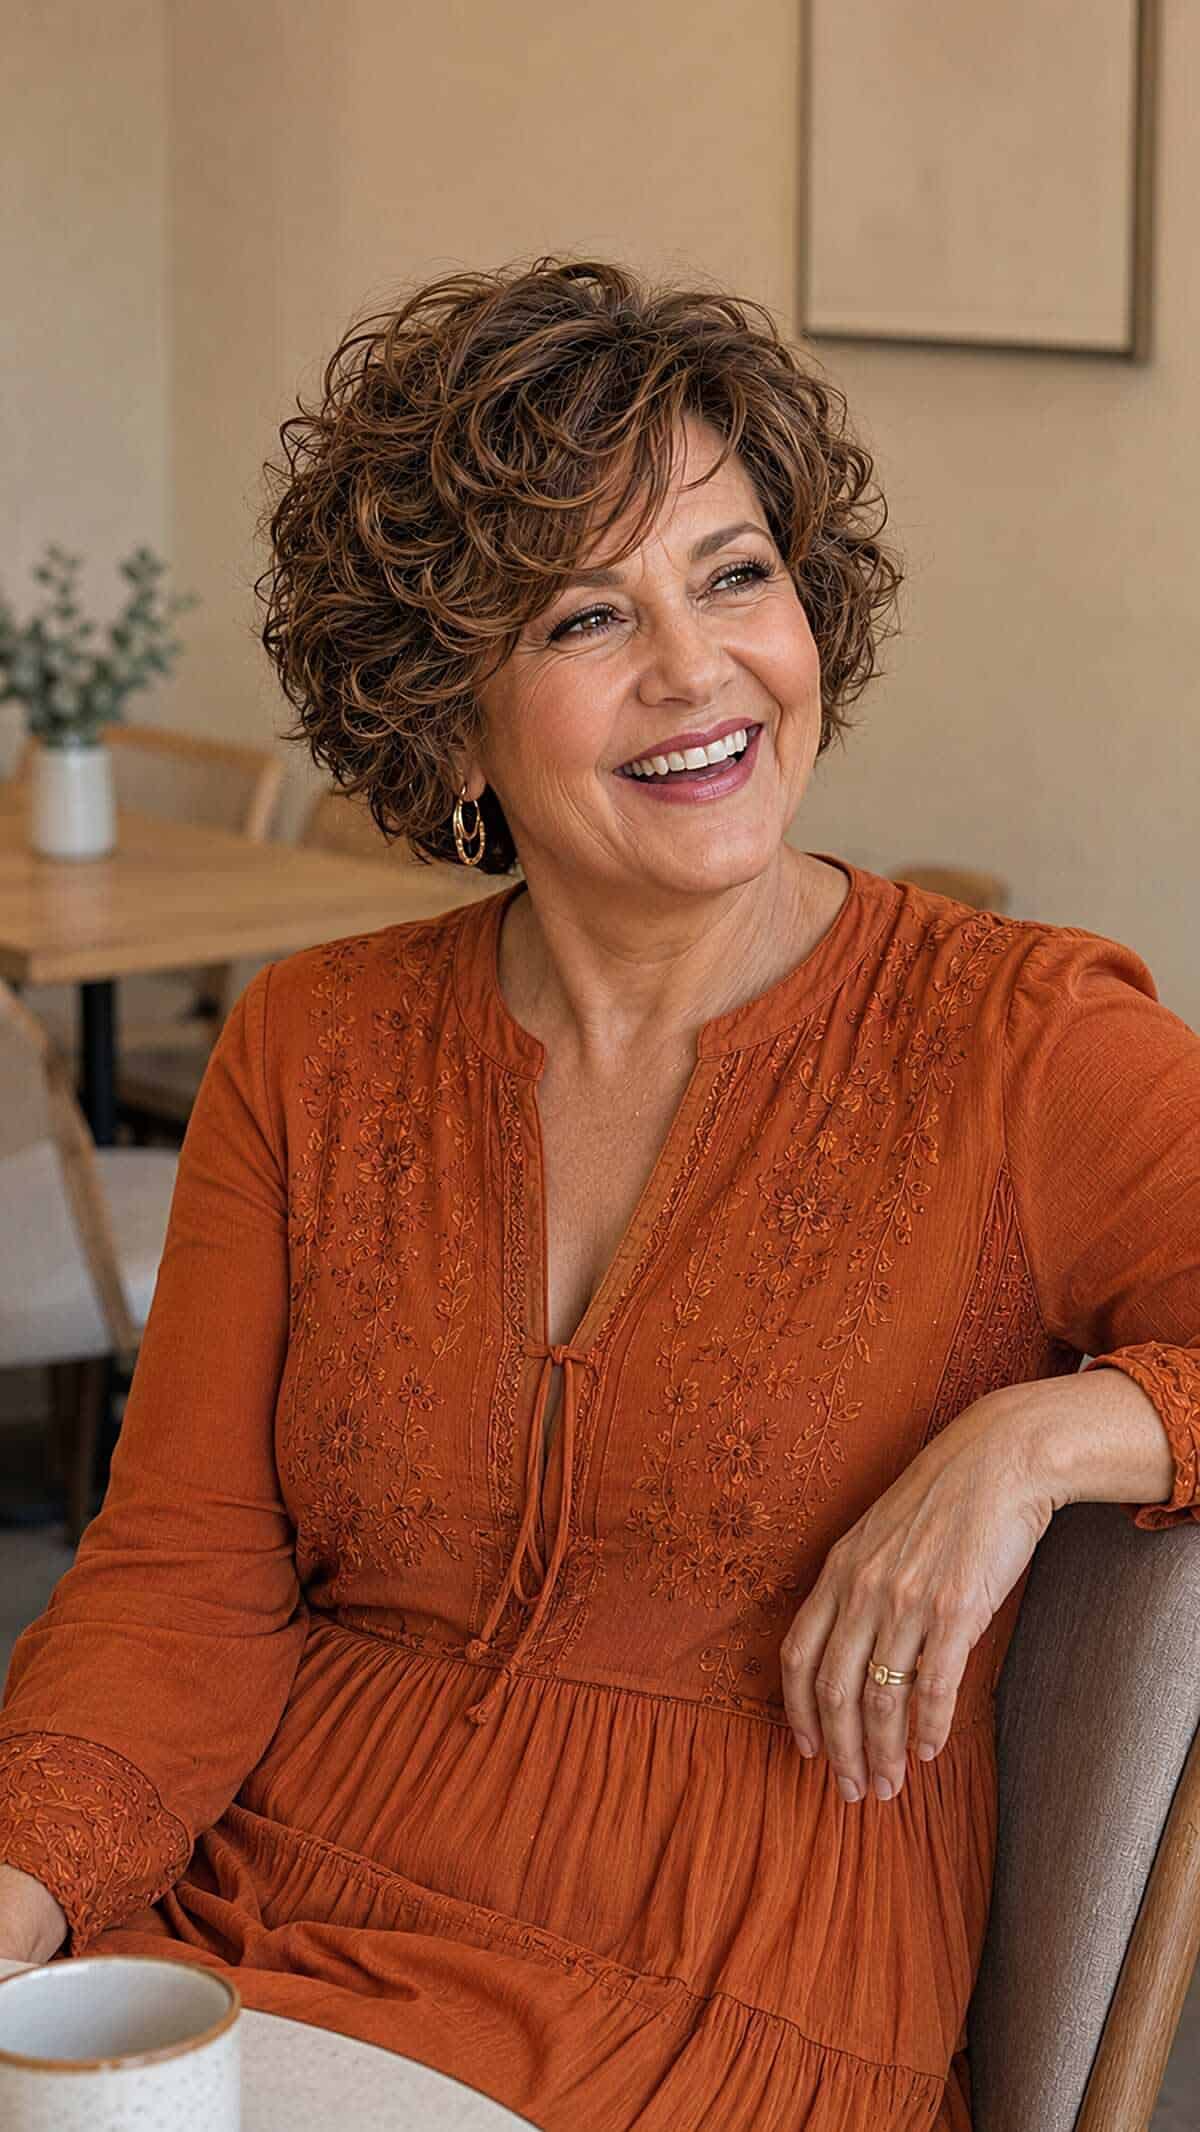
  • Short Curly Hairstyles for Women Over 50: Flattering Cuts That Work

    Short Curly Hairstyles for Women Over 50: Flattering Cuts That Work

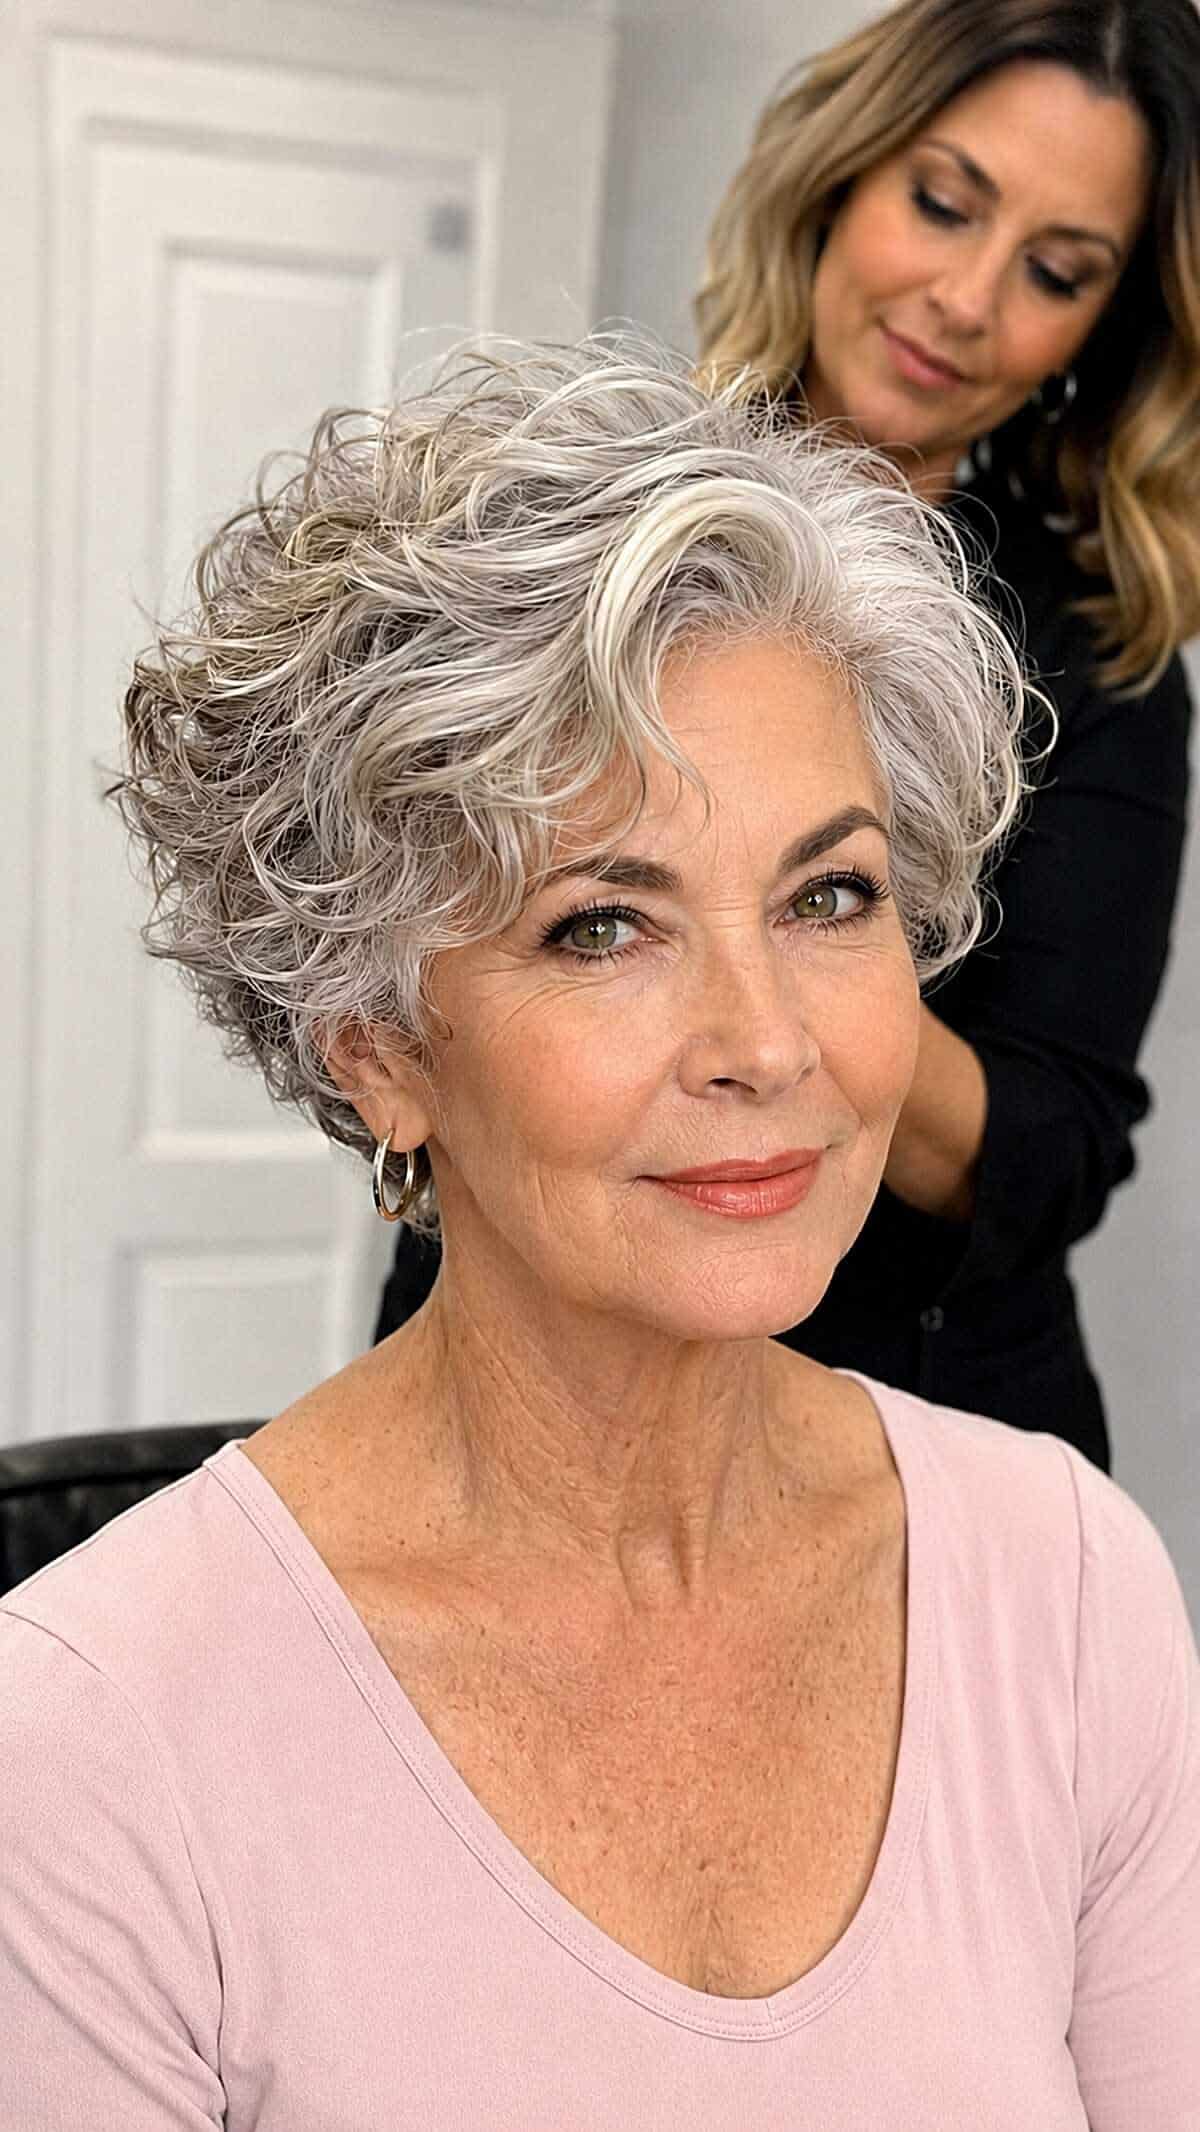
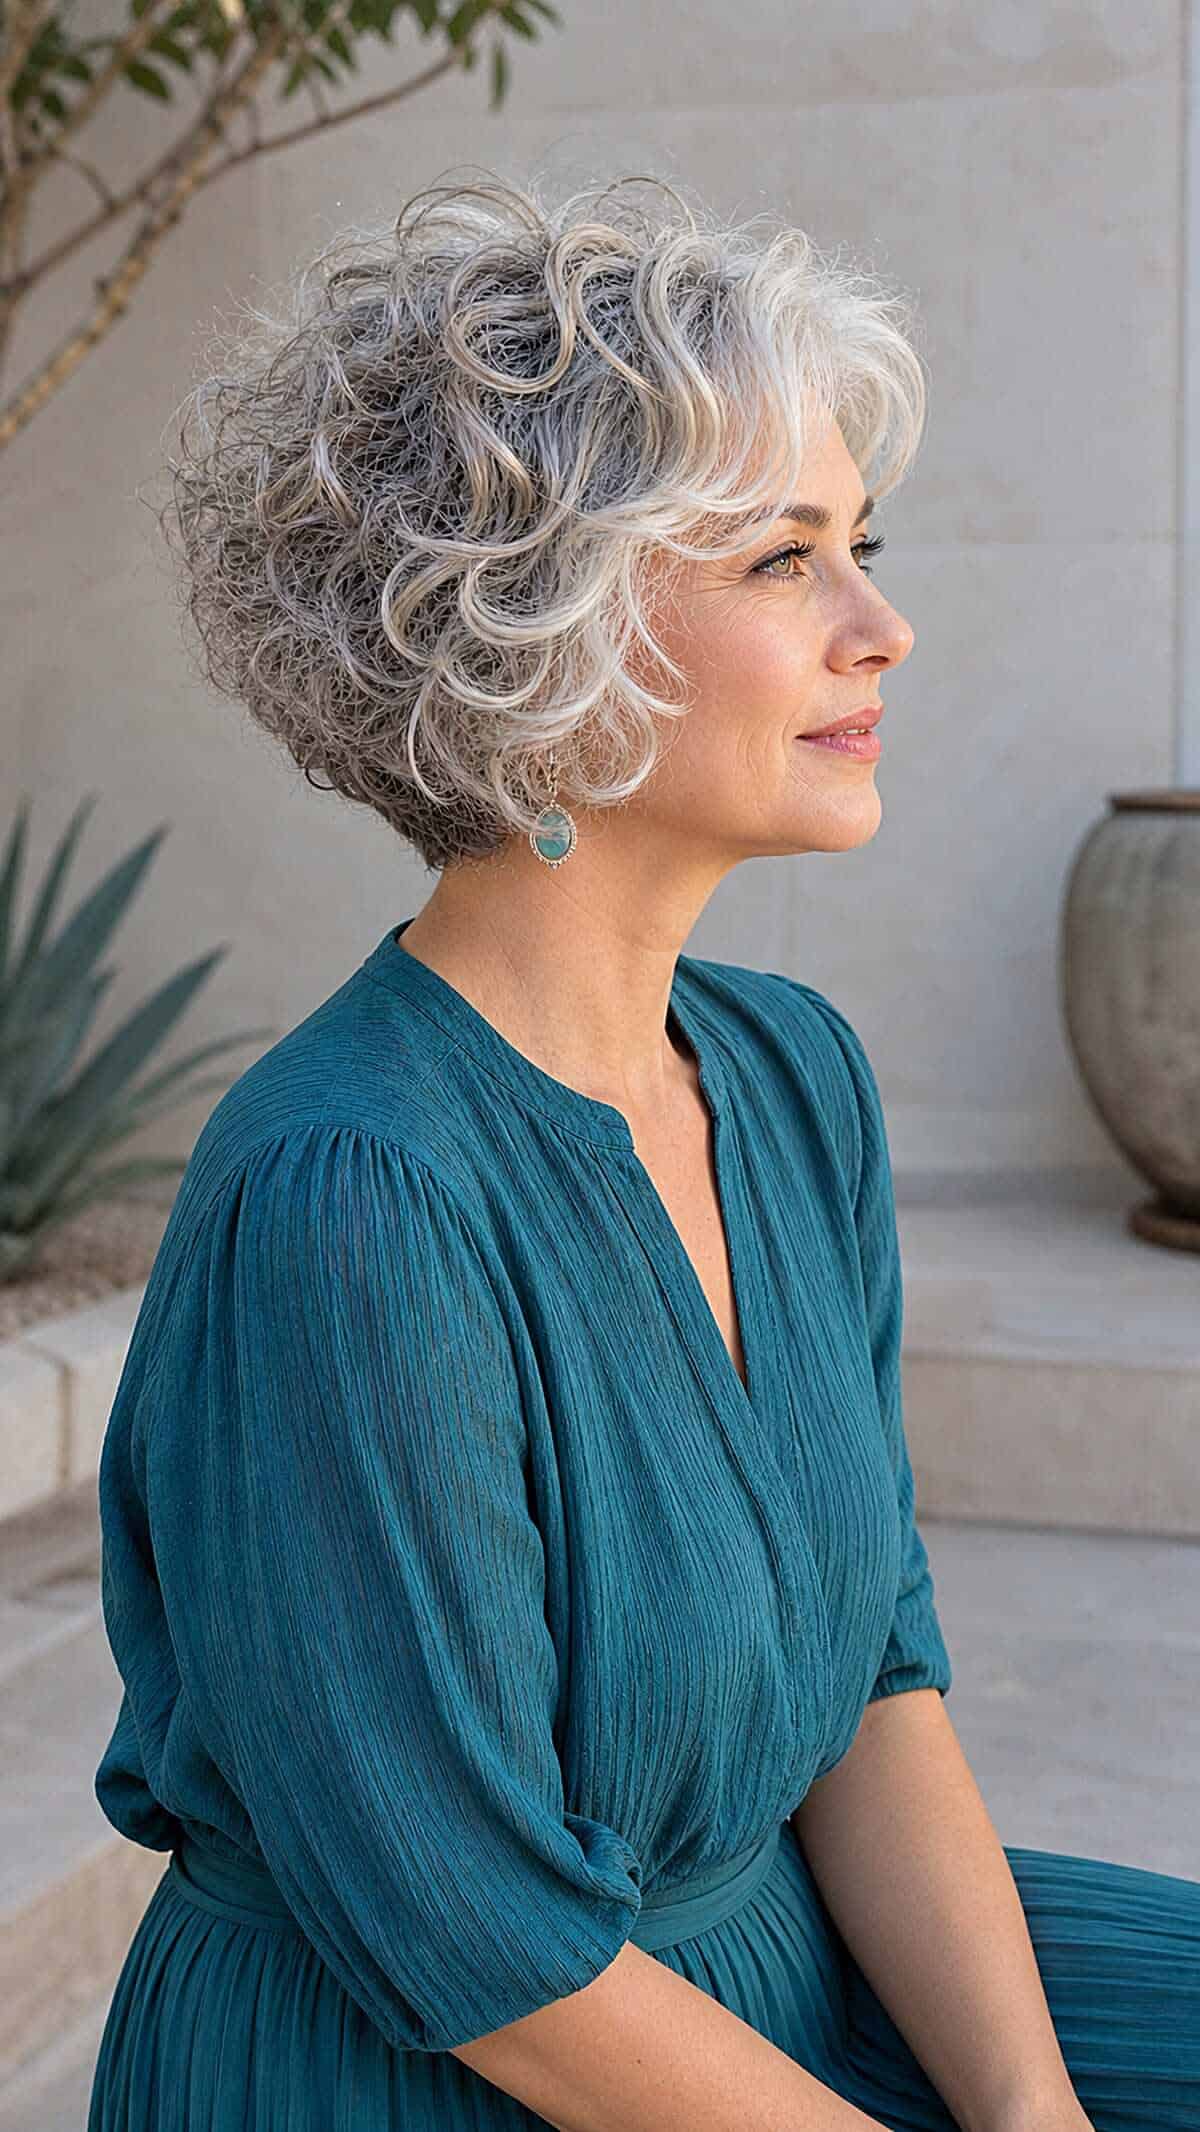
    Embracing short curly hair after 50 isn’t about giving up length; it’s about gaining back volume, shape, and ease. If you’ve noticed your curls looking flatter, thinner, or harder to manage in recent years, a well-cut short style can restore the fullness and definition you thought you’d lost. The right cut works with your changing texture rather than fighting it, and you’ll spend less time wrestling with products that no longer seem to work the way they used to.

    Why Short Curly Cuts Work Better After 50

    How Hair Texture Changes With Age

    Your curls aren’t imagining things. Hair structure genuinely changes as we age, particularly after menoponal shifts. The research on aging hair structure shows that reduced estrogen levels affect both hair shaft diameter and the scalp’s oil production. This means your individual strands get finer while simultaneously becoming coarser in texture, an odd combination that throws off the styling routines that worked for decades.

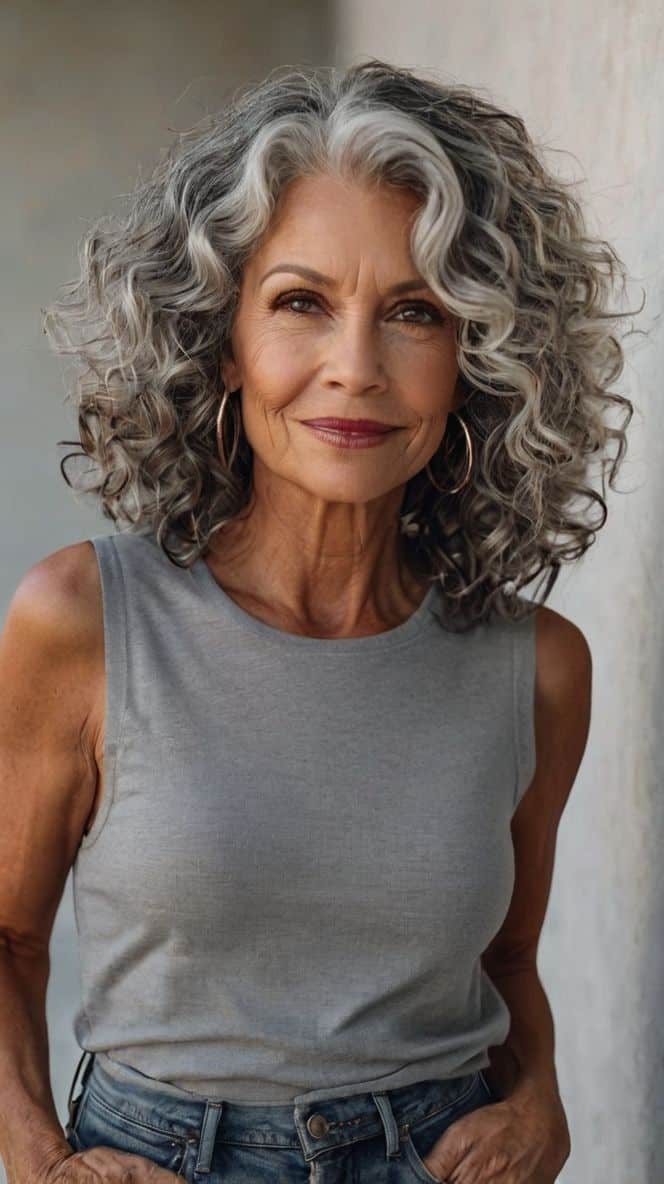
    Gray hair adds another dimension to this texture shift. Silver strands typically grow with a wiry, resistant quality because they lack the melanin that once gave hair its flexibility. If you’re transitioning to natural gray or already fully silver, you’ve probably noticed your curl pattern loosening in some areas while becoming unpredictably frizzy in others. This isn’t a problem with your products or technique; it’s genuinely different hair that needs a different approach, starting with how you layer and structure your cut.

    Many women also experience changes in their curl pattern itself. Type 3b curls might relax to 3a, or previously consistent waves might develop more varied patterns across the head. These shifts happen gradually but significantly alter how length sits on your head and how much weight your strands can support without losing shape.

    The Volume Advantage of Shorter Lengths

    Here’s the physics of curl and gravity: longer hair weighs more, and weight pulls curls straighter at the root. When your hair density decreases after 50, you have less overall mass to create volume, but that remaining hair is still being pulled down by its own length. Going shorter immediately removes that gravitational drag.

    A chin-length curly bob or a textured crop allows your natural curl pattern to coil more tightly at the root instead of stretching out. The result is visible lift at the crown, something that becomes increasingly difficult to achieve with shoulder-length or longer curls on thinning hair. You’re not creating an illusion of volume; you’re allowing your actual texture to express itself without fighting physics.

    Shorter lengths also make it easier to incorporate strategic layering that adds dimension. When a stylist removes weight from the right places in a short cut, each curl spring has room to form its natural shape without neighboring curls creating bulk or triangle silhouettes. The negative space between layers reads as movement and fullness rather than gaps or thinness.

    Less Manipulation Means Healthier Hair

    The daily reality of maintaining longer curly hair involves more detangling, more product application, more scrunching, more diffusing, and more overall handling. Each touch point is an opportunity for mechanical damage, which matters more when your hair’s structural integrity has already declined with age.

    Short curly styles require a fraction of that manipulation. You’re working with less surface area, so hydrating products distribute more easily and evenly. Styling sessions shrink from 30-45 minutes to 10-15 minutes. Air-drying becomes genuinely practical rather than an all-day commitment. The cumulative reduction in handling gives your hair a chance to retain moisture, maintain elasticity, and simply experience less breakage over time.

    For women dealing with scalp sensitivity or conditions like seborrheic dermatitis (more common with age), shorter hair also makes scalp care significantly easier. You can actually see and reach your scalp to apply treatments, and lighter hair doesn’t trap as much oil or product buildup against the skin.

    The Most Flattering Short Curly Cuts for Mature Hair

    Textured Pixie With Natural Curl

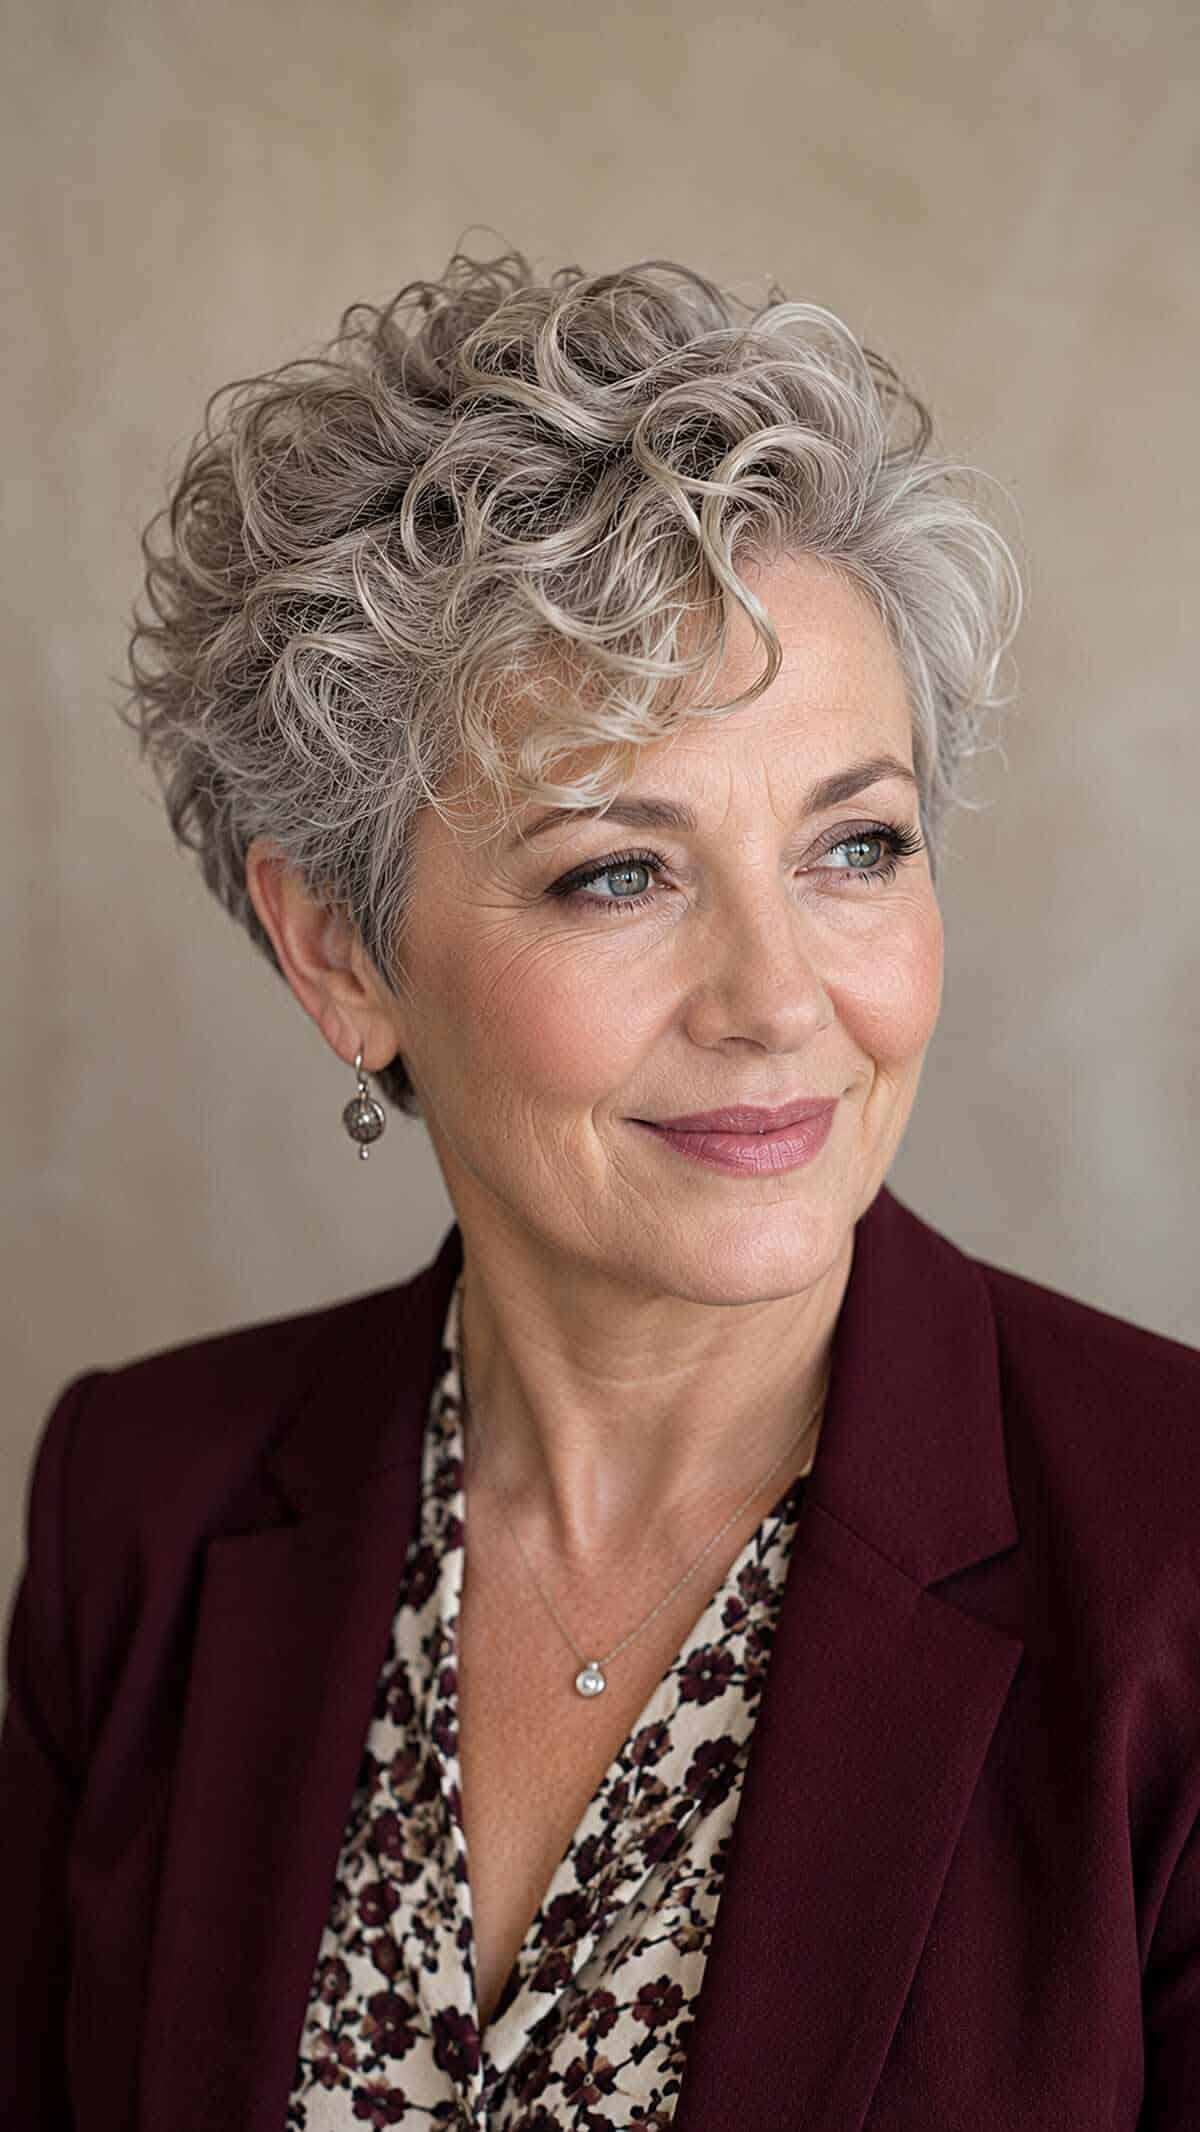
    A curly pixie is nothing like the tight, helmet-like cuts you might remember from the 1980s. Modern textured pixies leave 2-4 inches of length on top with strategic layering that lets curls form individual ringlets or waves. The sides and back are tapered shorter (but not shaved unless you want that edge), creating a silhouette that lifts at the crown and narrows at the nape.

    This cut works exceptionally well if your curl pattern has loosened with age or you’re dealing with significant thinning. The variation in length creates the appearance of density, and the upward movement draws the eye to your face rather than to any areas where hair might be sparse. Request longer pieces around the face to soften the overall look and provide some framing; these face-framing bits can be swept forward or tucked behind ears depending on your mood.

    The key is finding a stylist who cuts short textured styles dry and curl-by-curl rather than using clippers or cutting wet. Each curl needs to be individually shaped to create the seemingly effortless tousled effect that makes this cut so flattering.

    Layered Curly Bob (Chin-Length)

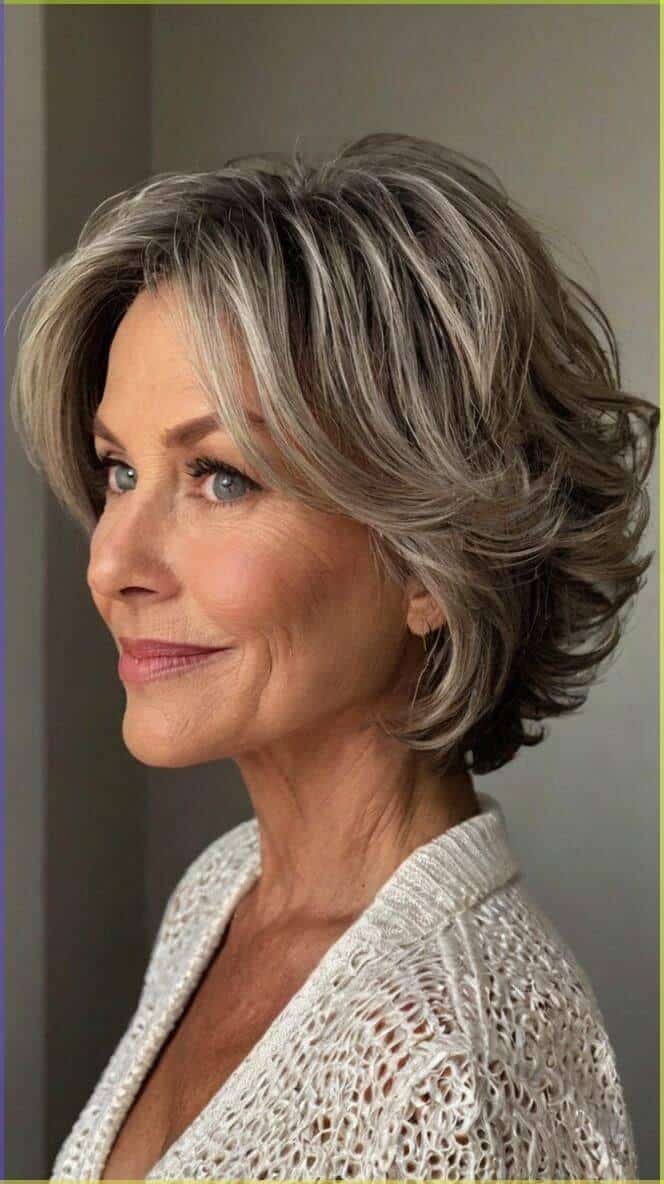
    The chin-length bob remains one of the most universally flattering short cuts for curly hair at any age, but it’s particularly effective after 50 because it hits the sweet spot between professional polish and low-maintenance styling. The length provides enough curl formation to create substantial volume without the weight that causes flatness at the root.

    Ask your stylist for internal layering rather than heavy graduation. Internal layers remove bulk from inside the haircut without creating visible stacking on the outside. This technique prevents the dreaded pyramid shape while maintaining a perimeter that looks intentional and finished. If you have thinner areas, your stylist can add more layers in fuller zones to balance the overall density.

    A curly bob also offers versatility that shorter pixie cuts can’t match. You can pin it back, tuck one side behind your ear for an asymmetric look, or add a small clip for a polished effect. The length is also ideal if you’re still deciding how short you want to go; it’s dramatic enough to feel like a real change but not so short that you’ll panic if you have second thoughts.

    Tapered Crop With Volume at the Crown

    Think of this as the curly version of a classic short back-and-sides, but with much more texture and movement on top. A tapered crop keeps the perimeter close to the head (typically following the hairline at the ears and nape) while leaving 2-3 inches of length concentrated at the crown and slightly forward.

    This cut is remarkably effective for women experiencing the most thinning at the temples or above the ears, common patterns as we age. By keeping those areas shorter and controlled, all attention shifts to the textured volume at the crown where you likely still have the most density. The contrast between close-cut sides and curly top reads as intentional style rather than attempting to hide thinning areas.

    The tapered crop works across curl types but is especially striking on tighter patterns (3b-4a) where the crown curls can form a beautiful cloud of texture. For looser waves, ask your stylist to add more choppy layers through the top to encourage piece-y separation rather than one soft wave.

    Face-Framing Shag Cut

    The shag has returned with a modern sensibility that suits mature faces beautifully. A curly shag in the 4-6 inch length range combines the movement of heavy layering with enough length to maintain softness and femininity. Unlike the uniform layers of 1970s shags, contemporary versions feature customized layering that responds to your specific curl pattern and face shape.

    The defining feature is shorter, wispy layers around the face that create a gentle frame, moving longer as you go back toward the crown and nape. These face-framing pieces are particularly flattering because they draw attention to your eyes and cheekbones while providing coverage for areas where volume has decreased near the temples.

    A shag requires a skilled curly-hair specialist because the layering has to work with your curl diameter. Too much layering on fine curls creates frizz; too little on thick curls creates bulk. The right balance produces that coveted effortless-but-polished look that reads as youthful without trying too hard.

    Styling Techniques for Aging Curls

    Working With Gray or Coarser Texture

    Gray curls demand more moisture than pigmented hair, full stop. The American Academy of Dermatology on aging hair notes that gray hair has a different cuticle structure that makes it more porous and prone to dryness. This is why your tried-and-true products suddenly stop working; your hair’s moisture needs have fundamentally changed.

    The solution is building hydration into every step. Use a moisturizing leave-in conditioner as your base layer after every wash, focusing on mid-lengths and ends but not avoiding the roots. Gray hair can handle richer products without getting greasy the way younger, oilier scalps might. Layer a curl cream over the leave-in while hair is still quite wet, then seal with a light oil if your hair tolerates it.

    For stubborn frizz (common with coarse gray texture), try the “soaking wet styling” method: apply all your products when your hair is dripping wet, squeeze out excess water with a microfiber towel or t-shirt, then don’t touch it again until completely dry. The extended drying time is worth the significantly improved curl definition and reduced frizz.

    Product Layering for Thinning Hair

    Thinning hair presents a paradox: it needs enough product for hold and definition but gets weighed down easily by heavy formulas. The solution is using multiple lightweight products in thin layers rather than one heavy product in a thick layer.

    Start with a protein-rich volumizing mousse applied to soaking wet hair at the roots. Protein helps temporarily plump the hair shaft, and mousse provides hold without weight. Follow with a water-based curl gel (not cream) raked through mid-lengths and ends. Skip heavy butters, thick creams, or anything that lists oils in the first three ingredients if volume is your priority.

    The layering order matters. Mousse first gives you root lift and structure. Gel second provides definition and hold. If you reverse this order or skip the mousse, you’ll get definition but lose volume. Some women add a root-lifting spray before the mousse for extra boost; just make sure it’s designed for curly hair to avoid dryness.

    Air-Dry Methods That Add Lift

    Short curly hair air-dries much faster than long hair, but technique still determines whether you get shaped curls or a shapeless poof. The micro-plopping method works particularly well for short cuts: after applying products, use a microfiber towel or t-shirt to scrunch upward toward your scalp in sections, holding for a few seconds to encourage curl formation and remove excess water. This is gentler than scrunching with hands and removes enough water that air-drying becomes practical.

    While air-drying, resist the urge to touch, fluff, or check your curls. Every disruption before your hair is completely dry creates frizz. If you have time, occasional root clips can help. Section your hair in 4-6 areas, lift the roots away from your scalp, and secure with a small clip while drying. Remove clips when hair is 90% dry. This creates lift without the crunch that heavy gels can leave.

    For overnight air-drying, try the modified pineapple: gather hair very loosely on top of your head with a scrunchie, making sure you’re not pulling or flattening any section. The loose gathering keeps curls from getting crushed while you sleep but doesn’t create tension. In the morning, remove the scrunchie, flip your head upside down, and gently shake at the roots for volume.

    When to Use Diffusing vs. Natural Drying

    Diffusing short curly hair takes 10-15 minutes compared to the 30-45 minutes longer hair requires, which makes it a much more practical option if you need styled hair quickly. Use a diffuser when you want maximum volume and definition or when your environment is too humid for clean air-drying.

    The technique for short hair differs from long hair diffusing. Rather than “pixie diffusing” (hovering the diffuser around your head), cup sections of your hair into the diffuser bowl and lift toward your scalp, holding for 20-30 seconds before moving to the next section. This lifting motion as you dry is what creates volume at the roots.

    Keep heat on medium or low. High heat dries faster but also increases frizz and can make aging hair brittle over time. Diffuse to about 80% dry, then let the last 20% finish naturally. This prevents overdrying while still giving you a styled look in minimal time.

    Air-drying makes more sense on non-humid days when you’re not in a rush. It’s also better if you’ve noticed your hair feeling dry or crunchy after diffusing, signs that heat styling is causing moisture loss. Some women alternate: diffuse when needed for volume and speed, air-dry the rest of the time to maintain hair health.

    Best Products for Short Curls Over 50

    Lightweight Protein-Rich Formulas

    Aging hair loses some of its natural protein structure, which is why products with hydrolyzed proteins (wheat, silk, or keratin) make such a visible difference after 50. These proteins temporarily bind to the hair shaft, filling in gaps in the cuticle and creating a smoother, stronger surface. You’ll see improved elasticity and less breakage, both crucial for maintaining short cuts that need shape.

    Look for leave-in conditioners or styling creams listing hydrolyzed proteins in the first five ingredients. Apply these to soaking wet hair so the proteins can properly absorb. If you have low porosity hair, which becomes more common with age, you may need to apply protein treatments under a warm towel or processing cap to help products penetrate the tightened cuticle.

    Balance is important: too much protein without enough moisture creates dry, stiff hair. If your hair feels crunchy or straw-like after using protein products, alternate with a moisture-focused deep conditioning treatment every other wash. Most women over 50 find a protein-moisture balance of about 60% protein to 40% moisture works best, the opposite ratio of what might have worked in younger years.

    Volumizing Mousses vs. Gels

    For thinning hair at any length, mousse typically outperforms gel for root volume. Mousse has an aerated structure that adds volume as it sets without weighing hair down. Apply it first, right at the roots on soaking wet hair, using more than you think you need. A golf-ball-sized amount isn’t excessive for short hair if volume is your goal.

    That said, gel still has a place in your routine for definition and hold through the lengths and ends. Modern curl gels have evolved far beyond the crunchy, helmet-like results of old formulas. Look for gels with “soft hold” or “flexible hold” on the label, often achieved with ingredients like flax seed or aloe rather than harsh polymers. These provide structure without stiffness.

    The winning combination for many women over 50: volumizing mousse at roots, lightweight gel on lengths, nothing at all on the very ends (which can look stringy with too much product on short cuts). This targeted application gives you volume where you need it and definition where you want it without overall heaviness.

    Moisture Balance for Gray Curls

    Gray curls are thirstier than pigmented curls, period. They need heavier moisturizers than you probably used before going gray. The challenge is finding products that provide serious hydration without creating greasiness or limp curls, especially on short styles where any heaviness is immediately visible.

    Water-based moisturizers with humectants (glycerin, honey, aloe) work better than oil-based products for maintaining volume on gray curls. These ingredients pull moisture from the air into your hair rather than sitting on top as a coating. In very dry climates, you may need to add a few drops of lightweight oil (argan or jojoba) to seal that moisture in, but start with just 2-3 drops for short hair.

    Deep conditioning becomes non-negotiable after 50, especially if you’re fully gray. Once weekly is minimum; twice weekly isn’t excessive if your hair is very dry. Apply a moisture-rich deep conditioner to clean, damp hair, cover with a processing cap, and leave for 20-30 minutes. The temporary inconvenience pays dividends in curl definition, softness, and overall manageability.

    Maintenance and Cut Frequency

    How Often to Trim Short Curly Styles

    Short curly hair needs more frequent cuts than long hair, simply because a quarter-inch of growth is more noticeable when your overall length is only 2-4 inches. Plan on cuts every 4-6 weeks if you want to maintain a precise shape like a pixie or tapered crop. Curly bobs can stretch to 6-8 weeks between cuts if you’re comfortable with a slightly grown-out look.

    The good news: short cuts are faster and usually less expensive than long-hair appointments. Many women find that the cost and time of more frequent cuts is offset by spending dramatically less time and money on daily styling products and routines. The math works in your favor over time.

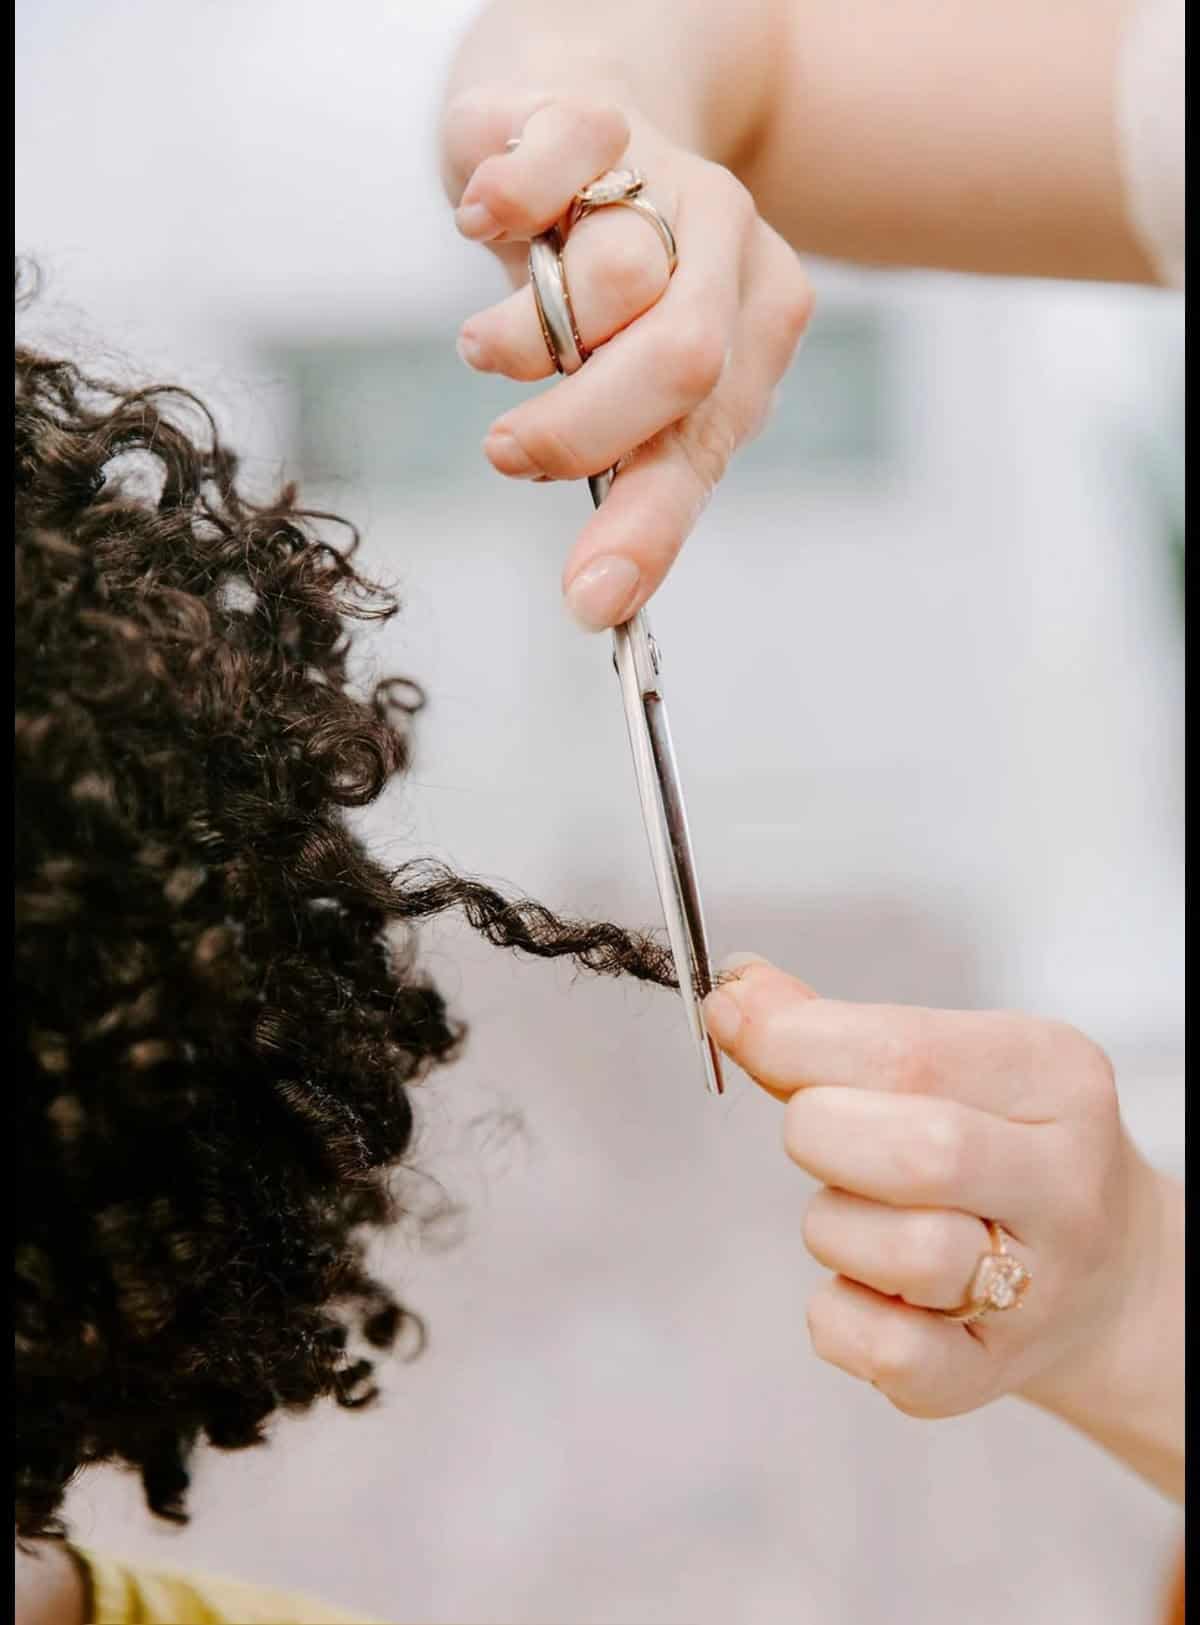
    Between professional cuts, you can maintain shape by trimming any obvious straggly pieces yourself with hair shears (never regular scissors, which damage the hair shaft). Focus only on pieces that stick out noticeably or have split ends, and trim them while dry so you can see exactly what you’re cutting. Don’t attempt to reshape your entire cut; that’s what you’re paying a professional to do.

    Communicating With Your Stylist About Texture Changes

    If you’ve been seeing the same stylist for years, they’ve likely noticed your texture changes, but explicit communication helps them adjust techniques. Point out specific areas where your curl pattern has loosened or where you’re experiencing the most thinning. Ask them to modify their cutting approach for your current texture rather than continuing to cut your hair as they did five or ten years ago.

    Be specific about your styling routine and how much time you’re willing to spend. A cut that requires 30 minutes of diffusing and product layering might be beautiful in the salon but frustrating at home if you want something faster. Most stylists appreciate this honesty; it helps them create a cut that works with your real life rather than an idealized version.

    If your stylist isn’t adapting to your changing texture or seems dismissive of your concerns about thinning or gray hair, it may be time to find a specialist in mature curly hair. These stylists exist in most cities and understand the specific challenges of aging texture. The Ouidad and Deva-trained stylist networks include many who specialize in this demographic.

    At-Home Shape Maintenance Between Appointments

    Short curly cuts can lose their shape as they grow, but simple at-home maintenance keeps you looking polished between professional cuts. Invest in a small pair of professional hair shears (under $30) designed for texture cutting. These have a slightly serrated edge that prevents hair from sliding during cutting and creates softer, less blunt ends.

    The safest areas to trim yourself are face-framing pieces and any individual curls that seem to stick out awkwardly from your overall shape. Always cut on dry hair so you can see the curl’s natural position, and cut into the curl at an angle rather than straight across. This point-cutting technique prevents blunt lines and helps trimmed pieces blend back into your overall style.

    For the back and sides of pixies or tapered crops, resist the urge to trim these yourself. These areas are difficult to see and easy to over-cut, creating unintentional asymmetry. If your nape area is growing out uncomfortably between appointments, ask your stylist if they offer quick “clean-up” trims for just the perimeter at a reduced cost. Many salons do this for regular clients.

    Frequently Asked Questions

    Will cutting my hair short make me look older?

    Short hair doesn’t age you; the wrong short haircut for your face shape and texture ages you. A well-cut short curly style with movement and texture around your face typically looks more modern and youthful than struggling with long, thin hair that lacks volume. The key is avoiding styles that are too severe or pulled back too tightly, both of which can create harsh lines. Face-framing layers and textured cuts create softness that flatters mature faces.

    Can I still do a short curly cut if my hair is thinning significantly?

    Absolutely, and you’ll likely see better results than trying to maintain length. Short cuts with strategic layering create the illusion of density by removing weight that pulls hair flat. Work with a stylist experienced in cutting thinning curly hair who can add layers in fuller areas while keeping thinner sections slightly longer to balance overall density. Volumizing products become more effective on short hair because you’re working with less surface area.

    How do I prevent my short curls from looking too poofy or triangular?

    Triangle shape happens when there’s too much bulk at the sides without enough length to weigh it down. The solution is internal layering that removes bulk from the sides while maintaining enough length through the crown for volume. Ask your stylist for a “stacked” or “graduated” shape that’s fuller at the crown and closer to the head at the sides and nape. Using gel rather than cream for styling also helps control expansion without losing curl definition.

    What if I don’t like my short curly cut after I get it?

    Give yourself at least two weeks to adjust and learn how to style it before panicking. Most women need time to develop new styling techniques for short hair and to see how their curls behave at this length through different weather conditions. If you’re still unhappy after genuinely trying, hair grows about half an inch per month, so you can transition back to a longer style gradually. In the meantime, accessories like headbands, clips, or small scarves can help you feel more comfortable while you adjust or grow out.

    Should I go gray with a short curly cut or keep coloring?

    This is entirely personal preference, not a hair-health requirement. That said, short cuts make the transition to gray much easier if you’re considering it because you’re cutting off colored hair more quickly and have less contrast between your roots and ends. Many women find that going gray with a fresh short cut feels like a complete, intentional transformation rather than “letting themselves go.” If you love your color, continue it; maintenance is actually easier on short hair because you have less length to cover.

    Conclusion

    Short curly hair after 50 isn’t a compromise or a concession to age; it’s a strategic choice that works with your hair’s current reality rather than fighting it. The volume, shape, and definition you gain from the right short cut can give you back the confidence that might have diminished as your long hair thinned or lost its pattern. These styles require investment in regular cuts and appropriate products, but they return that investment through dramatically reduced daily styling time and genuinely healthier hair.

    Your next step is simple: book a consultation with a curly-hair specialist (not just any stylist who says they “can do curly hair”) and bring photos of short curly hairstyles for women over 50 that appeal to you. Be honest about how much time you want to spend styling, which face features you want to emphasize, and any specific concerns about thinning or texture changes. A skilled stylist will translate those preferences into a cut that fits your life, your curls, and the woman you are right now.

  • 10 Haircuts for Boys With Curly Hair: Expert Styling Guide

    10 Haircuts for Boys With Curly Hair: Expert Styling Guide

    Boys with curly hair have an incredible advantage when it comes to standout haircuts, but the key lies in choosing styles that work with their natural texture rather than fighting against it. From sharp fades that showcase tight coils to longer free-form styles that celebrate volume, the right cut can make morning routines easier while keeping your child looking confident and fresh. This guide breaks down ten proven haircuts across different lengths and curl patterns, plus the practical maintenance tips that make each style actually work in real life.

    Understanding Curly Hair Before the Cut

    How curl pattern affects haircut choice

    Not all curls behave the same way under scissors, and understanding your child’s specific curl pattern makes the difference between a haircut that grows out beautifully and one that becomes a battle. Looser care routine for 2C waves tends to respond well to layered cuts that prevent triangle shapes, while tighter 3B and 3C curls benefit from weight and strategic length to control volume. Type 4 coils, especially 4A through 4C, often look best with cuts that embrace their natural shrinkage rather than trying to elongate artificially.

    The curl pattern also determines how much length you’ll actually see. A child with 3A curls might retain 70-80% of their hair length when dry, while 4C coils can shrink up to 75% from their stretched length. This means a four-inch cut on stretched 4C hair might appear as a one-inch afro when dry. A skilled stylist accounts for this when cutting, working with the hair in its natural state rather than stretching it out.

    Working with shrinkage and density

    Shrinkage isn’t a problem to solve but a characteristic to plan around. Boys with high-density, tightly coiled hair often do best with cuts that remove some bulk from the interior while maintaining length on the exterior, creating shape without losing the protective benefits of length. Low-density curls, on the other hand, benefit from cuts that maximize the appearance of fullness through strategic layering and maintaining moisture-rich styling routines with products like daily leave-in products.

    Density also affects how often trims are needed. Fine, loose curls may need shape-up trims every 6-8 weeks to prevent stringy ends, while dense, coily hair can often go 10-12 weeks between cuts. The texture’s natural protective structure means less exposure to split ends compared to straight hair, especially when maintained with gentle techniques.

    Finding a curl-savvy barber or stylist

    This step matters more than the specific cut you choose. A barber who understands curly hair will cut it dry or damp (never soaking wet), work with the natural curl pattern rather than brushing it out, and use techniques like twist-cutting or curl-by-curl trimming for coily textures. Ask potential stylists specific questions: Do they cut curls dry? How do they handle shrinkage? Can they show examples of curly cuts they’ve done on children with similar hair types?

    Red flags include stylists who insist on cutting curly hair wet and straight, use thinning shears aggressively on type 4 hair (which can cause frizz and breakage), or seem uncomfortable working with natural texture. According to dermatologist-recommended hair care for textured hair, finding a professional who specializes in your child’s hair type reduces the risk of damage and ensures healthier outcomes long-term.

    Short & Structured: Fades and Tapers

    Low fade with curly top

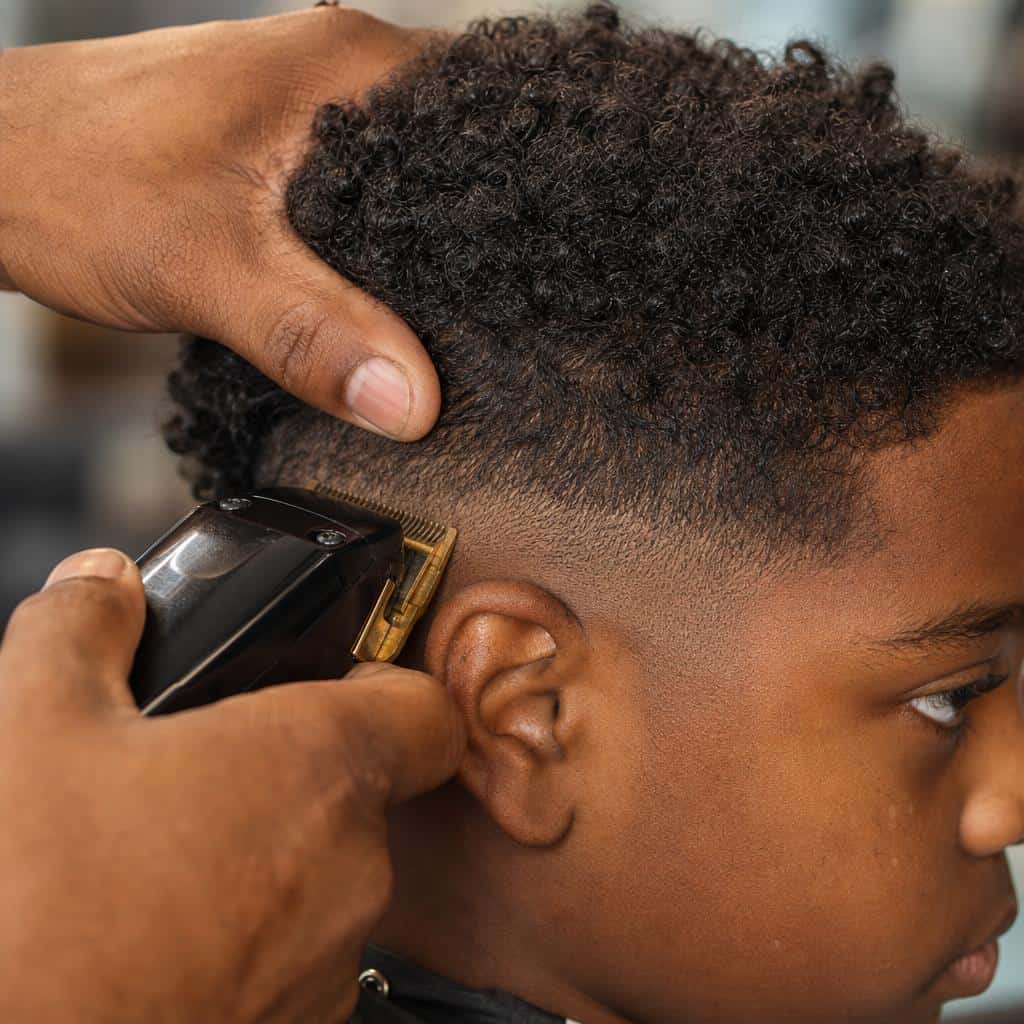
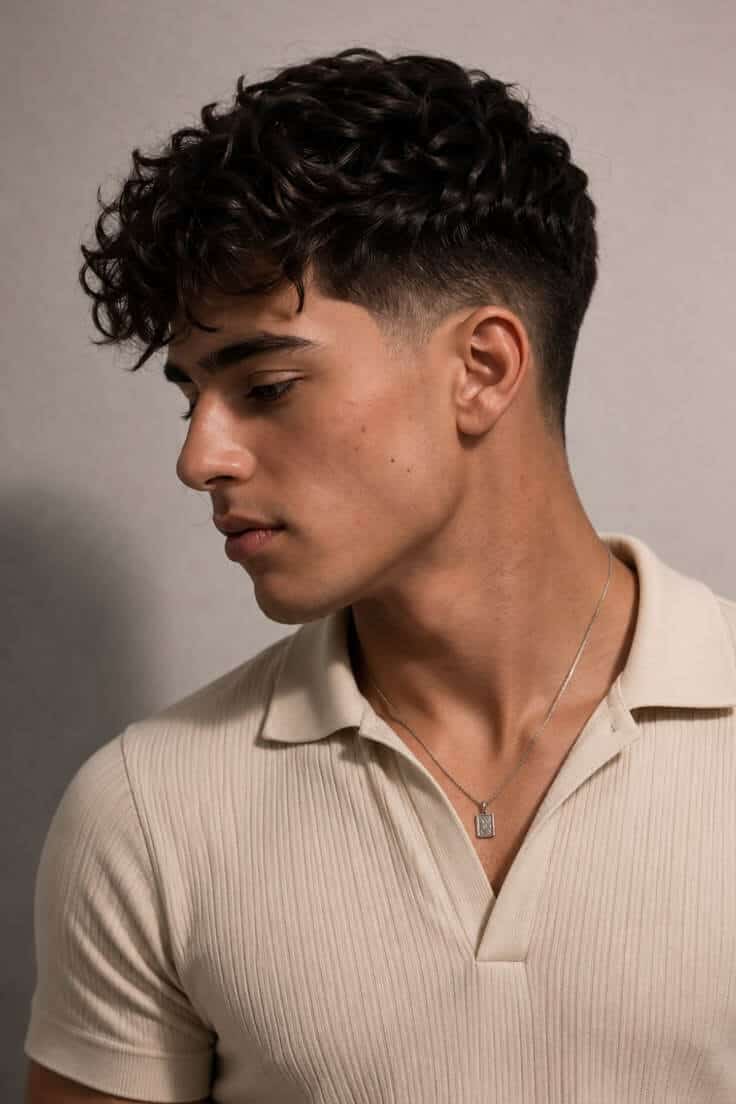
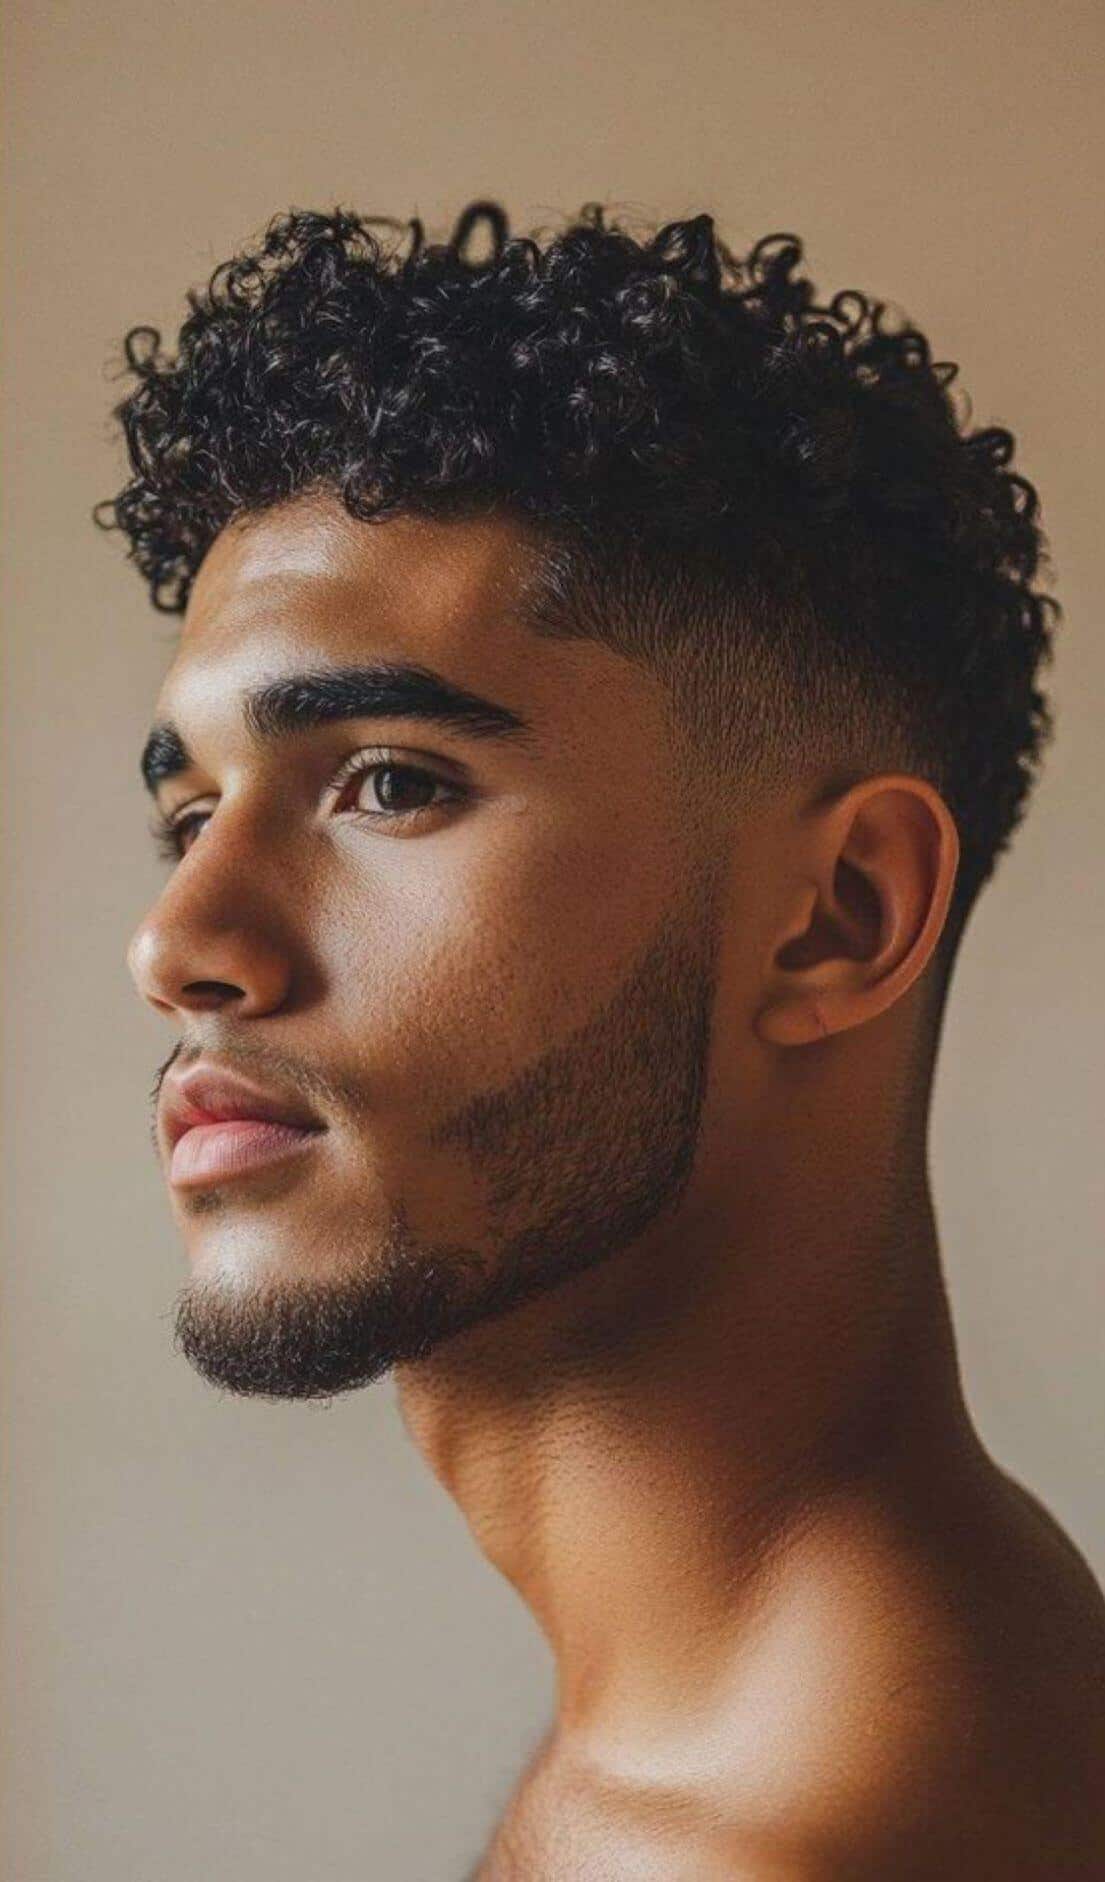
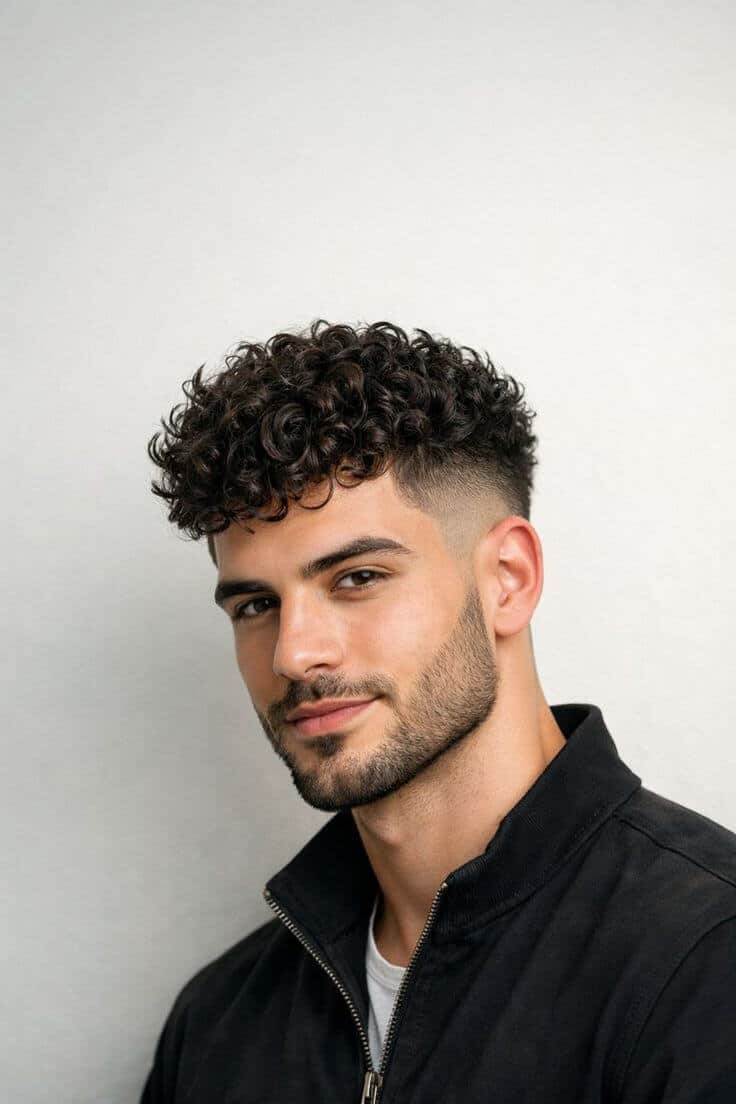
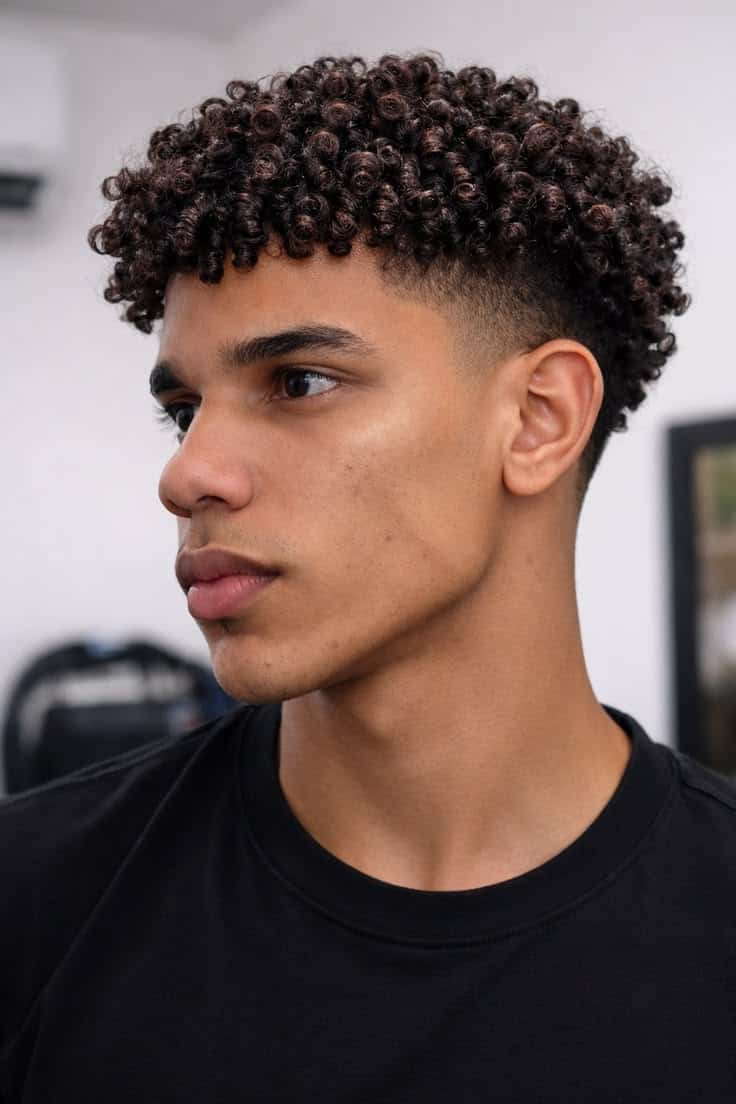
    The low fade keeps things conservative around the ears and neckline while letting 2-4 inches of curls shine on top. This cut works beautifully across curl types from 2C to 4C because the fade provides clean structure while the natural texture adds personality. The gradual blend typically starts about an inch above the ear, making it school-appropriate and parent-approved while still looking current.

    Styling a low fade is straightforward: apply a curl-defining mousse to damp hair on top, scrunch gently, and let it air-dry or diffuse. The faded sides require almost no maintenance between barber visits, but the top needs moisture. A quick spritz of water and leave-in conditioner in the morning reactivates the curls without a full wash.

    High fade with textured curls

    The high fade creates maximum contrast, with the fade starting at or above the temple and leaving substantial length (3-5 inches) on top. This cut makes a bold statement and works especially well for boys with dense, coily hair who want to show off their texture. The dramatic difference between the close-cut sides and full curls on top creates natural dimension that photographs incredibly well.

    Maintenance requires commitment to the top section. Regular moisturizing with leave-in products and occasional sulfate-free cleansers keeps the curls defined and healthy. The high fade itself needs touch-ups every 2-3 weeks to maintain the sharp line, so factor barbershop visits into your schedule and budget.

    Taper fade with natural definition

    More gradual than a traditional fade, the taper creates a subtle transition from longer hair on top to shorter hair around the perimeter. This cut suits conservative environments while still celebrating natural texture. It works across all curl types but really shines on boys with styling ideas for 3A curls that have enough definition to create visual interest without additional styling products.

    The taper requires less frequent maintenance than sharper fades, typically needing professional attention every 4-6 weeks. Between cuts, focus on keeping the curls moisturized and defined with a simple routine of water, leave-in conditioner, and light gel or cream. The gradual taper means grow-out looks intentional rather than unkempt.

    Temp fade with volume on top

    The temple fade (or temp fade) focuses the shortest part specifically around the temples and front hairline, creating a clean frame for the face while keeping length everywhere else. This style gained popularity in urban barbering communities and works phenomenally well with naturally voluminous hairstyle options for 4A hair that benefits from structure around the face.

    Styling involves encouraging the natural volume on top through proper moisture balance. Over-moisturizing can weigh down the roots, while under-moisturizing leads to frizz. Find the sweet spot with lightweight leave-ins and mousses that define without flattening. The temp fade itself is low-maintenance, but keeping the line crisp requires visits every 3-4 weeks.

    Medium-Length Textured Cuts

    Curly fringe with short sides

    This modern cut features 3-4 inches of length in the front, styled forward into a textured fringe, with shorter (but not faded) sides. It works particularly well for boys with looser curl patterns (2B through 3B) who want a contemporary look without the maintenance of a fade. The fringe can be worn casually tousled or more deliberately styled depending on the occasion.

    The key to this cut is ensuring the fringe length suits the curl pattern. Tighter curls need more length to achieve the forward movement, while looser waves can create the fringe effect with less length. Morning styling takes under five minutes: dampen the fringe area, apply a small amount of curl cream, and either scrunch for texture or gently push forward for a more deliberate fringe shape.

    Textured crop for loose curls

    The textured crop keeps everything relatively short (1.5 to 3 inches throughout) but uses strategic layering to create movement and prevent the boxy look that can happen with blunt cuts on wavy to loosely curly hair. This cut is incredibly practical for active boys because it requires minimal styling while still looking intentional and put-together.

    Maintenance is refreshingly simple. A quick wash every 2-3 days with appropriate products, followed by scrunching in a lightweight styling product, creates definition that lasts. The crop grows out gracefully, typically looking good for 6-8 weeks before needing a trim. Between cuts, focus on scalp health and hydration rather than complex styling routines.

    Side-swept curls with undercut

    This cut creates dramatic contrast with closely trimmed or shaved sides and back (the undercut) while keeping 4-6 inches of length on top, styled to sweep to one side. The undercut reduces overall hair volume while the longer top section maintains the personality of natural curls. It works across curl types but looks particularly striking on boys with 3A through 4A curls that have enough definition to create clear curl clumps when styled directionally.

    Styling requires establishing the side part and training the curls to fall in the desired direction. Apply styling products while the hair is very wet, use your fingers to create the part, and then either air-dry or diffuse while encouraging the side-swept direction. The undercut portion needs regular maintenance (every 3-4 weeks) to keep the contrast sharp, but the top can go longer between trims.

    Longer & Free-Form Styles

    Full curly afro

    The classic afro celebrates natural texture in its most unstructured form. This cut works with the hair’s natural growth pattern, trimming only to create an even, rounded shape while maintaining significant length (typically 3-6 inches of stretched length depending on the child’s age and preference). The afro looks stunning on styling approaches for 4C hair and other type 4 textures that naturally grow out rather than down.

    According to professional styling advice for boys’ curly haircuts, maintaining an afro’s shape requires regular moisture and careful detangling. Use a wide-tooth comb or pick to gently shape the afro after moisturizing, working from ends to roots. Trimming every 8-12 weeks removes any unevenness and maintains the rounded silhouette. The afro requires commitment to moisture and gentle handling but offers unmatched versatility for creative expression.

    Shoulder-length curls with shape

    Longer curls (extending past the ears when pulled) require strategic layering to prevent pyramid shapes and maintain movement. This cut works beautifully on boys with 2C through 3C curl patterns who want to grow their hair out while keeping it looking intentional rather than simply neglected. Layers throughout create dimension, while face-framing pieces can be customized to suit facial structure.

    The maintenance commitment increases with length. Regular deep conditioning treatments, protective styling at night (satin bonnets or pillowcases), and gentle detangling become non-negotiable. However, many boys with longer curls find that once they establish a routine, the daily maintenance is actually simpler than shorter cuts that require frequent restyling. The hair can often be refreshed with water and leave-in rather than completely rewashed.

    Long top with shaved designs

    This creative option combines significant length on top (4-7 inches) with closely shaved or faded sides that feature line designs, patterns, or shapes. The artistic element makes this cut popular among older boys and teens who want to express individuality. The contrast between the creative designs and natural curly texture creates a striking, memorable look.

    Styling focuses on maintaining healthy, well-defined curls on top while keeping the design sharp. The curly section needs regular moisture and definition, while the shaved design requires touch-ups every 1-2 weeks to maintain clarity. This is definitely the highest-maintenance option on this list, but for boys who love the creative expression, the time investment is worth it. Work with a barber who specializes in both textured hair and design work for best results.

    Daily Maintenance & Styling Tips

    Product essentials for boys’ curly cuts

    Keep the product lineup simple but effective. For most boys’ curly cuts, you need just three core products: a gentle, sulfate-free shampoo for weekly or bi-weekly cleansing, a hydrating leave-in formula for daily moisture, and one styling product (mousse, gel, or cream) appropriate for their curl pattern and desired hold level.

    Younger children with shorter cuts can often get away with just leave-in conditioner and water for daily refreshing, adding a styling product only for special occasions. As cuts get longer or more structured, the styling product becomes more important for maintaining definition and controlling frizz. Choose products without harsh alcohols, sulfates, or heavy silicones that can build up and weigh down curls over time.

    Refresh techniques between washes

    Most curly cuts look best when washed only 1-2 times per week, with refreshing on the in-between days. The basic refresh method works across curl types: lightly dampen the hair with water from a spray bottle, apply a small amount of leave-in conditioner, and scrunch or shake to reactivate the curl pattern. For boys with fades or tapers, focus the refresh on the curly section and leave the faded parts alone.

    For second or third-day hair that needs more help, try the “steam refresh”: run a hot shower to create steam in the bathroom, bring your child in (without getting in the shower), and let the steam gently rehydrate the curls. Follow with a small amount of product and gentle scrunching. This technique works especially well for tighter curl patterns that respond to humidity.

    How often to trim based on curl type

    Wavy to loose curly hair (types 2B through 3A) typically needs trims every 6-8 weeks to maintain shape and remove any damage from environmental factors. These curl patterns are more prone to visible split ends, so regular trims keep the hair looking healthy and defined.

    Medium to tight curls (types 3B through 4A) can often extend to 8-10 weeks between trims, especially when well-moisturized and protected. The tighter curl pattern naturally hides split ends better, and the hair’s structure provides more inherent protection. Very tight coils (4B and 4C) can sometimes go 10-12 weeks between shape-up trims, though boys with faded sides will need those touched up more frequently (every 2-4 weeks) even if the curly top doesn’t require cutting.

    Night routine to preserve the cut

    The difference between waking up with great curls and waking up with flattened, frizzy hair often comes down to nighttime protection. For boys with shorter cuts (under 3 inches), a satin or silk pillowcase is usually sufficient to reduce friction and frizz overnight. This simple swap prevents the cotton from roughing up the hair cuticle and absorbing moisture.

    For medium to long curls, add a satin bonnet or durag to the routine. Yes, it might feel awkward at first, but after a few nights it becomes automatic, and the morning results speak for themselves. Apply a tiny amount of leave-in or curl refresher before covering, focusing on any areas that tend to flatten. Boys with picked-out afros can loosely re-pick before bed and cover with a large satin bonnet to maintain the shape overnight. This small evening investment cuts morning styling time significantly and keeps the cut looking fresh between barber visits.

    Frequently Asked Questions

    What’s the best first haircut for a toddler with curly hair?

    Keep it simple with a basic shape-up that evens out the length without removing too much hair. Many toddlers have fine, developing curls that will change texture as they grow, so avoid dramatic cuts until the permanent curl pattern emerges around age 2-4. Focus on trimming any uneven areas and creating a gentle, rounded shape. Most importantly, choose a patient stylist experienced with young children who can make the first cut a positive experience.

    Should curly hair be cut wet or dry?

    Curly hair should always be cut dry or barely damp so the stylist can see the natural curl pattern and how each section will spring up after cutting. Cutting curly hair wet and stretched often results in unexpected shortness and unevenness once it dries and shrinks. Professional curl specialists typically cut completely dry, working with the hair’s natural state to create the most accurate shape.

    How do I prevent my son’s curly fade from looking messy as it grows out?

    Schedule regular fade touch-ups every 2-3 weeks to maintain the clean line, even if the top doesn’t need cutting. Between appointments, keep the curly top well-moisturized and defined with appropriate products. A quick edge-up at home using clippers (if you’re comfortable) can extend professional visits slightly, though be conservative and stick to obvious cleanup areas rather than attempting to recreate the fade itself.

    Can you thin out thick curly hair to make it more manageable?

    Thinning should be done very strategically and sparingly on curly hair. For wavy to loose curly patterns, careful interior layering can reduce bulk without creating frizz. For coily hair (type 4), traditional thinning shears often cause more problems than they solve, creating frizz and disrupting curl clumps. Instead, work with a curl specialist who can remove weight through technique-based cutting methods rather than thinning shears, preserving the integrity of the curl pattern while reducing volume where needed.

    Conclusion

    The right haircut transforms curly hair from something that feels challenging to manage into a defining feature your child can feel genuinely confident about. Whether you choose a sharp fade that combines structure with natural texture, a medium-length cut that balances easy maintenance with style, or a longer free-form look that celebrates curl pattern in its fullest expression, success comes down to working with the hair’s natural characteristics rather than against them. The practical reality is that curly haircuts for boys require finding a skilled stylist who understands texture, establishing a simple but consistent care routine, and choosing a style that fits your family’s actual time and maintenance capacity.

    Start by identifying your child’s curl pattern and finding a barber or stylist who specializes in cutting hair like theirs, then choose one of these ten cuts based on your lifestyle and their preferences. Focus on building that basic three-product routine (gentle shampoo, leave-in conditioner, and one styling product), and remember that the goal isn’t perfection but healthy, well-maintained hair that makes mornings easier and helps your child feel great about their natural texture.

  • Wavy Hairstyles for Every Length: 2A, 2B & 2C Styling Ideas

    Wavy Hairstyles for Every Length: 2A, 2B & 2C Styling Ideas

    Wavy hair occupies a beautiful middle ground between straight and curly textures, offering natural movement and versatility that works with cuts of any length. Whether you have fine 2A waves that barely bend, defined 2B S-patterns, or coarse 2C waves bordering on curly, understanding how to work with your specific texture will unlock dozens of styling possibilities that enhance rather than fight your natural pattern.

    Understanding Your Wave Type Before Choosing a Style

    Before committing to a cut or styling routine, identifying your wave type prevents frustration and wasted money on products that never quite deliver. The Type 2 family includes three distinct subcategories, each with unique characteristics that influence which hairstyles will look best and hold longest.

    Type 2A: Fine, Loose S-Waves

    Type 2A hair forms gentle S-shaped bends that start mid-shaft rather than at the roots. The strands are typically fine in diameter, creating an overall delicate texture that can easily fall flat with heavy products. This wave type responds beautifully to caring for type 2A hair routines that prioritize lightweight formulations and volumizing techniques. The waves themselves are subtle, often disappearing entirely when hair gets longer or weighted down, which makes choosing the right cut especially important for maintaining visible texture.

    These waves air-dry relatively quickly and rarely form ringlets, instead creating that coveted beachy texture without much effort. However, 2A strands are prone to greasiness at the roots and can look limp by day two if not properly cared for. The fine texture means each strand is delicate, making gentle handling and minimal manipulation key to preventing breakage.

    Type 2B: Defined S-Pattern Waves

    Type 2B waves display a more pronounced S-shape that begins closer to the roots and maintains definition throughout the length. The texture sits firmly between fine and coarse, with medium-density strands that hold style well without excessive product. This wave type strikes a balance that many find easiest to style, though it comes with its own considerations for maintaining 2B waves successfully.

    These waves have enough structure to resist humidity better than 2A but can still experience frizz in challenging weather. The pattern typically holds overnight, making second-day styling simpler than with looser wave types. Product absorption is moderate, meaning you can use slightly richer formulations without weighing down the waves, though heavy creams will still flatten the pattern.

    Type 2C: Coarse, Pronounced Waves

    Type 2C waves form well-defined S-patterns that may even spiral into loose curls, especially in the underlayers or around the face. The individual strands are thicker and coarser in texture, creating hair that has substantial body and volume. This wave type shares many characteristics with loose curls and benefits from type 2C hair care strategies that emphasize moisture and frizz control.

    The coarser texture makes 2C waves more resistant to styling changes but also more prone to dryness and frizz. These waves can handle richer products and often need them to maintain definition and shine. The pronounced pattern holds extremely well, sometimes lasting multiple days with proper refreshing techniques, and responds beautifully to layering that removes weight and encourages curl formation.

    Short Wavy Hairstyles: Pixies, Bobs & Crops

    Short cuts bring unique advantages for wavy hair, removing weight that can drag down your pattern while creating shape that emphasizes texture. The key is working with a stylist who understands how waves behave when cut short, since the same techniques used for straight hair often create unflattering bulk or awkward flipping.

    The Textured Wavy Pixie

    A pixie cut on wavy hair creates dimensional, effortlessly tousled texture that looks intentionally styled with minimal effort. The cut works particularly well for 2B and 2C waves, where the natural pattern provides enough definition to prevent the style from looking flat. Strategic layering throughout removes bulk while maintaining enough length on top to showcase the wave pattern, typically leaving 2-3 inches at the crown.

    The sides and back are usually tapered or undercut to prevent the triangular shape that can happen when wavy hair is cut uniformly short. Point-cutting the ends rather than blunt-cutting creates softer edges that blend beautifully with the wave pattern. This style requires regular trims every 4-6 weeks to maintain the shape, but daily styling takes just minutes with a lightweight mousse scrunched through damp hair.

    Chin-Length Bob for Waves

    The bob remains one of the most flattering cuts for wavy hair because it provides enough length to display the wave pattern while removing the weight that causes drooping. A chin-length bob works across all three wave types, though the exact styling approach differs. For 2A waves, subtle internal layering adds movement without removing too much density, while 2C waves benefit from more aggressive layering that prevents the pyramid effect.

    Blunt bobs create a polished, modern look but require denser hair to avoid appearing stringy. The cut should follow the natural wave pattern rather than fighting it, with the stylist cutting hair dry or at least observing the wave formation before making final length decisions. Face-framing layers starting at the cheekbone soften the overall look and work particularly well for heart-shaped or square faces.

    Chic blonde wavy bob hairstyle for modern women.
    Model with a stylish blonde wavy bob, perfect for versatile looks and easy styling.

    Short Shag with Natural Movement

    The shag has experienced a major resurgence because it’s practically designed for wavy textures. This layered, choppy cut creates maximum movement and volume, with shorter layers throughout that encourage waves to form more tightly. The modern shag differs from its 1970s predecessor by incorporating softer, more blended layers that create texture without extreme volume.

    Curtain bangs or wispy fringe complement the shag beautifully, framing the face while integrating seamlessly into the overall layered structure. The cut works especially well for fine 2A waves that need volume, as the layers create the illusion of thicker, fuller hair. For those exploring short wavy hairstyles with maximum versatility, the shag delivers options ranging from sleek and polished to completely tousled.

    Young woman with wavy, tousled short hairstyle and casual beige sweater.
    Model showcasing a trendy wavy short hairstyle for versatile styling.

    Styling Techniques for Short Wavy Hair

    Short wavy cuts dry faster than longer lengths, which means you have less working time to encourage definition. Apply products immediately after washing while hair is soaking wet, using praying hands to smooth formulas from roots to ends before scrunching. A golf-ball-sized amount of mousse or gel works for most short styles, though 2A waves may need only half that to avoid weighing down the pattern.

    Diffusing on low heat speeds drying while adding volume at the roots. Hover the diffuser rather than pressing it directly against your scalp, using the cup to gently lift sections as they dry. For air-drying, microfiber towels or cotton t-shirts absorb excess water without creating frizz. Many people with short wavy hair find that sleeping on a silk or satin pillowcase maintains definition overnight without requiring elaborate protective styling.

    Medium-Length Wavy Hairstyles: Lobs to Shoulder Cuts

    Medium-length cuts occupy the sweet spot for wavy hair, providing enough length to showcase the full wave pattern while remaining manageable for daily styling. This length range, spanning from just below the chin to a few inches past the shoulders, offers tremendous versatility in both cutting and styling approaches.

    The Layered Lob

    The long bob (lob) has dominated trend cycles for years because it flatters virtually everyone and adapts beautifully to wavy textures. Cutting the lob between the collarbone and shoulders creates a length where waves naturally gain definition without becoming weighed down. Strategic layering prevents the bulky triangle shape while maintaining enough density that the style looks intentionally full rather than thin.

    Interior layers remove weight from the mid-lengths, allowing waves to form more defined S-patterns rather than loose bends. The perimeter can be either blunt for a polished look or subtly layered for a softer finish. This cut transitions seamlessly from professional settings to casual weekends, looking equally appropriate whether you style it sleek or encourage maximum texture. According to professional wavy haircut recommendations, the lob works particularly well for those transitioning from heat styling to embracing their natural texture.

    Shoulder-Length Waves with Face-Framing

    Shoulder-length hair with face-framing layers creates dimension and movement that enhances natural waves beautifully. The layers start around the cheekbone or jawline and gradually blend into the overall length, creating a soft, flattering frame that draws attention to your features. This approach works across all wave types but shines particularly on 2B and 2C textures where the layers can form distinct spiral pieces.

    The face-framing effect becomes even more pronounced when you apply leave-in conditioner to those front sections and scrunch them separately, encouraging tighter curl formation. The rest of the hair maintains a more relaxed wave, creating beautiful contrast and visual interest. This cut requires less frequent maintenance than shorter styles, typically needing a trim every 8-10 weeks to maintain shape and remove any damaged ends.

    Beautiful woman with wavy, layered hairstyle in natural light.
    Woman showcasing a stylish wavy hairstyle perfect for various hair lengths.

    Medium Shag for Added Volume

    A medium-length shag incorporates more layers than a traditional lob, with choppy, piece-y texture throughout that maximizes movement and volume. The layers are cut at varying lengths to create dimension, with the shortest pieces typically landing around the crown or cheekbone area. This graduated approach prevents the heavy, bottom-loaded look that can plague wavy hair cut in uniform layers.

    The shag works exceptionally well for fine 2A waves that struggle with volume, as the layers create space and lift that makes hair appear fuller. For coarser 2C waves, the shag removes bulk that can create an unflattering pyramid shape while allowing the wave pattern to express itself freely. Styling is refreshingly low-maintenance: scrunch in your products, let it air-dry or diffuse briefly, and the cut’s inherent texture does most of the work.

    Best Cutting Techniques for Mid-Length Waves

    Understanding layered cuts for texture helps you communicate effectively with your stylist. Point-cutting creates soft, textured ends that blend seamlessly with wave patterns, while slide-cutting removes bulk from mid-lengths without creating blunt lines. Both techniques work better for wavy hair than traditional blunt cutting, which can create heavy, triangular shapes.

    Dry-cutting allows stylists to see exactly how your waves form and where they need shaping. A skilled stylist will cut some sections while dry to establish the overall shape, then refine when wet to ensure precision. This combination approach accommodates the fact that wavy hair behaves differently depending on moisture levels, styling products, and even humidity. Request that your stylist cut along your wave pattern rather than against it, working with the natural S-shape instead of trying to create geometric precision.

    Long Wavy Hairstyles: Past Shoulder to Maximum Length

    Growing and maintaining long wavy hair requires patience and strategic cutting to prevent the weight from pulling out your natural pattern. Many people with wavy hair struggle at longer lengths because they lose definition, but the right cut and care routine can preserve beautiful waves even when hair reaches mid-back or beyond.

    Long Layers for Movement and Shape

    Long layers prevent the heavy, triangle shape that plagues wavy hair while removing enough weight that your pattern can express itself. The layers should be long and subtle rather than short and choppy, typically starting no higher than armpit level to maintain length while creating movement. This graduated approach removes interior bulk without sacrificing the overall length that many people work years to achieve.

    The longest layers should still reach your desired endpoint, whether that’s mid-back, waist, or beyond. Shorter layers interspersed throughout create dimension and prevent the flat appearance that can happen when all hair is cut to one length. Ask your stylist to use a combination of point-cutting and slide-cutting techniques that remove weight without creating blunt, visible lines between layer transitions.

    V-Cut and U-Cut for Wavy Hair

    Alternative cutting shapes like V-cuts and U-cuts create beautiful dimension on long wavy hair. A V-cut creates a dramatic point at the center back, with hair gradually getting longer from the sides to the middle. This shape removes significant weight from the sides while preserving maximum length in back, creating a flattering silhouette that showcases waves beautifully when hair is worn down.

    The U-cut offers a softer version of the same concept, creating a gentle curve rather than a sharp point. This shape works particularly well for 2A waves that need to maintain density to show definition, as it removes less hair overall while still creating shape. Both cuts look stunning when styled with loose, beachy waves and require minimal maintenance beyond regular trims to maintain the shape.

    Maintaining Health at Longer Lengths

    Long wavy hair requires consistent moisture and protection to remain healthy. The ends of long hair can be several years old, having endured countless wash cycles, styling sessions, and environmental exposure. Following dermatologist hair care guidelines becomes especially important at longer lengths, as damage accumulates over time.

    Deep conditioning treatments every 1-2 weeks replenish moisture that daily styling depletes. Focus these treatments from mid-length to ends, avoiding the roots unless your scalp is extremely dry. Protein treatments every 4-6 weeks strengthen the hair shaft, preventing breakage that can make length goals impossible to reach. Regular trims every 10-12 weeks remove split ends before they travel up the hair shaft, actually helping you retain length over time despite removing small amounts.

    Styling Long Waves Without Weight

    The challenge with long wavy hair is applying enough product to control frizz and define waves without creating weight that pulls out the pattern. Lightweight gels and mousses work better than heavy creams for most people with long waves. Apply products in sections, ensuring even distribution from roots to ends, then scrunch firmly to encourage wave formation.

    Plopping or micro-plopping with a microfiber towel removes excess water and product, preventing the heavy, wet look that can plague long wavy styles. Many people with long waves find that applying products in layers creates better results than using one thick application. Start with a hydrating leave-in, add a wave-enhancing mousse, then finish with a light gel for hold. This combination provides moisture, volume, and definition without overwhelming the hair.

    Styling Techniques That Work Across All Lengths

    Certain styling approaches enhance wavy hair regardless of cut length, though you may need to adjust product amounts and timing based on whether you have a pixie or waist-length waves. Mastering these fundamental techniques gives you the foundation to create dozens of different looks.

    Scrunching for Definition

    Scrunching remains the cornerstone technique for encouraging wave definition. The motion involves cupping sections of hair in your palm and gently squeezing upward toward your scalp, physically encouraging the strands to form their natural S-pattern. Apply products while hair is soaking wet, then scrunch firmly several times per section, actually hearing the squishing sound as excess water and product release.

    Avoid touching hair while it dries, as disruption creates frizz and breaks apart forming wave clumps. Once completely dry, scrunch again gently to break any product cast and create soft, touchable waves. This final scrunching, called “scrunching out the crunch,” transforms crunchy, product-coated waves into natural-looking texture with movement.

    Air-Drying vs. Diffusing Waves

    Air-drying works beautifully for many wave types and requires zero special equipment, making it ideal for travel or rushed mornings. The downside is longer drying time and potentially less volume at the roots. To air-dry successfully, apply products thoroughly, scrunch, then leave hair completely alone until 100% dry. Touching partially dry waves creates frizz and disrupts forming clumps.

    Diffusing speeds drying while adding volume, particularly important for fine 2A waves that tend to lie flat. Use low heat and low airflow settings, hovering the diffuser near your scalp without touching to lift roots. Cup sections of hair into the diffuser bowl and hold for 30-60 seconds before moving to the next section. The key is patience: rushing with high heat creates frizz and can actually elongate your wave pattern.

    Product Layering for Hold Without Crunch

    Layering products in the correct order maximizes their effectiveness while minimizing crunch and weight. Start with hydrating products on soaking wet hair: a leave-in conditioner or curl cream provides moisture and slip. Next, apply mousse for volume and light hold, distributing it evenly through all sections. Finally, add gel for stronger hold and frizz control, focusing on areas that need the most definition.

    The amount of each product matters tremendously. For short hair, use dime-sized amounts of each product. Medium lengths need quarter-sized portions, while long hair may require a half-dollar to silver-dollar amount depending on density. Always start with less than you think you need since you can add more but removing excess is nearly impossible.

    Refreshing Second-Day Waves

    Second-day hair often looks better than first-day, once you learn proper refreshing techniques. Sleep on a satin or silk pillowcase to minimize friction that creates frizz and tangles. In the morning, assess which areas need attention: some sections may look perfect while others appear flat or frizzy.

    For spot refreshing, lightly mist problem areas with water or a diluted leave-in conditioner spray, then scrunch to reactivate your products and reform waves. For more comprehensive refreshing, try the “damp hand” method: wet your hands, shake off excess water, then scrunch sections of hair. This adds just enough moisture to reactivate products without fully wetting hair. Some people add a small amount of fresh gel or mousse during refreshing for areas that need extra help, focusing only on sections that lost definition.

    Frequently Asked Questions

    What’s the best haircut length for 2A waves?

    Medium lengths between the collarbone and a few inches past the shoulders work best for most 2A waves. This length provides enough weight to prevent excessive volume while not being so long that the fine texture loses all definition. The layered lob is particularly flattering because it removes bulk while maintaining enough density to show the wave pattern. Those exploring 2A styling inspiration will find that medium lengths offer the most versatility, allowing both sleek and textured styling options.

    Can I get bangs with wavy hair?

    Absolutely! Curtain bangs, wispy bangs, and side-swept fringe all work beautifully with wavy textures. The key is cutting them slightly longer than you think you want, as waves shorten the apparent length. Avoid blunt, heavy bangs cut straight across unless you plan to straighten them daily, as wavy bangs in this style tend to separate oddly and require constant maintenance. Curtain bangs that frame the face integrate seamlessly with wavy hair and require minimal styling beyond your regular routine.

    How often should I trim wavy hair to maintain my style?

    Short wavy cuts need trimming every 4-6 weeks to maintain their shape, as the style depends on precise proportions that grow out quickly. Medium lengths can stretch to 8-10 weeks between trims, while long wavy hair typically needs cutting every 10-12 weeks. Regular trims remove split ends before they travel up the hair shaft, actually helping you maintain length goals. If you notice increased tangling, dullness, or wispy ends, you’ve probably waited too long between cuts.

    Do layers make wavy hair frizzy?

    Layers themselves don’t cause frizz, but poor cutting techniques can. When cut correctly using point-cutting or slide-cutting methods, layers actually reduce frizz by removing bulk and allowing waves to form properly. The problem occurs when stylists use techniques designed for straight hair on wavy textures, creating blunt lines and disconnected sections. Working with a stylist experienced in cutting textured hair ensures your layers enhance rather than fight your natural pattern.

    Should I cut wavy hair wet or dry?

    The ideal approach combines both. Cutting dry shows exactly how your waves form and where they need shaping, while cutting wet allows for precision and clean lines. Many skilled stylists start by observing your dry wave pattern, then dampen hair for the actual cutting, and finish with dry refinements. Avoid stylists who insist on cutting wavy hair only when wet and stretched straight, as this approach ignores your natural texture and often leads to disappointing results.

    What’s the easiest wavy hairstyle to maintain?

    A shoulder-length cut with long layers requires the least daily effort while still looking polished. This length dries relatively quickly, doesn’t require elaborate sleeping protection, and looks good with minimal product. The natural wave pattern provides built-in style, so you can simply apply your products, scrunch, and let it air-dry with beautiful results. Short cuts require more frequent trims and precise styling, while very long hair demands more time and product to maintain definition.

    Conclusion

    Your perfect wavy hairstyle exists at the intersection of your specific wave type, lifestyle needs, and personal aesthetic. Whether you choose a short pixie that emphasizes your 2C wave pattern, a medium lob that balances manageability with versatility, or long flowing layers that showcase your natural texture, the right cut should make your daily routine simpler rather than more complicated. The styling techniques that work best remain consistent across lengths: proper product application on soaking wet hair, scrunching for definition, and learning whether air-drying or diffusing serves your schedule and volume needs.

    Start by identifying your wave type with honesty, then choose a stylist who demonstrates experience cutting textured hair rather than one who insists on fighting your natural pattern. Bring reference photos that show hair similar to yours in texture and density, not just the style you want, and communicate clearly about your willingness to style daily versus your preference for wash-and-wear simplicity. The confidence that comes from a haircut designed specifically for wavy hair transforms your entire relationship with your texture, turning what might have felt like a styling challenge into your signature look.

  • 4A Hairstyle Ideas for Defined Coils: Low-Maintenance & Protective Styles

    4A Hairstyle Ideas for Defined Coils: Low-Maintenance & Protective Styles

    If you have 4A hair, you’re working with tightly coiled springs that pack beautiful volume and versatility. Your coils are small, densely packed, and full of personality, but they can also shrink dramatically and crave moisture more than looser curl patterns. The right hairstyles don’t just look amazing on 4A texture; they work with your coils’ natural behavior rather than against it, giving you definition, length retention, and styles that actually last. Whether you want wash-and-go ease, protective versatility, or low-manipulation everyday looks, understanding how to prep and style your specific coil pattern makes all the difference.

    Understanding 4A Hair Before Styling

    What Makes 4A Coils Unique

    Your 4A hair texture forms tight, springy coils that resemble a corkscrew or coiled telephone cord, typically about the circumference of a crochet needle. This distinct coil pattern creates natural volume and bounce, but it also means each strand loops back on itself repeatedly, making moisture distribution more challenging than it is for looser curl patterns. Unlike wavy or loosely curly hair, 4A coils don’t allow sebum (your scalp’s natural oil) to travel down the hair shaft easily, which is why your hair can feel dry even when your scalp produces adequate oil.

    The density of 4A coils also creates beautiful fullness, but individual coil definition can get lost without proper styling techniques. Each coil wants to clump with its neighbors when wet, but as hair dries, friction and manipulation can separate those clumps into frizz. That’s why styling products and application methods matter so much for this texture.

    Beautiful woman with defined, natural curly hairstyle for low-maintenance styling.

    Shrinkage and Moisture Needs

    Shrinkage is one of 4A hair’s signature traits, and it’s not a flaw but rather proof of your coils’ spring and elasticity. You can expect anywhere from 50 to 75 percent shrinkage when your hair air-dries, which means shoulder-length stretched hair might appear chin-length or shorter when worn in its natural coiled state. While shrinkage protects your ends and demonstrates hair health, it can be frustrating when you want to show length.

    Moisture retention presents another challenge, especially if you have low porosity coils that resist water absorption. According to research on hair porosity and moisture retention, tightly coiled hair patterns often require moisture-sealing techniques and humectant-rich products to maintain hydration throughout the day. Without adequate moisture, 4A coils become brittle, lose definition, and break more easily.

    Foundation: Prep for Any 4A Style

    Every successful 4A hairstyle starts with properly cleansed, conditioned, and moisturized hair. Use a sulfate-free shampoo or co-wash that cleanses without stripping natural oils, then follow with a deep conditioning treatment at least weekly. Your conditioning step should include slip, meaning enough lubrication to detangle without excessive manipulation.

    After conditioning, apply products to soaking-wet hair, not damp hair. This is critical for 4A coils. Water is your primary styling agent, and products applied to wet hair distribute more evenly and provide better coil clumping. Start with a quality leave-in conditioner using the praying hands method (smoothing product between your palms down sections of hair), then layer a curl cream or custard for hold, and seal everything with a lightweight oil or butter on the ends.

    Wash-and-Go Styles for 4A Coils

    Classic Defined Wash-and-Go

    The wash-and-go is the ultimate low-maintenance style for 4A hair when executed properly. After applying your leave-in conditioner to dripping-wet hair, section your hair into four to six parts for easier product distribution. Apply a strong-hold gel designed for coily hair using the raking method: spread fingers wide and rake through each section from root to tip, encouraging coils to clump together.

    Once gel is applied, use the “shake and bounce” technique by gently shaking each section to encourage coil formation, then either air-dry or use a hooded dryer on low heat. The key to a successful wash-and-go is the gel cast, that crunchy feeling when hair is completely dry. Once fully dry (this can take several hours), scrunch out the crunch by gently squeezing sections of hair to break the gel cast, revealing soft, defined coils underneath.

    Elongated Wash-and-Go with Shingling

    Shingling is a more time-intensive technique that provides maximum coil definition and some elongation. Working on soaking-wet hair in small sections (about half-inch wide), apply gel or curl cream to each tiny section individually, then smooth it from root to tip between your thumb and forefinger. This “shingling” motion coats each coil and encourages it to form a defined spiral.

    For added elongation, gently pull each shingled section downward as you apply product, or use a Denman brush to smooth product through while stretching the coil slightly. This method takes significantly longer than a traditional wash-and-go but produces extremely defined, uniform coils with less shrinkage. Expect to spend 45 minutes to over an hour depending on your hair’s density.

    Product Layering for Maximum Definition

    The LOC or LCO method (Liquid, Oil, Cream or Liquid, Cream, Oil) helps 4A coils retain moisture and definition throughout the week. Start with water or a water-based leave-in (liquid), add a lightweight oil like jojoba or grapeseed to seal in moisture, then finish with a cream or gel for hold and definition. Some people find better results reversing the oil and cream order, so experiment to see what your coils prefer.

    Avoid over-layering, which creates product buildup and weighs down coils. Two to three products are typically sufficient. If your hair feels sticky, heavy, or looks dull, you’re likely using too much product or products with incompatible ingredients (such as silicones mixed with water-soluble gels).

    Stretched and Elongated 4A Hairstyles

    Braid-Out and Twist-Out Techniques

    Braid-outs and twist-outs offer defined texture with significant elongation, making them ideal when you want to show your hair’s length while protecting your ends. For a braid-out, section freshly washed, conditioned hair into medium-sized sections and apply your styling cream or butter. Braid each section (three-strand plaits work well), ensuring you braid all the way to the ends and secure with a small elastic or bobby pin.

    Allow braids to dry completely, either overnight or under a hooded dryer, then carefully unravel each braid without separating the curl pattern too much. For more volume, gently separate the defined waves with your fingers. Twist-outs follow the same principle but use two-strand twists instead of braids, creating a tighter, more defined pattern that’s beautiful on 4A coils.

    Banding for Length Retention

    Banding is a heatless stretching method that elongates 4A coils while they dry, reducing shrinkage by 40 to 60 percent. After applying leave-in conditioner to damp (not soaking) hair, divide hair into four to eight sections depending on thickness. Starting at the roots, wrap a fabric-covered elastic or soft hair tie around each section, then add another elastic two to three inches down, continuing this pattern down the length of each section.

    The tension from the bands gently stretches your coils as they dry, creating elongated, fluffy hair without heat damage. Leave bands in until hair is completely dry (usually overnight), then remove them carefully and style as desired. This technique is excellent before creating updos, buns, or any style where you want added length.

    Blow-Out Styles with Heat Protection

    A blow-out can give 4A hair dramatic length and volume, but heat protection is non-negotiable. On freshly washed hair, apply a heat protectant spray or cream to every section, then use the tension method: hold each section taut while directing the blow dryer’s nozzle down the hair shaft from root to tip. This smooths the cuticle and elongates coils without requiring a brush.

    For even more stretch, use the comb-chase method with a wide-tooth comb attachment, or follow up with a blow-dryer brush on low-to-medium heat. Keep the dryer moving constantly to avoid heat concentration in one spot, and limit blow-outs to once or twice monthly to minimize heat damage. Always finish with a lightweight oil to seal the cuticle and add shine.

    Protective Styles for 4A Hair

    Two-Strand Twists and Flat Twists

    Two-strand twists are one of the most versatile protective styles for 4A coils because they’re gentle on your hair, relatively quick to install, and can last one to three weeks with proper maintenance. Section clean, moisturized hair into small-to-medium parts, apply a twisting cream or butter to each section, then divide it in half and twist the two pieces around each other from root to tip.

    Flat twists (similar to cornrows but with two strands instead of three) lie flush against the scalp and work beautifully for updos, half-up styles, or creating patterns along your hairline. Both styles protect your ends from manipulation and environmental damage while allowing your scalp to breathe. You can wear the twists as-is or unravel them after a few days for a textured twist-out.

    Braided Updos and Buns

    Updos keep your ends tucked away and protected, which is essential for length retention with 4A hair. Try a high bun created from stretched hair (via banding or a previous braid-out): gather hair into a high ponytail using a fabric scrunchie, twist the ponytail around its base, and secure with bobby pins. For added elegance, leave out some edges or face-framing coils.

    Braided updos combine protection with style. Create four to six large braids, then pin them into a low bun, crown, or intricate pattern at the back of your head. These styles can last several days and transition easily from casual to formal settings with the right accessories.

    Faux Locs and Passion Twists

    Extension-based protective styles like faux locs and passion twists give 4A hair a break from daily manipulation while offering length and styling flexibility. Faux locs are installed by wrapping synthetic hair around small sections of your natural hair, creating the appearance of mature locs without the commitment. They typically last four to eight weeks and require minimal daily maintenance.

    Passion twists use a lighter, curlier synthetic hair wrapped in a two-strand twist pattern, creating a softer, more bohemian look than traditional faux locs. Both styles protect your natural coils from environmental stressors and manipulation, but they require proper preparation (clean, moisturized hair before installation) and maintenance (regular scalp cleansing and moisturizing) to avoid dryness or breakage when removed.

    Low-Manipulation Everyday Styles

    Pineapple Updo for Second-Day Hair

    The pineapple is your best friend for preserving wash-and-go or twist-out definition overnight and refreshing it the next day. Before bed, flip your head upside down and gather all your hair into a very high, loose ponytail at the crown of your head using a satin scrunchie or fabric hair tie. Don’t smooth or tighten the ponytail; just loosely gather the hair to prevent flattening while you sleep.

    In the morning, remove the scrunchie and gently shake out your coils. The pineapple prevents friction against your pillowcase and maintains volume at the roots. For extra protection, sleep on a satin pillowcase or wear a satin bonnet over your pineapple. This method easily extends a fresh style by three to five days.

    Half-Up Styles and Top Knots

    Half-up styles offer the perfect balance between showcasing your coils and keeping hair manageable. Gather the top half of your hair (from temple to temple across the crown) and secure it into a ponytail or bun, leaving the bottom section loose and defined. This works especially well on second or third-day hair when your roots might need a lift but your coils still have good definition.

    Top knots are similarly easy: gather all your hair to the crown, twist it around itself, and secure with pins or a hair tie. For 4A coils, slightly stretch your hair first (via banding or a previous braid-out) so the top knot has more height and fullness. These styles minimize manipulation while keeping your ends protected.

    Headband and Scarf Accessories

    Accessories can completely transform a simple style while protecting your hairline from tension and manipulation. Wide fabric headbands smooth edges and frame your face beautifully, while silk or satin scarves can be tied, twisted, or wrapped around buns and ponytails for added color and texture.

    For a quick refresh on day-old hair, smooth your edges with a light gel or edge control, place a decorative headband about an inch back from your hairline, and fluff your coils for volume. This takes under five minutes and makes even tired hair look intentional and polished.

    Maintaining Definition Between Styles

    Nighttime Preservation Methods

    How you protect your 4A coils at night determines how long your style lasts and how much re-styling you’ll need in the morning. Beyond pineappling, consider sectioning hair into four to six loose twists or braids before bed, which preserves coil clumps while preventing tangling. Secure each section loosely with a fabric-covered elastic or clip.

    Always sleep on satin or silk pillowcases, or wear a satin bonnet or scarf. Cotton pillowcases create friction that roughens your hair cuticle, causes frizz, and absorbs moisture from your coils overnight. A complete guide to type 4 hair characteristics emphasizes that nighttime protection is one of the most critical factors in maintaining healthy, defined coils.

    Refreshing Coils Without Rewashing

    To refresh 4A coils between wash days, mix water with a small amount of leave-in conditioner in a spray bottle (about 3:1 ratio). Lightly mist sections of hair until damp but not soaking, then apply a small amount of gel or cream and scrunch or rake through to redefine coils. You can also spot-treat frizzy areas by applying product only where needed rather than saturating all your hair.

    For twist-outs or braid-outs losing definition, re-twist or re-braid a few sections at night, allow them to set, then unravel in the morning and blend with the rest of your hair. This targeted approach extends your style without the time commitment of starting fresh.

    Product Buildup Prevention

    Product buildup dulls coils, prevents moisture absorption, and makes hair feel heavy or sticky. Prevent buildup by clarifying your hair every two to four weeks with a sulfate-free clarifying shampoo or an apple cider vinegar rinse (mix one part ACV with three parts water, apply to wet hair, let sit for a few minutes, then rinse thoroughly).

    Between clarifying sessions, avoid silicone-heavy products unless you’re using sulfate shampoos regularly (silicones require sulfates for complete removal). Water-soluble products wash out more easily and reduce buildup risk. If your coils feel coated, look limp, or won’t absorb moisture even after conditioning, it’s time for a clarifying treatment.

    Frequently Asked Questions

    How often should I wash 4A hair to maintain healthy coils?

    Most people with 4A coils do best washing once per week to once every ten days, depending on scalp oiliness, product usage, and activity level. If you exercise frequently or use heavy styling products, you might need to cleanse more often, while those with very dry scalps can extend to every two weeks. The key is listening to your scalp rather than following a rigid schedule. If your scalp itches, feels dirty, or your hair won’t absorb moisture despite applying products, it’s time to wash. Between washes, you can co-wash (cleanse with conditioner only) to refresh without stripping natural oils.

    What’s the difference between styling 4A and 4C hair?

    While both are coily textures, 4A coils have a more defined S-pattern that clumps more easily with product, making wash-and-gos and shingling techniques more effective. 4C hair has a tighter, Z-shaped pattern with less natural definition, so it often requires more manipulation (twisting, braiding) to create uniform texture. The styling techniques overlap significantly, but 4A hair generally shows coil definition with less effort, while 4C excels at voluminous, textured styles. Many people have a combination of both textures on different parts of their head.

    Can I get a defined wash-and-go on 4A hair without gel?

    Technically yes, but it’s significantly harder and the results typically don’t last as long. Gel provides the hold necessary to keep coil clumps intact as they dry and creates the protective cast that prevents frizz. You can try using a strong-hold curl cream or custard alone, but most 4A coils need the film-forming ingredients in gel (like polymers) to maintain definition throughout the day. If you dislike the crunchy gel cast, focus on fully scrunching it out once hair is completely dry, which leaves soft, touchable coils with lasting definition.

    How do I combat extreme shrinkage when I want to show length?

    Use stretching techniques before or during styling: banding, African threading, braiding or twisting hair while damp and allowing it to dry stretched, or using the blow-dryer tension method. Heavier styling creams and butters also weigh coils down slightly, providing some elongation, though this can sacrifice volume. Keep in mind that shrinkage is actually a sign of healthy elasticity in your coils. If showing length is your goal for a particular style or occasion, heat-free stretching methods protect your hair better than frequent flat-ironing or blow-drying.

    Why does my 4A hair feel dry even right after conditioning?

    This usually indicates one of three issues: low porosity that prevents moisture absorption, insufficient product application while hair is wet enough, or product buildup creating a barrier. If you have low porosity 4A hair, try using heat (a shower cap under a hooded dryer) during deep conditioning to open the cuticle and allow moisture penetration. Always apply leave-in products to soaking-wet hair, not damp hair, and ensure you’re using enough product for your density. Finally, clarify regularly to remove buildup that blocks moisture from entering the hair shaft.

    Conclusion

    Your 4A coils are incredibly versatile, capable of everything from tightly defined wash-and-gos to dramatic stretched styles that showcase your length. The hairstyles that work best are those that respect your hair’s need for moisture, work with your natural shrinkage rather than fighting it constantly, and protect your delicate coil structure from excessive manipulation. Whether you prefer the simplicity of a well-executed wash-and-go, the versatility of twist-outs and braid-outs, or the long-term ease of protective styles, success comes down to proper preparation, the right products for your porosity, and techniques that enhance rather than force your natural coil pattern.

    Start with just one new technique from this guide: try shingling a small section during your next wash day, experiment with banding overnight, or perfect your pineapple method for better second-day hair. Small improvements in how you work with your 4A texture add up quickly to healthier, more defined, longer-lasting styles. Your coils have incredible potential, and with the right approach, you’ll spend less time fighting your hair and more time enjoying the beautiful, voluminous styles that 4A hair does best.

  • 2A Hairstyle Ideas: 15+ Looks That Work With Fine, Subtle Waves

    2A Hairstyle Ideas: 15+ Looks That Work With Fine, Subtle Waves

    If you have type 2A hair, you know the challenge well: your waves are just subtle enough that they can look limp without the right approach, yet just textured enough that stick-straight styles feel like a battle. The good news? These fine, gentle S-waves respond beautifully to strategic cuts and styling techniques that work with your natural pattern rather than against it. Whether you’re looking for a short bob that adds body or longer layers that prevent flatness, these 15+ hairstyle ideas will help you embrace your natural texture while getting the volume and definition you’re after.

    Understanding 2A Hair Before You Style

    What Makes 2A Hair Unique

    Type 2A hair sits at the subtle end of the wavy spectrum, with a loose S-pattern that’s most visible from the mid-lengths to ends. Unlike tighter wave patterns, 2A waves tend to be fine in texture and can easily be pulled straight by the weight of the hair itself. Your hair likely lies close to the scalp at the roots, with just enough bend to create a soft, beachy texture when styled properly.

    The key characteristic that sets 2A apart is its delicate balance. These waves want to form, but they need support to do so without getting weighed down. This is why understanding caring for type 2A hair is essential before diving into specific styles. Your hair shaft is typically finer than other wave types, which means it’s more prone to damage from heat and heavy products, but it also responds quickly to the right lightweight techniques.

    Most people with 2A hair notice their pattern is stronger in certain areas, often the back and underneath layers, while the top and front sections may appear straighter. This natural variation actually works in your favor when it comes to hairstyling, as it creates organic movement and prevents the “one-note” look that can happen with completely uniform texture.

    Common Styling Challenges and Solutions

    The primary frustration for 2A hair is the flatness factor. Because the waves are subtle and the hair is often fine, gravity easily pulls the pattern out at the roots, leaving you with volume-less lengths that can look limp by midday. Product buildup is another common culprit, as traditional curl creams and heavy gels that work beautifully on tighter patterns will collapse fine 2A waves within hours.

    Frizz presents itself differently on 2A hair compared to curlier textures. Instead of an all-over halo, you’ll typically see flyaways concentrated around the hairline and random straight pieces that refuse to blend with the wave pattern. This happens because your hair’s cuticle is more susceptible to moisture imbalance, and individual strands can swing between straight and wavy depending on humidity and product application.

    The solution to these challenges lies in three core principles: choosing the right cut, using lightweight products, and employing techniques that encourage the wave without adding weight. Many stylists recommend haircut recommendations for 2A texture that incorporate layers and texture-building techniques to naturally boost volume from the roots.

    The Foundation: Cuts That Set You Up for Success

    Your haircut does more heavy lifting for 2A waves than you might realize. The right cut creates natural lift at the crown, removes excess weight that pulls waves straight, and establishes a shape that works whether you air-dry or add minimal styling. Ask your stylist for internal layering that removes bulk without creating visible choppiness on the surface.

    Long, one-length cuts can work against 2A hair by creating a triangle shape where all the weight sits at the bottom, dragging down any wave formation. Instead, look for cuts with movement built in through strategic layering, especially around the crown and through the mid-lengths. Face-framing layers are particularly effective for 2A textures because they’re lighter and more likely to hold their wave pattern.

    Blunt cuts can also work beautifully for 2A hair, but only when kept at specific lengths. A chin-length or shoulder-skimming blunt cut prevents the hair from getting long enough to weigh itself down, while the clean line creates the illusion of density that fine hair often lacks. The key is regular trims every 8-10 weeks to maintain the shape and prevent straggly ends that make waves look undefined.

    Short 2A Hairstyle Ideas (Chin to Shoulder)

    The Textured Bob: Your Volume-Building Foundation

    A textured bob is arguably the most flattering cut for 2A hair because it removes length-related weight while maximizing natural volume. The ideal length hits anywhere from chin to collarbone, with internal layers that create movement without looking choppy or disconnected. This cut works exceptionally well because your natural wave pattern has less hair to pull against, allowing the S-bend to form more pronounced curves.

    To style a textured bob on 2A hair, apply a volumizing mousse to damp hair, focusing on the roots and mid-lengths. Use the scrunching method while the hair is still quite wet, then either air-dry or diffuse on low heat with your head flipped upside down for the first few minutes. The result is a tousled, effortlessly textured look that doesn’t require perfection to look polished.

    The beauty of this style is its versatility. On day one, you might scrunch in product for defined waves. By day two or three, you can embrace a straighter, sleeker texture or add texture spray for a more lived-in look. For those exploring short wavy hair ideas, this bob serves as an excellent starting point that can be customized with bangs, asymmetry, or graduated lengths.

    The Shaggy Lob with Piecey Layers

    The shaggy lob brings back the best elements of 70s texture with a modern twist that’s perfect for 2A waves. This style typically falls between the collarbone and shoulders, with shorter layers throughout that create a deliberately undone, piecey finish. The layers are cut with a razor or point-cutting technique to soften the ends and encourage that coveted “I woke up like this” texture.

    This cut is particularly forgiving for 2A hair because it’s designed to look imperfect. Those random straight pieces that frustrate you in more structured styles actually add to the overall aesthetic here. The shorter interior layers lift at the roots naturally, while the longer perimeter pieces maintain enough weight to prevent the style from looking too puffy or triangular.

    Style by applying a lightweight sea salt spray to damp hair, then rough-dry with your fingers or a diffuser. The goal isn’t perfect waves but rather separated, textured pieces that move independently. You can enhance specific sections with a 1-inch curling iron if desired, wrapping hair away from your face and leaving the ends out for a more relaxed finish.

    Blunt Cut with Subtle Bend

    Don’t underestimate the power of a sharp, blunt cut for 2A hair. When kept at the right length (typically between chin and shoulders), a blunt cut creates the appearance of thicker, denser hair while your natural wave adds just enough movement to prevent it from looking severe or heavy. This style works best for those whose 2A pattern is consistent throughout rather than concentrated in specific sections.

    The key to making a blunt cut work with fine 2A waves is the styling approach. Rather than fighting for tight curls or pin-straight hair, embrace the in-between. After washing, apply a minimal amount of lightweight styling cream to damp hair, then use a paddle brush while blow-drying to smooth the top layers while encouraging the natural bend in the lengths.

    This style shines when you want a polished, put-together look that still feels relaxed and natural. It’s particularly effective for professional settings where you need to look groomed without spending an hour on your hair. The blunt line creates a strong silhouette, while the subtle wave prevents the style from reading as too severe or manicured.

    Medium to Long 2A Hairstyle Ideas

    Layered Cuts That Prevent Flatness

    As 2A hair gets longer, strategic layering becomes non-negotiable if you want to maintain any volume or wave definition. Long layers, starting around the cheekbones or chin and extending through the lengths, remove weight where it accumulates most (the mid-lengths and ends) while preserving overall length. This approach to layered cuts for texture prevents the dreaded pyramid shape that can happen when all the hair is one length.

    Request layers that are blended and soft rather than heavily textured or choppy. Your stylist should create longer layers that gradually increase in length from the interior to the perimeter, which maintains density at the ends while building volume through the crown and mid-shaft. This technique allows your natural wave to form without getting pulled out by excess weight.

    For daily styling, layers give you options. You can enhance the wave with scrunching and diffusing, straighten select pieces around the face for a blended look, or add loose waves with a large-barrel curling iron that mimics and amplifies your natural pattern. The layers ensure that whatever approach you choose won’t fall completely flat within an hour of leaving the house.

    Curtain Bangs and Face-Framing Waves

    Curtain bangs are a match made in heaven for 2A hair because they’re designed to be imperfect and slightly undone. These bangs part down the middle (or slightly off-center) and frame the face with pieces that are longer at the temples and shorter in the center. The length and weight are light enough that they naturally hold a soft bend without requiring hot tools or heavy products.

    The face-framing layers that accompany curtain bangs extend the shaping down through the cheekbones and jawline, creating a flattering frame that draws attention to your features while adding movement where 2A hair needs it most. These shorter pieces are naturally lighter and more prone to waving, which helps the overall style maintain dimension and texture.

    Style curtain bangs by blow-drying them with a round brush, directing the hair away from the center part as you dry. For the face-framing pieces, you can either scrunch them with the rest of your waves or use a flat iron to create a gentle bend away from your face. This combination of straight-ish bangs and wavy lengths creates an effortlessly cool, French-girl aesthetic that works beautifully with fine 2A texture.

    The Effortless Beach Wave Look

    The beach wave aesthetic is what 2A hair naturally wants to do, which is why this style feels so intuitive for this texture type. Unlike tighter curl patterns that need significant product and technique to achieve beach waves, 2A hair simply needs a little encouragement and the right products to enhance what’s already there. This style works for medium to long lengths, typically past the shoulders.

    To create enhanced beach waves, start with damp hair and apply a sea salt or texturizing spray from mid-lengths to ends, avoiding the roots to prevent weighing them down. Scrunch the product through in sections, then either air-dry or use a diffuser on low heat. The goal is separated, piecey waves with a matte finish rather than defined, shiny curls. According to styling techniques for loose waves, the scrunch-and-release method works particularly well for this texture.

    For added dimension, you can wrap random sections around a 1 to 1.25-inch curling iron, alternating the direction you wrap and leaving the last inch or two of hair out of the barrel. This creates waves that look naturally sun-kissed and tousled rather than uniformly curled. Finish by scrunching in a small amount of texturizing paste to separate the waves and add lived-in texture.

    Updos and Half-Up Styles for 2A Waves

    The Textured Low Bun

    A low bun showcases 2A texture beautifully because the slight wave adds visual interest and softness that straight hair can’t achieve without teasing or texturizing products. The key is to work with your natural texture rather than trying to smooth it completely, creating a bun that looks intentionally undone and romantic.

    Start by enhancing your natural wave with a bit of texture spray or dry shampoo for grip, then gather hair at the nape of the neck. Instead of pulling it tightly, leave some slack for a softer, more relaxed shape. Twist the hair loosely and wrap it into a bun, securing with bobby pins. Pull out a few face-framing pieces and gently pull apart the bun to make it fuller and more textured.

    This style works particularly well for second or third-day 2A hair when your waves have relaxed into a more tousled pattern and there’s natural texture and grip in the hair. You can dress it up with decorative pins or a silk scarf, or keep it simple for an everyday elevated look that takes less than five minutes.

    Half-Up Twists and Clips

    Half-up styles are ideal for 2A hair because they solve the root-flatness problem while showcasing the wave pattern in the lengths. A simple half-up twist or claw clip pulls hair away from the face and creates instant volume at the crown, while the remaining hair displays your natural texture. This style is particularly flattering on wavy hair styling ideas that need dimension.

    For a twist variation, take sections from each side of your head at temple level, twist them toward the back, and secure with bobby pins or a small clip. Leave the twist slightly loose and messy rather than tight and sleek. The tension at the crown creates lift, while the twisted sections add visual interest that works beautifully with fine 2A waves.

    Claw clips have made a major comeback and work exceptionally well for this hair type. Gather the top half of your hair (from the temples back), give it a slight twist for added volume, and secure with a medium or large claw clip. The clip instantly adds height at the crown, while the wavy lengths below create a balanced, romantic silhouette. This is a perfect option for when your roots are flat but your ends still have decent wave definition.

    Loose Braids That Embrace Natural Texture

    Braids on 2A hair create a soft, bohemian look that’s more relaxed than the tight, intricate braids you might see on straighter textures. The natural wave adds dimension and prevents braids from looking too sleek or severe. Try a loose side braid, fishtail, or simple three-strand braid that you gently pull apart after securing to create a fuller, more textured appearance.

    The trick with braiding 2A hair is to add texture first. Spray in some dry texture spray or apply a small amount of styling paste, then rough up the hair with your fingers before braiding. This gives you grip and prevents the braid from looking too flat or sliding out. Don’t aim for perfection; the bumps and loose pieces are part of the charm.

    Dutch braids (where you cross sections under rather than over) work particularly well for 2A hair because they sit on top of the head and create more visible dimension. Start with slightly damp hair that has some wave-enhancing product in it, braid in two sections down the sides or one down the center, and secure at the nape. Sleep in the braids and release in the morning for gorgeous, amplified waves that work with your natural pattern.

    Styling Techniques That Enhance 2A Waves

    The Right Way to Scrunch Fine Waves

    Scrunching is the fundamental technique for encouraging 2A waves, but the method matters more than you might think. The mistake many people make is scrunching only at the ends or using too much product, which weighs down fine hair and prevents waves from forming at the roots where you need them most.

    Start with soaking wet hair and apply your chosen lightweight mousse in sections, raking it through from roots to ends. Then, flip your head over and scrunch upward in sections, cupping the hair in your palm and gently squeezing toward the scalp. Hold each scrunch for a few seconds before releasing, which helps the wave pattern begin to form while the hair is still wet and moldable.

    The key with fine 2A hair is to scrunch while the hair is still dripping wet, not just damp. The water weight actually helps define the wave pattern initially, and as it dries, the waves will lighten and lift rather than falling flat. Avoid touching the hair as it dries, and if you’re diffusing, use a low heat, low speed setting and continue to scrunch gently with the diffuser cup rather than just holding it near the hair.

    Root-Lifting Methods That Actually Work

    Root volume is the ongoing challenge for 2A hair, but several techniques can create lift that lasts beyond the first hour. The first is strategic product placement: apply volumizing mousse or root-lift spray directly at the scalp in sections, then use your fingers to lift the roots away from the head as you blow-dry. This sets the hair in a lifted position before the wave pattern forms in the lengths.

    Diffusing upside down for the first few minutes of drying is another game-changer for 2A roots. Flip your head over completely, position the diffuser at the roots, and dry in that position until the hair is about 50 percent dry. Then flip back up and continue diffusing normally. This initial upside-down phase encourages the roots to dry in an lifted position rather than lying flat against the scalp.

    Clip-drying is a technique borrowed from curlier hair types that works surprisingly well for 2A texture. Section damp hair and use small claw clips or duck-bill clips to pin the roots up and away from the scalp, creating a “tent” of lifted hair. Let the hair dry completely (or diffuse on low) with the clips in place, then remove them and gently shake out the roots. This creates lasting volume without backcombing or teasing.

    Air-Dry vs. Diffuse: What Works for 2A

    The air-dry versus diffuse debate depends on your specific 2A pattern, your lifestyle, and your volume goals. Air-drying is gentler on fine hair and can produce beautiful, natural-looking waves, but it often results in less volume at the roots and can take hours to fully dry. If you have time and your primary concern is minimizing heat exposure, air-drying with proper product application and scrunching can yield lovely results.

    Diffusing, when done correctly on low heat and speed, can actually enhance 2A waves while adding volume that air-drying rarely achieves. The key is to use the diffuser to set the wave pattern rather than blowing it out. Position the diffuser cup around sections of scrunched hair, hold it still, and let the gentle heat dry the hair without disturbing the forming waves. Move the diffuser frequently rather than focusing heat on one area for too long.

    Many people with 2A hair find a hybrid approach works best: air-dry until the hair is about 60-70 percent dry, then use the diffuser to finish drying and add targeted volume at the roots. This minimizes heat exposure while still achieving better lift and definition than air-drying alone. For those noticing their waves are getting more defined over time, exploring whether if your waves are closer to 2B might help you adjust your technique accordingly.

    Products That Support 2A Hairstyles Without Weighing Down

    Lightweight Mousses for Definition and Hold

    Mousse is often the holy grail product for 2A hair because it provides hold and definition without the weight of creams or heavy gels. Look for volumizing mousses that are specifically formulated for fine or wavy hair, as these contain polymers that create structure while remaining lightweight. The foam consistency distributes evenly through hair, coating each strand without clumping or creating product buildup.

    Apply mousse to soaking wet hair for best results, using about a golf ball-sized amount for medium-length hair (adjust for your length and density). Rake it through in sections from roots to ends, then scrunch to encourage wave formation. The mousse will feel wet and slightly crunchy as it dries, but once fully dry, you can scrunch out the crunch for soft, defined waves with lasting hold.

    Avoid mousses that contain heavy oils or butters near the top of the ingredient list, as these will weigh down fine 2A hair. Instead, look for ingredients like hydrolyzed proteins (for strength without weight), aloe vera (for lightweight hydration), and flexible-hold polymers that won’t make hair stiff or crunchy. Many people find that mousse alone is sufficient for 2A styling, eliminating the need for additional leave-in products that can cause buildup.

    Salt Sprays and Texturizing Products

    Sea salt sprays are designed to mimic the texture-enhancing effect of ocean water, making them a natural fit for 2A beach waves. These products contain salt (usually sea salt or Epsom salt) that roughens the hair cuticle slightly, creating grip and separation that prevents fine waves from clumping together or lying flat. They also typically have a matte finish that adds to the undone, beachy aesthetic.

    The key with salt sprays on fine 2A hair is moderation. Too much salt can be drying and make hair feel stiff or straw-like. Apply to damp hair for wave enhancement, or use on dry hair as a texture refresher on days two and three. Spray in sections, scrunch gently, and let air-dry or diffuse on low heat. The result is separated, piecey waves with a lived-in texture.

    Texturizing sprays without salt offer similar benefits with less potential dryness. These products typically contain polymers and starches that add grip and volume while absorbing excess oil. They’re excellent for reviving flat 2A waves between washes, adding volume at the roots, or creating more defined separation in the lengths. Spray at the roots and massage in with your fingers for instant lift, or spritz through lengths and scrunch for refreshed wave definition.

    When to Skip Heavy Creams and Gels

    While creams and gels are staples in many curly hair routines, they’re often too heavy for fine 2A waves. Rich curl creams, which work beautifully on coarser, tighter curl patterns, will typically weigh down 2A hair and pull out the wave pattern within a few hours. The same goes for thick, heavy gels formulated for strong hold on tight curls, which can make fine waves look greasy and flat rather than defined.

    If you do use a cream or gel on 2A hair, it should be specifically labeled for fine or wavy hair, and you should use a fraction of the amount recommended on the package. A pea-sized amount of lightweight curl cream or a dime-sized amount of soft-hold gel is typically sufficient for 2A hair. Apply only to the mid-lengths and ends, avoiding the roots entirely unless the product is specifically a root-lifting formula.

    Many people with 2A hair find they get better results by skipping traditional curl products altogether and instead using a combination of volumizing mousse at the roots and a light texture spray through the lengths. This approach provides structure and hold without the weight that collapses fine waves. Save the creams and gels for occasions when you’re specifically trying to smooth and sleek the hair rather than enhance your natural texture.

    Woman with subtle, fine waves in her wet, dark hair, touching her scalp.

    Frequently Asked Questions

    How often should I wash 2A hair for the best hairstyles?

    Most people with 2A hair find that washing every 2-3 days maintains the best balance of clean roots and workable texture. Daily washing can strip fine hair of the natural oils that help waves form and hold, while going too long between washes can lead to flat, greasy roots that weigh down any wave pattern. Dry shampoo is your friend on in-between days, adding volume at the roots while absorbing oil.

    Can I get layers if my 2A hair is thin or fine?

    Yes, layers are actually recommended for fine 2A hair, but they should be long layers that are blended and soft rather than short, choppy layers that can make thin hair look stringy. The layers remove weight without removing density, allowing your waves to form more easily while maintaining the appearance of fullness. Discuss your concerns with your stylist so they can customize the layering approach to your specific hair thickness.

    What’s the difference between 2A and 2B hair when choosing hairstyles?

    Type 2A hair has a looser, more subtle S-wave that’s most visible from the mid-lengths down, while 2B hair has a more defined S-pattern that starts closer to the roots. If you’re not sure which you have, 2A hair will more easily be pulled straight by its own weight and typically requires more product and technique to maintain definition. Both types can wear similar hairstyles, but 2B hair may achieve more dramatic results with less effort on styles that rely on defined waves.

    Will cutting my 2A hair short make it lose its wave?

    Not necessarily. Many people find that cutting 2A hair shorter actually enhances the wave pattern because there’s less weight pulling the pattern straight. The key is getting the right cut with proper layering and texturizing. Some people do find their wave is more concentrated in certain areas, so if your waves are primarily in the back and underneath, a very short pixie might reduce visible wave, but shoulder-length bobs and lobs typically enhance 2A texture beautifully.

    How do I refresh 2A waves on day two or three?

    Refreshing 2A waves works best with a light texture or sea salt spray applied to the lengths while the hair is lightly misted with water from a spray bottle. Scrunch the product through, focusing on areas that have fallen flat or straight. You can also refresh volume at the roots with dry shampoo, lifting sections and spraying at the base, then massaging in with your fingers. For areas that need more help, you can re-wet small sections completely, apply a bit of mousse, and re-scrunch to reform the wave.

    Conclusion

    The best 2A hairstyles work with your hair’s natural subtle wave rather than fighting it. Whether you choose a short textured bob that maximizes volume, long layers that prevent flatness, or easy updos that showcase your natural texture, success comes down to the right cut, lightweight products, and techniques that enhance rather than weigh down. These fine, gentle waves are more versatile than they often get credit for, offering a beautiful middle ground between stick-straight and tightly curled that can look effortlessly polished or romantically undone depending on how you style them.

    Start by evaluating your current cut and identifying whether strategic layers or a length change might better support your wave pattern. Then experiment with one or two of the styling techniques above, keeping your product routine simple and lightweight. Your next great hair day is likely just one good haircut and the right mousse away from becoming your everyday reality.

  • 15 Gorgeous 3A Hairstyle Ideas That Celebrate Your Loose, Springy Curls

    15 Gorgeous 3A Hairstyle Ideas That Celebrate Your Loose, Springy Curls

    If your curls form loose, bouncy spirals about the width of a marker pen, you’re working with 3A hair texture—one of the most versatile curl patterns. These springy ringlets can easily shift from polished to playful, but finding styles that enhance your natural pattern without weighing it down takes some know-how. Whether you’re seeking a fresh cut or new ways to showcase your spirals, the right strategic layering and styling approach can transform your daily routine.

    Understanding What Works for 3A Curls

    The Unique Character of 3A Hair

    Type 3A curls sit right at the intersection of waves and tighter coils, creating distinct S-shaped spirals that start forming near the root. Unlike those with looser waves that may only curl at the ends, your entire shaft naturally wants to spiral. This structure gives you fantastic volume potential, but it also means your curl clumps are more delicate than they appear. The relatively loose spiral allows more shine than tighter curl patterns because natural oils can travel down the shaft more easily, yet humidity can still disrupt your cuticle layer and invite frizz.

    According to the detailed breakdown of 3A curl characteristics, these curls typically have well-defined ringlets when properly hydrated. The key challenge lies in maintaining that definition without product buildup that flattens your roots or stiffens your spirals. Your hair responds beautifully to moisture but rebels against heavy creams and butters that work well for tighter textures.

    Why Certain Styles Flatter Loose Spirals

    Not every trendy cut translates well to 3A texture. Blunt, one-length cuts can create a pyramid effect as your curls expand outward with no variation in weight distribution. Meanwhile, styles that work wonderfully on straighter hair may look unintentionally messy on loose spirals without the right foundation. The most flattering 3A hairstyles share common elements: they incorporate enough layers to prevent bottom-heaviness, they account for shrinkage (your hair may appear 25-40% shorter when dry), and they’re designed with your curl’s natural direction in mind.

    Styles that add strategic height at the crown while maintaining some weight through the mid-lengths tend to balance your proportions beautifully. Face-framing pieces cut to different lengths create movement and prevent your curls from forming a uniform mass. The best cuts also consider how your individual spirals cluster together, working with your natural clumping pattern rather than fighting it.

    Weight and Length Considerations

    Length dramatically affects how your 3A curls behave. Shorter styles from chin to shoulder length often show maximum spring and definition because gravity hasn’t pulled the spirals downward. As you grow your hair longer, the weight of each strand begins to elongate your curl pattern, sometimes stretching your spirals into looser waves at the crown while maintaining tighter curls at the ends. This isn’t necessarily a problem, but it does require different styling strategies and potentially more support from lightweight mousse or gel.

    Many people with 3A hair find a sweet spot between collarbone and mid-back length where their curls still spring beautifully but offer enough versatility for updos and protective styles. If you’re committed to maintaining length with curls, expect to invest more time in application techniques that encourage root lift and prevent your spirals from losing their shape under their own weight.

    Classic Everyday 3A Hairstyles

    The Layered Shoulder-Length Cut

    This enduring favorite works so well for 3A texture because it balances practicality with style versatility. Layers starting around chin level and graduating through the length remove bulk without sacrificing fullness. When cut correctly, each layer supports the one beneath it, creating natural volume that doesn’t require extensive styling. The shoulder-length sweet spot gives your curls enough weight to prevent excessive frizz while keeping the overall shape manageable for daily wear.

    Ask your stylist to dry-cut this style so they can see exactly how your curls fall naturally. Wet cutting often leads to unexpected shrinkage and uneven results. The layers should follow your curl pattern rather than create disconnected sections, blending seamlessly when you run your fingers through your hair.

    Long Loose Spirals with Face-Framing Layers

    If you love your length but want more dimension, face-framing layers provide the perfect compromise. Shorter pieces around your face (typically starting at cheekbone or chin level) draw attention to your features while the back remains longer. This creates beautiful movement when you turn your head and prevents that heavy, pulled-down feeling that comes with one-length long curly hair.

    The key is keeping those front layers long enough that they still spiral rather than becoming too short and springing up awkwardly. Your stylist should account for shrinkage when determining where to place the first cut. These layers work especially well if you have a round or square face shape, as the diagonal lines create a softening, lengthening effect.

    Mid-Length Shag for Volume and Movement

    The modern shag has experienced a major comeback, and it’s particularly stunning on 3A curls. This heavily layered cut features shorter pieces throughout the crown and gradually longer lengths toward the perimeter, creating an intentionally pieced-out, effortlessly cool vibe. The multiple layers catch light differently and prevent your curls from clumping into uniform sections, giving you that coveted lived-in texture.

    Shags require a skilled curl specialist who understands how to create controlled chaos without making your hair look truly chaotic. The layers should be thoughtfully placed to enhance your natural volume pattern. This cut typically looks best when diffused rather than air-dried, as the diffuser lifts the shorter crown layers and emphasizes the style’s inherent texture.

    Wash-and-Go Styling for Daily Wear

    For many 3A curl patterns, a well-executed wash-and-go becomes your daily foundation. This isn’t about being lazy; it’s about mastering a reliable routine that brings out your best curl definition with minimal manipulation. Start with soaking-wet hair and apply your hydrating leave-in products using praying hands or raking methods to encourage clumping.

    The right product combination matters enormously. A lightweight leave-in followed by a curl-enhancing cream or mousse, sealed with a medium-hold gel, creates the classic “gel cast” that protects your curls as they dry. Once fully dry, scrunch out the crunch for soft, defined spirals that last for days. Your wash-and-go will look different depending on your cut, but the technique remains foundational to most 3A styling.

    Bold and Trendy 3A Styles

    The Curly Bob: Mid-Length Definition

    The curly bob has evolved far beyond the generic short cut. Modern versions range from chin-grazing to shoulder-length, often incorporating subtle stacking at the back for gorgeous shape from every angle. This length showcases 3A spirals at their springiest while remaining professional and polished. The reduced weight compared to longer styles means your curls bounce higher and hold their definition longer between wash days.

    Bob-length curly styles work particularly well if you have medium to thick density, as they show off your hair’s natural fullness without becoming overwhelming. For finer 3A hair, a slightly longer bob (closer to shoulder length) prevents the style from looking too sparse. Styling is typically straightforward since the shorter length dries faster and requires less product to achieve full coverage.

    Asymmetrical Cuts for 3A Texture

    An asymmetrical cut features one side noticeably longer than the other, creating deliberate imbalance that looks edgy and intentional on curly hair. This works beautifully for 3A spirals because your natural texture softens what might otherwise look severe on straight hair. The contrast between sides adds visual interest and gives you styling flexibility (you can tuck the shorter side behind your ear for a completely different look).

    The dramatic angle draws the eye and flatters most face shapes by creating diagonal lines. Maintenance is surprisingly manageable because your curls disguise regrowth better than they would in a symmetrical cut. Just be prepared for the frequent question, “Did you mean to cut it that way?”—and own your answer confidently.

    Curtain Bangs with Loose Curls

    Curtain bangs have dominated recent hair trends, and they translate wonderfully to 3A texture when cut correctly. These face-framing pieces part down the middle and sweep to each side, creating a vintage-inspired look that’s both romantic and modern. On curly hair, they should be cut longer than you initially think to account for shrinkage—what seems like a conservative length when wet may spring up significantly shorter when dry.

    The beauty of curtain bangs on 3A hair is their forgiving nature. If they curl a bit differently from day to day, it adds to the effortless charm rather than looking sloppy. You can style them with slightly more product for defined spirals or let them air-dry for a softer, feathered effect. They work with virtually any length in the back, from bobs to long layers.

    The Modern Curly Shag

    While we touched on shags earlier, the ultra-modern version deserves its own mention. This iteration pushes the layering even further, often incorporating micro-layers throughout and sometimes adding textured bangs or heavy fringe. The result is maximum volume, tons of movement, and an intentionally undone aesthetic that photographs beautifully and suits creative, fashion-forward personalities.

    This isn’t a low-maintenance cut despite its casual appearance. The numerous layers require careful product distribution to prevent frizz, and you’ll likely need to refresh your curls more frequently than with a simpler cut. However, if you’re someone who enjoys the styling process and wants a truly standout look, the modern curly shag delivers dramatic results that celebrate everything unique about 3A texture.

    Protective and Low-Manipulation Styles for 3A Hair

    Loose Braids and Twists

    Protective styling isn’t just for tighter curl patterns. Loose braids and twists give your 3A spirals a break from daily styling while maintaining your curl pattern. Simple three-strand braids, Dutch braids, or two-strand twists keep your hair contained and protected from environmental damage and manipulation. The key difference from protective styles on coarser textures is that 3A hair typically needs less tension and benefits from styles that don’t pull too tightly at the roots.

    When you unravel these styles, you’re left with beautiful crimped texture that adds even more volume to your natural pattern. This makes braids and twists dual-purpose: they protect your hair while also creating an entirely different textured look for when you take them down. Keep them in for anywhere from a few hours to several days, depending on your goals.

    Pineapple Updo for Night and Day

    The pineapple technique involves gathering your curls into a very loose, high ponytail on top of your head. This protects your curl pattern overnight by keeping the bulk of your hair off your pillow, reducing friction and frizz. For 3A hair, the pineapple also works as a quick daytime style that looks intentionally casual and keeps hair off your neck in warm weather.

    Use a scrunchie or silk hair tie to avoid creating a dent in your curls. The ponytail should be loose enough that you’re not pulling your roots taut. In the morning, shake out your pineapple and your curls should fall back into place with minimal distortion. This simple technique can extend your wash-and-go by several days, making it one of the most practical tools in your styling arsenal.

    Half-Up Styles That Preserve Curl Pattern

    Half-up, half-down styles offer the best of both worlds: your face stays clear while you still showcase your curls’ length and shape. For 3A hair, these work particularly well because your spirals have enough definition to look polished even when casually pulled back. Simple variations include the classic half-ponytail, twisted crown sections pinned back, or small braids incorporated into swept-back top sections.

    The trick is securing the top portion without disrupting your curl clumps too much. Work with your natural part and curl direction rather than fighting them. Avoid pulling too tightly, which can stretch out your spirals and create frizz. These styles work on second, third, or even fourth-day hair, making them excellent for midweek refreshes when you don’t have time for a full wash.

    Bun Variations Without Tension

    High buns, low buns, and messy topknots all have a place in the 3A styling rotation, provided you’re mindful about tension. Constant tight pulling can damage your hairline and lead to traction alopecia over time, so your buns should feel secure but never painful. The messy bun works especially well for curly hair because it’s supposed to look slightly undone, embracing your natural texture rather than fighting it.

    When creating buns, gather your hair gently and twist loosely rather than pulling everything smooth. Allow some curls to escape around your face and nape for a softer effect. For sleeping, a very loose, high bun can protect your curls similarly to a pineapple while offering slightly more containment if you tend to move a lot at night.

    Styling Techniques to Maximize 3A Definition

    Product Application Methods for Loose Spirals

    How you apply products matters just as much as which products you choose. For 3A curls, the most effective methods are praying hands (smoothing product between your palms and running them down sections of hair), raking (running fingers through hair to distribute product and encourage clumping), and scrunching (squeezing curls upward to encourage spring). Many people combine these techniques, starting with praying hands for even distribution, then raking to form clumps, and finishing with scrunching for extra definition.

    A Denman brush can also work beautifully for 3A texture, using small sections and brushing through to create uniform, well-defined curl clumps. This technique, sometimes called “brush styling,” gives you more control over individual curl formation but takes more time than hands-only methods. Experiment to find what your particular hair responds to best, keeping in mind that the right technique brings out definition without creating frizz or disrupting your natural pattern.

    Diffusing vs. Air Drying

    Air drying is gentler and reduces heat exposure, but it takes significantly longer and may result in less volume at the roots for 3A hair. Diffusing with low heat and airflow speeds up drying time while lifting roots and setting your curl pattern more firmly. The diffuser’s bowl-shaped attachment cradles your curls as they dry, preventing the stretching and drooping that sometimes happens with air drying, especially on longer hair.

    If you choose to diffuse, start with the heat and speed settings on low to medium. Cup sections of curls in the diffuser bowl and hold for 30-60 seconds before moving to the next section. Avoid moving the diffuser around too much, which creates frizz. Many 3A individuals find a hybrid approach works best: air dry until about 50-70% dry, then finish with the diffuser to set the style and add volume.

    Maintaining Multi-Day Curls

    One of the best things about mastering your 3A routine is making your wash-and-go last well beyond day one. Proper nighttime protection is essential. Beyond pineappling or loose buns, consider sleeping on a silk or satin pillowcase to reduce friction. Some people prefer a silk bonnet or buff that contains their curls completely.

    In the morning, don’t immediately touch or manipulate your curls. Let them settle naturally for a few minutes after releasing them from your protective style. If they need help, hover your hands around your head and gently shake at the roots without actually touching the hair shafts. This wakes up your curls without disturbing their structure. Reserve actual touching and scrunching for when you do a proper refresh with product.

    Refresh Strategies Between Wash Days

    Refreshing is an art that extends the life of your style significantly. The simplest method involves lightly misting your hair with water (or a water and leave-in mixture) and scrunching to reactivate the products already in your hair. For more definition, you can apply a small amount of curl cream or mousse to your palms, emulsify it with water, and scrunch into specific sections that need help.

    Some 3A curl owners prefer foam-based refreshers that add volume without weight. Others swear by refresh sprays specifically formulated to revive day-old curls. The key is using much less product than on wash day since you’re building on what’s already there. Focus on areas that lose definition first (usually around the face and crown) rather than applying product all over. With practice, you can keep your curls looking fresh for 3-5 days or even longer.

    Choosing the Right Cut for Your 3A Hair Goals

    Working with Your Natural Volume

    Your density (how many individual hairs you have per square inch) significantly influences which cuts will flatter your 3A texture. High-density hair benefits from substantial layering and thinning to prevent overwhelming volume and triangle shapes. Medium density typically looks best with moderate layering that adds movement without creating gaps. Low-density 3A hair needs careful, minimal layering to maintain the appearance of fullness since removing too much weight can make your hair look sparse.

    Pay attention to where your hair naturally has the most volume. Many people with 3A curls experience their fullest point somewhere between the ears and the bottom of the occipital bone (the bump at the back of your skull). Strategic layers placed above and below this point help redistribute volume for a more balanced silhouette. Your stylist should work with, not against, your natural volume pattern.

    Face Shape and 3A Hairstyle Pairing

    While you should ultimately choose styles you love regardless of supposed “rules,” certain approaches do tend to flatter specific face shapes. Oval faces can pull off virtually any length and style. Round faces often look great with longer lengths and styles that add height at the crown while keeping sides closer to the head. Square faces benefit from soft, face-framing layers that curve around the jawline. Heart-shaped faces look beautiful with chin-length or longer cuts that add width at the jawline to balance a narrower chin.

    Long or oblong faces typically look most balanced with shoulder-length or shorter cuts that add width without excessive height. Remember that these are guidelines, not absolutes. Your personal style, lifestyle needs, and hair characteristics all matter more than following face-shape formulas. The confidence you bring to any hairstyle makes the biggest difference in how it looks.

    Gorgeous woman with natural 3A curly hairstyle for spring.

    What to Tell Your Stylist

    Finding a stylist experienced with curly hair, ideally one who specializes in dry cutting, makes an enormous difference in your results. When booking, specifically ask about their experience with 3A curl patterns. During your consultation, be clear about your maintenance commitment (are you willing to style daily or do you need something truly low-maintenance?), your lifestyle (athletic activities, climate considerations), and how you typically style your hair.

    Bring photos, but manage expectations by acknowledging when your model has different density or length. Describe what you dislike about your current cut as much as what you hope to achieve. Mention specific problem areas like frizz zones, sections that won’t hold curl, or areas that get too voluminous. A good stylist will assess your curl pattern, face shape, and hair health before making recommendations. Don’t be afraid to speak up during the cut if something doesn’t feel right, checking in with this professional styling guide for 3A hair for technique validation.

    Conclusion

    Your 3A curls offer remarkable versatility, whether you prefer the effortless elegance of styling longer curls, the bold statement of a precisely layered bob, or the casual charm of a textured shag. The key to making any style work lies in understanding your specific curl needs: the right cut that accounts for shrinkage and natural volume patterns, techniques that enhance definition without weight, and a consistent routine that keeps your spirals hydrated and happy. What works beautifully for your friend’s 3A hair might need adjustments for yours, so embrace the experimentation process as part of your curl journey.

    Start by choosing one new styling technique or hairstyle idea from this guide and commit to trying it for at least two weeks. Give your curls time to adjust to new methods, and pay attention to how they respond on different days and in various conditions. Whether you book that consultation for curtain bangs, master the art of diffusing for maximum volume, or simply refine your wash-and-go routine, every small step builds your confidence and expertise. Your loose, springy spirals are designed to turn heads, so choose styles that make you feel as gorgeous as your curls truly are.

  • Celebrity Pixie Haircut Inspiration for Curly Hair: Cut & Style Like the Stars

    Celebrity Pixie Haircut Inspiration for Curly Hair: Cut & Style Like the Stars

    Short, curly hair has never been more celebrated, and celebrity pixie haircuts prove that texture and short length create a stunning combination. From red carpet appearances to casual street style, stars with naturally curly, wavy, and coily hair are embracing pixie cuts that showcase their natural texture while offering freedom from lengthy styling routines. Whether you’re considering your first major chop or looking for fresh ways to style an existing short cut, celebrity examples provide valuable blueprints for cuts that actually work with your curl pattern.

    Why Celebrity Pixie Haircuts Work So Well on Curly Hair

    Celebrities have access to top stylists who understand one crucial truth: curly hair in a pixie cut isn’t just straight hair cut short. The texture itself becomes the star of the show, creating shapes and volumes that would be impossible with straight hair. When you look at celebrity curly hair inspiration, you’ll notice that the most successful short cuts leverage natural curl patterns rather than fighting them.

    Volume and Texture Advantages

    Curly pixie cuts deliver instant volume without teasing, spraying, or hours of styling. Each curl spring creates lift at the root, resulting in a three-dimensional shape that appears different from every angle. Stars like Lupita Nyong’o and Tessa Thompson showcase how type 4 hair in a short cut creates sculptural shapes that would take straight-haired celebrities teams of stylists to achieve.

    The natural texture variation in curly hair means your pixie cut will never look flat or one-dimensional. Type 3 curls create movement and bounce, while tighter coils offer architectural structure. This built-in texture is why celebrity stylists often recommend pixie cuts specifically for curly clients who want maximum impact with minimal daily effort.

    Face-Framing Benefits for Different Face Shapes

    Short curly cuts excel at highlighting facial features in ways longer styles sometimes obscure. Celebrities work with stylists who customize pixie cuts to balance face shapes, using curl placement strategically. For round faces, stylists create height at the crown while keeping sides closer to the head. For longer face shapes, width through the temples and fuller sides create horizontal balance.

    The key difference with curly pixies compared to straight versions is that your curls provide natural softness around your face. You don’t need razor-sharp lines or severe angles because your texture creates organic, flattering framing. This is why celebrities with strong facial features often choose curly pixies: the texture softens without hiding bone structure.

    Maintenance Considerations for Short Curly Cuts

    Here’s the reality celebrities don’t always share on Instagram: pixie cuts require regular trims to maintain their shape. Most curly pixies need professional shaping every 4-6 weeks, compared to 8-12 weeks for longer curly cuts. However, the daily styling time decreases dramatically. Many celebrities with short curly cuts report spending 10-15 minutes on styling compared to 45+ minutes with longer hair.

    Product usage also changes with length. You’ll use significantly less of everything, from cleansers to styling products, which partially offsets the increased trimming costs. Celebrities often note that their product collections shrink when they go short because you simply need less product to saturate and style shorter strands.

    Iconic Celebrity Pixie Cuts by Curl Type

    Not all celebrity pixie cuts translate equally across curl types. What works beautifully on loose waves may not suit tight coils, and vice versa. Understanding which celebrities share your curl pattern helps you find realistic inspiration for your own short wavy hair options or tighter textures.

    Wavy Pixie Inspiration (Type 2A-2C)

    Michelle Williams has long been the poster child for wavy pixies, though her naturally straight hair is often styled with waves. For naturally wavy textures, look to Katy Perry’s various pixie iterations or Audrey Tautou’s classic textured crops. These cuts typically feature longer top sections (2-4 inches) that allow waves to form S-patterns, with shorter sides and backs that keep the overall shape clean.

    Wavy pixies benefit from disconnected lengths, where the top section is notably longer than the sides. This contrast prevents the in-between length where waves can look messy rather than intentional. Celebrities with this texture often style with lightweight mousse products that define waves without weighing them down, creating that piecey, textured finish seen on red carpets.

    Screenshot

    Curly Pixie Icons (Type 3A-3C)

    Halle Berry’s iconic pixie remains the gold standard for type 3 curls, though her texture varies from straighter to curlier depending on styling. More recently, actresses like Kiersey Clemons have embraced their natural 3B-3C curls in short cuts that showcase springy ringlets. These pixies typically maintain 3-5 inches of length on top to allow full curl formation, with sides either kept equally curly or shortened to create shape contrast.

    The challenge with type 3 pixies is managing the tendency for curls to create excessive width. Celebrity stylists address this through strategic layering that removes bulk without sacrificing curl definition. The cuts often include subtle undercuts or tapered sides that control volume while letting the top curls shine. For more versatility as you consider length, explore curly bob styles that offer similar face-framing with slightly more length.

    Short curly pixie haircut for women with textured layers and side-swept bangs.

    Coily Pixie Pioneers (Type 4A-4C)

    Lupita Nyong’o, Danai Gurira, and Adepero Oduye have all rocked stunning coily pixies that celebrate type 4 texture in its full glory. These cuts often work best with 2-4 inches of length all over, creating rounded or sculptural shapes that highlight the hair’s natural density and spring. Unlike wavy or looser curly pixies that may feature dramatic length variations, coily pixies often succeed with more uniform lengths that allow the texture itself to create shape.

    Tapered cuts have become particularly popular for type 4 hair, where the back and sides are gradually shortened while the top maintains more length. This creates flattering height and allows for versatile styling, from slicked-down looks to full-volume afros. Many celebrities with 4A hair styling options note that pixie length actually makes it easier to define their curl pattern because products and moisture distribute more evenly through shorter strands.

    How to Request a Celebrity Pixie Cut at the Salon

    Walking into a salon with a celebrity photo doesn’t guarantee you’ll walk out looking identical, but it does provide a crucial starting point for communication. The key is understanding what to request and what questions to ask before the first snip.

    Bringing Reference Photos That Match Your Texture

    The biggest mistake people make is bringing photos of celebrities with completely different hair textures. If you have 3C curls, a photo of straight-haired Michelle Williams styled into a pixie won’t help your stylist understand what you want. Instead, gather 3-5 photos of celebrities with similar curl patterns wearing pixie cuts you admire.

    Pay attention to the specific elements you like in each photo: Is it the length on top? The way the sides are shaped? The overall volume? Point these out specifically rather than expecting your stylist to guess. Also bring photos from multiple angles if possible, since curly pixies often look completely different from front, side, and back views. Short curly hairstyle galleries can provide multiple angles of the same cut.

    Curly pixie haircut for women with short, textured black hair and bold makeup.

    Key Questions to Ask Your Stylist

    Before agreeing to the cut, ask your stylist how many curly pixies they’ve cut in the past six months. This isn’t about being confrontational; it’s about ensuring they have current experience with short textured cuts. Curly cutting techniques have evolved significantly, and a stylist who mostly cuts long curls or short straight hair may not have the specialized skills needed.

    Ask specifically about their approach: Will they cut dry or wet? What technique will they use (slide cutting, point cutting, carving)? How will they account for shrinkage? For curly and coily hair, dry cutting is generally preferable because it allows the stylist to see exactly how each curl will fall. If your stylist plans to cut while wet and then “see how it dries,” that’s a red flag for curly pixies where precision matters tremendously.

    Also discuss your daily styling commitment honestly. If you’re not willing to style every day, tell them. Some pixie cuts maintain shape with air-drying and minimal product, while others need regular diffusing and styling to look intentional. Your stylist should tailor the cut to match your actual routine, not an aspirational one.

    Short curly hairstyle for women with textured layers and side-swept bangs.
    Screenshot
    Short curly pixie haircut for women with textured layers and side-swept bangs.
    Elegant woman with a short, curly hairstyle at a celebrity event.

    Curly pixie haircut for women with short, textured black hair and bold makeup. Short curly pixie haircut for women with textured layers and side-swept bangs.

    Understanding Curl-Specific Cutting Techniques

    Celebrity stylists use specialized techniques for curly pixies that differ from standard cutting methods. Curl-by-curl cutting, where each ringlet is shaped individually, works beautifully for types 3A-3C in pixie length. This method ensures every curl has the right length to form its natural pattern without creating bulk or unwanted volume.

    For coily textures, twist cutting (where small sections are twisted and then cut) helps maintain density while creating shape. Some stylists use a combination of clipper work for sides and scissor work for the top, creating clean tapers that complement the hair’s natural texture. Understanding these techniques helps you communicate knowledgeably with your stylist and recognize when they’re using approaches suited to curly hair versus generic cutting methods.

    Styling Your Celebrity-Inspired Pixie Daily

    Celebrities have glam squads, but you don’t need professional help to achieve polished pixie styling. The key is finding a streamlined routine that works with your specific curl type and lifestyle. Most successful celebrity pixie styling relies on the right products applied to properly prepped hair.

    Product Combinations for Short Curly Hair

    Short curly hair needs less product by volume but often benefits from layering multiple formulas. Start with a hydrating leave-in conditioner on soaking wet hair, using about a nickel-sized amount for pixie length. This provides the moisture base that prevents frizz and helps curls form properly.

    Layer a curl cream or gel while hair is still dripping wet. For pixie length, you want lightweight to medium-hold products rather than heavy creams that can weigh down short curls. Many celebrity stylists mix a pea-sized amount of cream with a quarter-sized amount of gel, creating a custom formula that offers both definition and hold without crunchiness.

    For those with low porosity considerations, warming products between your hands before applying helps them penetrate better on short hair. You can also apply products in sections (even with a pixie cut), ensuring every curl gets product rather than just surface coverage. The goal is even distribution without overloading, which is easier to achieve on short hair once you find your ideal product amounts.

    Diffusing vs Air-Drying Techniques

    Celebrity pixies often look perfectly styled because they’re diffused professionally. For home styling, diffusing short curly hair takes about 10-15 minutes compared to 30+ minutes for longer hair. Use medium heat and low speed, cupping curls gently into the diffuser bowl rather than rubbing or disrupting the curl pattern.

    The pixie-specific technique many celebrity stylists use involves diffusing the roots first to create lift, then gently diffusing the ends. This prevents the flat-on-top, poofy-on-ends look that sometimes happens with short curly cuts. Tilt your head to different angles as you diffuse, encouraging volume where you want it (usually at the crown) and encouraging curls to fall toward your face for flattering framing.

    Air-drying works beautifully for many pixie cuts, particularly on type 4 hair where the dense texture holds its shape well. The key is applying products to soaking wet hair and then not touching it at all while it dries. This hands-off approach prevents frizz and allows your natural curl pattern to shine. Some celebrities use the “plop” method even with pixies, using a small microfiber towel to encourage curl formation for 10-15 minutes before air-drying completely.

    Elegant curly pixie haircut for women with accessories and natural makeup.

    Refreshing Second and Third-Day Hair

    Short curly hair shows flattening more obviously than longer styles, so refresh techniques matter. Many celebrities with curly pixies simply rewet their hair completely each morning rather than attempting multi-day styling. With pixie length, this takes just minutes and uses minimal product, making it practical for daily washing if that works for your hair.

    For true refresh days, focus on the roots and any flattened sections. Lightly mist with water or a water-product mixture, scrunch to reactivate curls, then either air-dry or give a quick diffuse. Some people find that sleeping on a satin pillowcase maintains pixie curls better than any bonnet or scarf, since short hair doesn’t require the same protection from friction as longer styles.

    If your pixie develops frizzy areas that won’t smooth with water alone, apply a tiny amount of lightweight gel or cream to just those sections. The advantage of pixie length is targeted fixes work quickly without requiring you to restyle your entire head, which is often necessary with longer curly styles.

    Stylish curly pixie haircut for women with short hair and natural curls.

    Growing Out or Maintaining Your Pixie Cut

    Celebrities rarely keep the same hairstyle forever, and you won’t either. Whether you’re committed to pixie life or already planning your exit strategy, understanding the maintenance and growth process helps you make informed decisions about your short cut journey.

    Trim Schedules for Curly Pixies

    Most curly pixies need professional shaping every 4-6 weeks to maintain their intended silhouette. This is more frequent than longer curly cuts because even a half-inch of growth significantly changes the proportions of a short style. Celebrities typically schedule standing appointments to ensure their cuts always look fresh, which is practical advice for anyone committed to pixie maintenance.

    Between full cuts, some people get “cleanup” trims focused just on the neckline and around the ears at the 3-week mark. These mini-appointments cost less and take less time but keep the cut looking polished. Discuss this option with your stylist during your initial consultation, as some salons offer reduced pricing for these maintenance trims.

    For coily textures that you wear in a TWA (teeny weeny afro), you might stretch trims to 6-8 weeks since the rounded shape tolerates growth better than more sculpted pixie styles. However, if you have tapered sides or specific shaping, those areas will need more frequent attention to prevent an overgrown, undefined appearance.

    Transition Strategies for Awkward Lengths

    Growing out a pixie cut takes most people 12-18 months to reach a true bob-length alternative, and the journey includes several awkward phases. Celebrities who grow out pixies often use strategic styling to disguise difficult lengths, like slicking sides back when they’re too long to stay tucked but too short to blend smoothly.

    The most challenging phase typically hits around 3-4 months of growth, when your pixie loses its original shape but hasn’t reached the next workable length. During this period, many people get “shape” trims that don’t remove length but redistribute it more flatteringly. Your stylist can take bulk from areas that are getting too heavy while leaving the overall length to continue growing.

    Accessories become particularly useful during pixie grow-out. Headbands, silk scarves, and decorative clips can control sections that won’t cooperate while adding style. Many celebrities embrace this transitional period by experimenting with gel-slicked styles, faux undercuts using styling products, or even temporary color to distract from length awkwardness.

    Styling Options as Your Hair Grows

    As your pixie grows, you’ll move through several distinct styling phases. At 3-4 inches of length, you can start creating more defined parts and directional styling. At 5-6 inches, the beginnings of a curly shag or layered bob emerge, offering new styling possibilities. Throughout growth, keep investing in quality trims that shape your growing hair into intentional styles rather than just letting it grow wild.

    Some people find that growing out a pixie actually helps them understand their curl pattern better. As different sections reach various lengths, you’ll see how your curls behave at multiple stages, which informs better styling choices once you reach your target length. This experimentation can be valuable for understanding your hair in ways you never did when it was all one long length.

    Frequently Asked Questions

    Will a pixie cut make my curls tighter or looser?

    Removing length and weight will allow your natural curl pattern to express itself more fully, which usually means curls appear tighter or springier. This isn’t actually changing your curl pattern but rather showing what it does without the stretching effect of longer hair. If you’ve always worn your curls long, your true curl pattern at shorter lengths might surprise you with more spring than you expected.

    How do I know if my face shape suits a pixie cut?

    Nearly every face shape can wear a pixie cut when it’s customized properly by an experienced stylist. The key is adjusting proportions: adding height for round faces, creating width for long faces, softening angles for square or rectangular faces. Bring photos of celebrities with similar face shapes and curl types to show your stylist the specific proportions you’re hoping to achieve. The texture of curly hair actually makes pixies more forgiving than straight versions because curls create natural softness and movement.

    Can I still do protective styling with a pixie cut?

    Traditional protective styles like braids or twists become challenging or impossible with very short hair, but there are alternatives. Many people with coily pixies use regular conditioning treatments, satin pillowcases, and gentle handling as their protection approach rather than physical styling. Some shorter protective options like bantu knots can work with as little as 2-3 inches of length. The reduced manipulation of daily styling with a wash-and-go pixie can itself be protective compared to constantly manipulating longer hair.

    What happens to my curls during humidity with a pixie cut?

    Short curly hair typically handles humidity better than long curls because there’s less hair to absorb moisture and frizz. The increased surface area relative to length in a pixie means products coat hair more thoroughly, creating better frizz protection. That said, you’ll still need anti-humidity products in your routine. Many people find their short curly cuts actually look better in humid weather because the moisture encourages curl definition without the weight and frizz issues that plague longer styles.

    Should I cut my hair in stages or go straight to a pixie?

    This depends entirely on your personality and risk tolerance. Some people find it easier psychologically to cut gradually (long to shoulder, shoulder to bob, bob to pixie) over several months. Others prefer one dramatic transformation and the immediate reduced maintenance. There’s no wrong choice. However, understand that gradual cutting means paying for multiple cuts and spending months in transitional lengths. Going straight to a pixie gives you immediate results but requires commitment, since growing out takes significant time if you change your mind.

    How often should I wash my hair with a pixie cut?

    Washing frequency depends on your curl type, scalp needs, and lifestyle, not your hair length. However, many people with curly pixies wash more frequently than they did with longer hair because daily washing and styling takes just minutes rather than an hour-plus commitment. There’s no rule requiring multi-day styles with short hair. If daily washing works for your scalp and you have time for quick 10-minute wash-and-go routines, that’s perfectly healthy for most curl types. Let your scalp’s oil production and your lifestyle guide washing frequency rather than arbitrary rules about how often curly hair “should” be washed.

    Conclusion

    Celebrity pixie haircuts demonstrate that short hair and natural texture create combinations full of style, personality, and practical advantages. The stars who confidently wear their curls, coils, and waves short show us that texture at pixie length isn’t a compromise but a deliberate choice that celebrates natural patterns while simplifying daily routines. Whether you’re drawn to the sculptural beauty of a coily TWA, the playful movement of a curly crop, or the effortless texture of a wavy pixie, there’s a celebrity-inspired cut that can work for your specific curl pattern and lifestyle.

    If you’re considering taking the plunge, start by finding a stylist experienced with curly pixie cuts and bringing multiple reference photos that match your texture. Ask specific questions about their approach, be honest about your daily styling commitment, and trust the process even when growth periods get awkward. Your first short cut might not be your last, but it will teach you invaluable lessons about your hair’s natural behavior and how to style it confidently at any length. Take the leap when you’re ready, and remember that hair grows back but the confidence from rocking a style you truly love can transform how you move through the world.

  • Which Denman Brush

    Which Denman Brush

    If you have looked at Denman brushes on Amazon, you have probably felt the confusion: a dozen near-identical black brushes with names like D3, D4, D31 and D41, and no obvious way to tell which one is right for you. It is one of the most common questions in the curly-hair world, and the honest answer is simpler than the product pages make it look.

    The whole Denman range really comes down to one thing: how many rows of pins the brush has, and how close together they sit. Once you understand that, picking the right one takes about two minutes. This guide breaks down the models that actually matter, explains which suits your hair, and helps you buy once rather than guessing.

    Every product here is one we would happily recommend to a friend. We earn a small commission if you buy through our links, at no extra cost to you, and that never changes which products make the list.

    The quick answer

    Most curly and wavy people want the D3 (7-row), the classic that defines curls beautifully on short to medium hair. Choose the D4 (9-row) if your hair is longer, thicker or denser and you want more grip. Choose the 5-row if you have short hair, want something gentler, or need a compact brush for travel. Here they are side by side.

    [[PRODUCTGRID:B00197623M,B003KQ946M,B000OUBC8A]]

    How Denman brushes actually differ

    Denman styling brushes all work the same way: rows of round-ended nylon pins set into a rubber cushion, spaced to grip your hair, distribute product, and clump curls together into defined pieces. This is the technique curlies call “denman-ing” or “brush styling,” and it is what gives you smooth, defined curls rather than frizz.

    The models differ on two things: the number of rows (more rows means a bigger brush and more tension) and how close together the pins sit (closer pins give more definition, wider-spaced pins glide more gently and snag less). More rows and closer pins equals more definition and control. Fewer rows and wider pins equals gentler detangling and less pull. That is genuinely the whole system.

    Denman D3 (7-row): the best all-rounder for most curly hair

    The D3 is the original Denman styler and the one most curly-hair guides call the gold standard. Its 7 rows of close-set pins are the sweet spot for defining curls: enough grip to clump and shape your pattern, without so much tension that it drags or causes breakage. It is the multi-tool of the range, used for detangling, styling, smoothing and defining, and it works across most wavy and curly hair on short to medium lengths.

    If you are new to brush styling and not sure where to start, this is the answer. It is the most forgiving, the most versatile, and the one the largest number of people end up happiest with. Only look elsewhere if your hair is very long and thick, or very short.

    Best for: most wavy to curly hair, short to medium length, and anyone starting out. Skip if: your hair is very long and dense, or very short.

    [[PRODUCT:B00197623M]]

    Not sure what your curl type actually is? It changes which tools and products work best. Get your free personalised curl routine and we will send the exact steps for your hair.

    Denman D4 (9-row): best for longer, thicker hair

    The D4 is the D3’s bigger sibling. It adds two more rows of close-set pins, for nine in total, which means more surface area, more grip and more tension in each stroke. That extra tension is exactly what longer, thicker or denser hair needs to define properly, and it is also why the D4 is a favourite for smoothing and blow-dry styling.

    The trade-off is that all that grip can feel like too much on fine or short hair, tugging rather than gliding. If your hair is on the longer side, or simply thick and dense, the D4 gives you the control the D3 sometimes cannot. If your hair is fine or short, the D3 or the 5-row will feel kinder.

    Best for: longer, thicker, denser hair, and smoothing or blow-dry styling. Skip if: your hair is fine, short or easily tugged.

    [[PRODUCT:B003KQ946M]]

    Denman 5-row styler: best compact and gentle option

    The 5-row Denman is the smallest of the styling brushes, and it fills a real gap. With fewer rows it is lighter, narrower and gentler, which makes it ideal for short hair, for getting into smaller sections, and for anyone who finds the 7-row D3 to be more brush than they want. It is also the natural travel pick, since it takes up less space in a bag.

    You lose some of the clumping power of the bigger brushes, so it is not the choice if maximum definition on long hair is your goal. But for short styles, gentle everyday use, or a second brush to travel with, it is genuinely handy.

    Best for: short hair, gentle everyday use, small sections and travel. Skip if: you have long, thick hair and want maximum definition.

    [[PRODUCT:B000OUBC8A]]

    Which Denman brush for your curl type?

    If you would rather choose by your hair rather than the model number, here is the short version:

    Wavy hair (type 2): your hair is finer and flattens easily, so you want closer pins for definition without weight. The D3 is the sweet spot; the 5-row works well for shorter waves.

    Curly hair (type 3): the D3 is the classic pick for short to medium curls, and the D4 for longer or thicker curls that want more tension and grip.

    Coily hair (type 4): tighter coils are more fragile, so detangle first with a wide-tooth comb, then use the D3 or D4 gently for definition. If any brush snags, a well-known trick is to remove every other row of pins so hair passes through more easily.

    Frequently Asked Questions

    What is a Denman brush and what does it do?

    A Denman brush is a styling brush with rows of round-ended pins set in a rubber cushion. For curly hair, it grips and clumps your curls together as you brush product through soaking wet hair, creating smooth, defined curls with less frizz. The same brush also detangles, smooths and helps with blow-dry styling, which is why it is such a popular multi-purpose tool.

    What is the difference between the Denman D3 and D4?

    The main difference is size and tension. The D3 has 7 rows of pins and the D4 has 9, with both sets of pins spaced closely for definition. The extra two rows on the D4 give more grip and tension, which suits longer, thicker or denser hair, while the D3 is the more versatile all-rounder for short to medium hair. If you are unsure, most people are happiest starting with the D3.

    Is a Denman brush good for curly hair?

    Yes, a Denman is one of the most popular tools for defining curls. The pins are spaced to grip and clump curls together rather than separating them into frizz, which enhances your natural pattern. It works across wavy, curly and coily hair, though very tight or fragile coils should be detangled with a wide-tooth comb first and brushed gently.

    How do you use a Denman brush on curly hair?

    Apply your styling product to soaking wet hair, then take a section and brush from root to tip, letting the pins clump the curl together. Work in sections, re-shaping curls as you go, then air-dry or diffuse on low. Using it on wet hair with product is what creates definition; brushing dry hair will just cause frizz.

    How many rows should my Denman brush have?

    Choose fewer rows for shorter or finer hair and gentler use, and more rows for longer, thicker hair that needs extra grip. The 7-row D3 is the versatile middle ground that suits most people, the 9-row D4 adds tension for longer or denser hair, and the 5-row is the compact, gentle option for short hair and travel.

    The bottom line

    For most people the choice is simple: get the D3 (7-row). It is the classic, the most versatile, and the one the largest number of curly and wavy heads are happiest with. Reach for the D4 (9-row) instead if your hair is long, thick or dense and wants more grip, and pick the 5-row if you have short hair, want something gentler, or need a compact brush to travel with.

    Whichever you choose, remember the technique matters as much as the brush: use it on soaking wet hair with product, work in sections, and let your curls dry undisturbed. Do that, and any of these three will help you get smoother, more defined curls.

  • Best Leave-in Conditioners

    Best Leave-in Conditioners

    A good leave-in conditioner is the foundation of every curly hair routine. It is the first thing you reach for after washing, the layer that detangles, adds moisture and preps your curls before any cream or gel goes on. Get it right and everything after it works better.

    But leave-ins are not one-size-fits-all. A light rose-water spray that revives fine waves will do nothing for dry, damaged coils, and a rich castor-oil formula that rescues brittle hair will flatten looser curls. Below are six of the best leave-in conditioners for curly hair, each matched to a specific texture and need, with who it is best for and who should skip it.

    Some of the links in this article are affiliate links, which means we may earn a small commission if you buy through them, at no extra cost to you. We only recommend products we would genuinely suggest to someone with your curls.

    The best leave-in conditioners at a glance

    Here is the full lineup. Read on for who each one is best for. [[PRODUCTGRID:B084RWMHH2,B076FHJ3K5,B09HCYF8MS,B002KQ7E9M,B0CBQR41YB,B0771X4JLV]]

    TGIN Rose Water Smoothing Leave-In: best for waves and fine hair

    Rose water makes this one of the lightest leave-ins here, which is exactly why it suits waves and finer curls that go limp or greasy under heavier formulas. It detangles and smooths while defining, without coating the hair or weighing your pattern down.

    If richer leave-ins leave your waves flat and lifeless, a light smoothing formula like this lets your natural texture come through with softness and slip. It is also a good everyday option for anyone who refreshes second-day hair and wants moisture without buildup.

    Best for: Waves and fine curls that get weighed down by heavy leave-ins.
    Skip if: You have dry, thick or coily hair needing deep moisture. [[PRODUCT:B084RWMHH2]]

    Marc Anthony Grow Long Leave-In Spray: best for detangling and length

    This is a light, sprayable detangling leave-in aimed at length retention. The spray format makes it quick to distribute through wet hair, softening knots so you can comb through with less breakage, which is where most length is actually lost.

    It works well as a daily detangler and a base layer before styling, particularly for hair that tangles easily or that you are trying to grow out. It leans light rather than deeply moisturising, so pair it with a cream if your hair is on the drier side.

    Best for: Tangle-prone hair and anyone focused on retaining length.
    Skip if: You need rich, heavy moisture rather than light slip. [[PRODUCT:B076FHJ3K5]]

    Not sure which leave-in your curls actually need? Take the guesswork out of it. Get your free personalised curl routine and we will help you match products to your exact curl type and goals.

    SheaMoisture JBCO Strengthen & Restore Leave-In: best for damaged or coily hair

    Built around Jamaican black castor oil, this is the richest leave-in on the list, and it is aimed at dry, damaged, over-processed or coily hair that needs serious moisture and strengthening. It coats and softens where lighter sprays would simply not deliver enough.

    If your hair is brittle, breaking or feels straw-like, a restorative leave-in like this gives it the weight and slip it is crying out for. The flip side is that it is too heavy for fine or wavy hair, so match it to genuinely thirsty textures.

    Best for: Dry, damaged or coily hair needing rich moisture and strength.
    Skip if: You have fine or wavy hair that flattens under heavy products. [[PRODUCT:B09HCYF8MS]]

    milk_shake Leave-In Detangling Spray: best salon-grade detangler

    A long-standing salon favourite, milk_shake’s leave-in is a lightweight detangling spray that softens and smooths across pretty much all curl types. It is the kind of do-it-all leave-in that earns permanent space in a lot of bathrooms.

    It gives easy comb-through and a clean, conditioned finish without heavy buildup, which makes it versatile for waves through curls. If you want one reliable detangler that plays nicely under creams and gels, this is a safe, quality pick.

    Best for: Anyone wanting a versatile, quality everyday detangler.
    Skip if: You want maximum moisture for very dry or damaged hair. [[PRODUCT:B002KQ7E9M]]

    Curls Blueberry Bliss Reparative Leave-In: best for repair and breakage

    This reparative leave-in targets breakage and damage while adding moisture, and it is formulated for wavy, curly and coily hair alike. The focus is on strengthening the hair and reducing snapping, rather than just surface softness.

    If you are dealing with breakage, split ends or the after-effects of heat and colour, a reparative formula like this is worth building your routine around. It sits between the light sprays and the heavy castor-oil option, so it suits a broad range of curls needing repair.

    Best for: Wavy to coily hair fighting breakage and damage.
    Skip if: Your hair is healthy and you just want light daily detangling. [[PRODUCT:B0CBQR41YB]]

    Marc Anthony Strictly Curls Leave-In Spray: best budget everyday curl spray

    The most wallet-friendly pick here, this curl-specific leave-in spray hydrates and tames frizz as a simple everyday base layer. It is aimed squarely at defining curls rather than doing heavy repair or deep conditioning.

    For an affordable daily leave-in that preps curls for styling and knocks back frizz, it does the job without fuss. It is light, so if your hair is very dry you will want a cream over the top, but as a cheap, reliable first step it is hard to argue with.

    Best for: Anyone wanting an affordable everyday curl-defining leave-in.
    Skip if: You need intensive moisture or damage repair. [[PRODUCT:B0771X4JLV]]

    How to choose the right leave-in conditioner

    Match the weight to your curl pattern. Waves and fine curls do best with light, sprayable leave-ins, while thick, dry or coily hair needs richer, creamier formulas. Using a heavy leave-in on fine hair flattens it, and a light one on coily hair leaves it thirsty.

    Lead with your main concern. If breakage is your issue, choose a reparative formula. If it is tangles and length, choose a detangling spray. If it is dryness and damage, go rich. The best leave-in is the one aimed at the problem you actually have.

    Remember it is step one, not the whole routine. A leave-in detangles and moisturises, then a curl cream defines, then a gel seals and holds. See our guides to the best curl creams and best curl gels for the next two steps.

    Apply to soaking wet hair. Leave-ins distribute best and give the most slip when hair is dripping wet, straight out of the shower. That is when they detangle most easily and lock in the most moisture before the rest of your products go on.

    Frequently Asked Questions

    Do you apply leave-in conditioner to wet or dry hair?

    Apply leave-in conditioner to soaking wet hair, ideally straight out of the shower. Wet hair lets the product distribute evenly and detangle with the most slip, and it locks moisture in before it evaporates. You can lightly mist a leave-in on dry hair to refresh curls between washes, but the main application should always be on wet hair.

    What is the difference between a leave-in conditioner and a curl cream?

    A leave-in conditioner is the first step, a light-to-medium layer that detangles and adds moisture right after washing. A curl cream comes next and focuses on defining and shaping the curl. They do different jobs, and most curly routines use both, leave-in first, then cream. Our best curl creams guide covers the cream step.

    Can you leave a leave-in conditioner in overnight?

    Yes, leave-in conditioners are designed to stay in the hair, so leaving one in overnight is fine and can add extra moisture. Many people apply a leave-in before a satin bonnet or pillowcase to wake up with softer, more manageable curls. Just use a sensible amount so hair does not feel greasy or weighed down.

    How much leave-in conditioner should you use?

    Start with a small amount and add more only if needed. Fine and wavy hair usually needs just a few pumps or sprays, while thick and coily hair can take a generous palmful. Too much leave-in leaves hair limp or greasy, so build up gradually rather than overloading in one go.

    Which leave-in is best for dry or damaged curly hair?

    For dry or damaged hair, choose a rich, restorative leave-in with strengthening ingredients such as castor oil, or a reparative formula aimed at breakage. Lighter rose-water or detangling sprays will not deliver enough moisture for very thirsty or brittle hair. Match the richness of the leave-in to how dry your hair genuinely is.

    The bottom line

    The best leave-in conditioner depends entirely on your curls and your main concern. For waves and fine hair, TGIN’s light rose-water formula defines without weighing hair down. If tangles and length are your focus, Marc Anthony Grow Long detangles and protects. For dry, damaged or coily hair, SheaMoisture’s JBCO leave-in brings the rich moisture and strength that thirsty textures need. milk_shake is the versatile salon-grade detangler that suits almost everyone, while Curls Blueberry Bliss is built for repairing breakage across wavy to coily hair. And for an affordable everyday base layer, Marc Anthony Strictly Curls hydrates and tames frizz without the spend. Pick the one aimed at your texture and your top concern, apply it to soaking wet hair, and build your cream and gel on top.