Category: Curl & Wave Basics

  • Short Wavy Hair: Styles, Cuts & Styling Tips for Every Wave Type

    Short Wavy Hair: Styles, Cuts & Styling Tips for Every Wave Type

    Short wavy hair offers the perfect sweet spot between manageability and texture, giving you defined waves without the weight that can pull longer hair straight. Whether you’re working with loose 2A waves or bouncy 2C spirals, the right short cut can amplify your natural pattern, reduce styling time, and give you that effortless, beachy look year-round.


    Why Short Wavy Hair Works (Understanding Your Wave Type)

    The relationship between hair length and wave pattern is more significant than most people realize. When you cut wavy hair short, you’re fundamentally changing how gravity and weight interact with your natural texture, and understanding this dynamic helps you make smarter decisions about which cuts will work best for your specific wave type.

    How Length Affects Wave Pattern

    Longer wavy hair carries more weight, which literally pulls your waves straighter as they grow. This is why many people with type 2A hair care needs notice their waves become barely visible past shoulder length, but spring back to life when cut shorter. The physics are simple: less hair shaft means less gravitational pull on each wave bend, allowing your natural pattern to express itself more fully.

    For medium-density waves, cutting to chin length or above removes enough weight that your wave pattern can tighten by up to half a curl category. A 2B wave at shoulder length might display as a 2C wave when cut to a bob. This isn’t changing your hair’s fundamental structure, it’s simply revealing what was always there but weighed down.

    Best Wave Types for Short Cuts (2A-3A)

    While any wave type can work short with the right cut, certain patterns particularly thrive at shorter lengths. Type 2A waves, which often struggle to maintain definition when long, gain bounce and body in wavy hairstyles for all lengths that hit above the shoulders. The reduced weight allows these fine, loose S-patterns to hold their shape throughout the day without falling flat.

    Type 2B waves are perhaps the most versatile for short cuts. Their medium texture provides enough body to support various styles from sleek bobs to tousled pixies, and they have enough natural bend to create interesting movement without requiring intensive styling. These waves respond beautifully to layering and can handle both structured and lived-in looks.

    Type 2C waves and loose 3A curls bring maximum texture to short cuts. These defined S-patterns and spirals create natural volume at shorter lengths, though they require more attention to layer placement to avoid the dreaded triangle shape. When cut correctly, they deliver that coveted “just back from the beach” texture with minimal effort.

    The Weight Factor: Why Shorter Can Mean Bouncier

    Each strand of hair has a weight limit before it begins to stretch and elongate your wave pattern. Think of it like a spring: a light spring bounces easily, but add enough weight and it stretches out. This is exactly what happens to wavy hair as it grows longer. The cumulative weight of the hair shaft, especially when wet or coated with product, gradually pulls waves straighter.

    Cutting your hair short removes this burden, allowing your waves to bounce back to their natural formation. This is particularly noticeable after washing. Where long wavy hair might take hours to fully dry and often dries straighter at the roots, short wavy hair dries faster and maintains more consistent wave pattern from root to tip. You’re working with less surface area, so products distribute more evenly and the hair doesn’t have time to stretch while drying.

    The bounce factor also affects how your hair moves. Shorter waves have more spring and energy, creating dynamic movement that longer, heavier waves simply can’t match. This natural animation means your hair looks intentionally styled even on minimal-effort days.

    Best Short Wavy Hairstyles by Cut

    Choosing the right short cut for your waves depends on your hair’s density, wave pattern, and how much daily styling effort you want to invest. Each of these styles offers different benefits and works best with specific wave characteristics.

    The Wavy Bob: Classic and Versatile

    The bob remains the most popular short wavy haircut for good reason. It works across all wave types from 2A to 3A and can be adapted to virtually any face shape through subtle adjustments in length and angle. A chin-length bob on wavy hair creates natural movement without the bulk that can accumulate in longer styles.

    For finer 2A waves, a blunt bob with minimal layering maintains thickness at the perimeter while the shorter length encourages more wave definition. Medium 2B waves benefit from a slightly angled bob, longer in front than back, which creates elegant movement and prevents the back from looking too bulky. Defined 2C and 3A waves shine in a heavily textured bob with internal layering to remove weight while maintaining length.

    The beauty of the wavy bob is its styling flexibility. You can wear it sleek for professional settings, tousled for casual days, or even temporarily straighten it for variety. This adaptability makes it ideal if you’re transitioning from long hair and aren’t ready to commit to a more dramatic short cut. Looking at curly bob styles can give you ideas for how texture translates to this classic cut.

    Textured Pixie Cuts for Fine Waves

    Pixie cuts aren’t just for straight or curly hair. Fine to medium wavy hair creates beautiful texture in a longer pixie, where the crown and top sections are left long enough (2-4 inches) to showcase your wave pattern while the sides and back are tapered short. This creates incredible volume at the crown, something that’s often elusive with longer wavy styles.

    The key to a successful wavy pixie is maintaining enough length on top to allow your waves to form. Too short and you’ll just have straight or bent hair; leave 3-4 inches and your natural S-pattern can develop. The contrast between textured top sections and tighter sides creates a modern, edgy look that requires surprisingly little maintenance.

    Styling a wavy pixie is refreshingly simple. A small amount of lightweight mousse applied to damp hair and either air-dried or quickly diffused creates perfect tousled texture. The short length means it dries in 15-20 minutes naturally, making it ideal for busy mornings.

    The Wavy Shag: Layers for Movement

    The shag haircut has experienced a major resurgence, and it’s particularly flattering on wavy hair. This heavily layered cut, typically featuring choppy, graduated layers throughout and often including bangs or face-framing pieces, creates maximum movement and texture. The shag works best on medium to thick wavy hair (2B-2C) that can support the layering without looking too thin.

    What makes the shag special for waves is how the varied layer lengths create dimension. Each layer catches light differently and moves independently, giving your hair a lived-in, effortlessly cool appearance. The shortest layers around the crown add height and volume, while longer pieces underneath provide enough weight to prevent the top from becoming too poofy.

    Modern shags differ from their 1970s predecessors by incorporating more strategic layering. Your stylist should consider your layered cuts for texture needs, placing shorter pieces where you need volume and maintaining length where you want weight. The result is a customized cut that enhances your specific wave pattern rather than fighting against it.

    Asymmetrical Cuts and Side-Swept Styles

    Asymmetrical cuts, where one side is noticeably longer than the other, create striking visual interest on wavy hair. The contrast between a longer side that showcases your waves and a shorter side that reveals your face shape offers an edgy, fashion-forward look. This style particularly suits 2B and 2C waves, which provide enough texture to emphasize the length difference without looking messy.

    Side-swept styles with a deep side part amplify your natural wave direction and create volume on one side while keeping the other sleek. This works especially well if your waves naturally fall in one direction or if you have a cowlick that dictates your part placement. The asymmetry draws attention to your bone structure and can be used strategically to balance face shapes.

    The Lob (Long Bob) for Transitioning

    If you’re not ready for a dramatic length change, the lob (long bob) falling between collarbone and shoulders offers a gentle introduction to shorter wavy hair. This length removes enough weight to enhance wave definition while maintaining enough length for updos and ponytails when needed.

    The lob is particularly forgiving for those still learning to work with their natural texture. It provides enough hair to experiment with different styling techniques but isn’t so long that it takes forever to dry or requires extensive product. For many people with type 2B care guide needs, the lob becomes their permanent style because it balances manageability with versatility.

    Cutting Considerations: What to Ask Your Stylist

    The conversation you have with your stylist before the cut determines your results more than any styling technique you’ll use afterward. Going in prepared with specific requests and understanding key cutting terminology ensures you’ll walk out with a cut that works with your waves, not against them.

    Dry Cutting vs. Wet Cutting for Waves

    This is perhaps the most important question to ask your stylist. Dry cutting, where hair is cut in its natural dried state, allows the stylist to see exactly how your waves form and where each piece will fall. This technique prevents the common problem of hair “shrinking” shorter than expected once waves dry after a wet cut.

    Wet cutting can work for wavy hair, but it requires a stylist experienced with textured hair who understands that your hair will be 15-30% shorter when dry depending on your wave tightness. Many stylists trained primarily on straight hair aren’t accustomed to accounting for this shrinkage, leading to cuts that feel too short once you style them at home.

    The best approach for most wavy cuts is a hybrid: rough cutting wet to remove bulk and establish the basic shape, then refining dry to perfect the layer placement and ensure everything sits correctly. Don’t be afraid to specifically request this approach, and if your stylist seems unfamiliar with dry cutting textured hair, it might be worth finding someone who specializes in waves and curls.

    Layer Placement for Your Wave Type

    Not all layers are created equal, and where your stylist places them dramatically affects your final result. For fine 2A waves, ask for long layers starting below the chin to maintain density while adding movement. Too many short layers on fine hair creates a wispy, thin appearance.

    Medium 2B waves handle traditional layering well, with layers beginning around chin to ear level. This removes enough bulk to prevent triangle shape while preserving enough weight to keep waves defined. Request “disconnected layers” rather than heavily blended ones if you want more texture and separation between wave clumps.

    Defined 2C and 3A waves need internal layering to remove weight without sacrificing length. Ask your stylist to “carve out weight” from the interior sections while keeping the perimeter relatively solid. This technique, sometimes called channel cutting or internal graduation, prevents puffiness while maintaining a strong outline to your style.

    Face Shape and Proportion

    Your face shape should influence specific cut details, though it doesn’t have to dictate your entire style choice. Round faces benefit from volume at the crown and length that extends past the fullest part of the face, so slightly longer bobs or lobs with height on top work well. Avoid blunt, chin-length cuts that end right at the widest point of your face.

    Oval faces can handle virtually any short wavy style, from pixies to bobs. This face shape’s balanced proportions mean you have maximum flexibility to choose based on lifestyle and personal preference rather than proportion concerns. Heart-shaped faces look excellent with chin-length bobs that add width at the jawline, balancing a broader forehead.

    Square and rectangular faces soften beautifully with wavy texture and benefit from styles that add width at the temples and keep some length through the jaw area. Avoid super-short crops that expose your entire jawline, and instead opt for textured styles that fall to at least mid-cheek level. The waves themselves provide softening movement that balances angular features.

    Maintaining Shape Between Cuts

    Short cuts grow out faster than you think, and maintaining the shape requires trims every 6-8 weeks depending on your growth rate and style. Ask your stylist what will happen as your cut grows, and which areas will need attention first. Some cuts, like textured shags and wavy pixies, actually look better after a few weeks of growth when they’ve softened slightly.

    If budget or time constraints limit frequent salon visits, ask about “maintenance zones” where you can do minor trims yourself. Many stylists will show you how to trim your own bangs or clean up around the ears between appointments. For the actual shape and layers, though, professional trims are essential. DIY cutting rarely goes well with textured hair because it’s difficult to see how waves will settle when you’re cutting your own head.

    How to Style Short Wavy Hair

    The right styling approach makes the difference between short waves that look polished and intentional versus short waves that look unkempt. Fortunately, shorter length means faster styling and less product needed, making your daily routine quicker than it was with longer hair.

    Wash and Wear Techniques

    True wash-and-wear styling is achievable with short wavy hair if your cut is right for your wave pattern. The process starts in the shower: after conditioning, gently squeeze excess water from your hair rather than rough-drying with a towel. Your hair should be wet but not dripping when you apply products.

    Apply a leave-in conditioner first, using prayer hands to smooth it through your hair, then follow with a wave-enhancing cream or gel. The key with short hair is using less product than you think you need. A dime-sized amount of styling product is usually sufficient for hair shorter than chin-length. Too much product on short hair creates crunch and weight that pulls waves straight.

    After product application, scrunch your hair upward toward your scalp several times to encourage wave formation. Then simply leave it alone. Don’t touch it, don’t adjust it, don’t “help” the waves. Short hair dries relatively quickly (30-60 minutes depending on thickness), and most touching disrupts wave clumps and creates frizz.

    Diffusing Short Waves Without Frizz

    When you need your hair dry faster, diffusing works beautifully on short waves. The technique differs slightly from diffusing long hair because you have less hair to fit in the diffuser bowl. Use a low to medium heat setting and low airflow. High heat or high wind will blast your waves apart and create frizz.

    For bob-length wavy hair, flip your head upside down and gently place sections of hair into the diffuser bowl, then hold it still against your scalp for 15-30 seconds before moving to the next section. This “hover diffusing” method dries without disturbing your wave pattern. For very short styles like pixies or cropped cuts, you can diffuse right-side up, cupping the diffuser to your head and pulsing the airflow rather than using continuous heat.

    Diffuse only until your hair is about 80% dry, then let it finish air-drying. This prevents overdrying, which leads to frizz and crunch. Once completely dry, you can scrunch out any gel cast for soft, defined waves.

    Air-Drying Methods for Definition

    Air-drying short wavy hair produces the most natural, soft results, though it requires patience and the right technique. After applying products, you can enhance definition by “micro-plopping” or micro-scrunching with a microfiber towel or cotton t-shirt. This technique absorbs excess water while encouraging waves to clump together.

    For volume at the roots, clip a few small sections at the crown while your hair dries. These clips hold the roots away from your scalp, preventing the flat-root problem that sometimes occurs with wavy hair. Remove them once hair is mostly dry and gently fluff the roots with your fingers.

    If you have time, periodic scrunching during the drying process (every 15-20 minutes) helps maintain wave definition as your hair transitions from wet to dry. This is especially helpful for looser wave patterns that tend to relax as they dry.

    Product Layering for Short Hair (Less is More)

    Short hair requires a lighter hand with products than longer hair. The surface area is smaller, so products concentrate more heavily. A typical product routine for short wavy hair includes just 2-3 products: a leave-in conditioner for moisture, a styling cream or mousse for hold and definition, and optionally a light oil on the ends to prevent dryness.

    Apply products in order from thinnest to thickest consistency. Start with your leave-in, which provides a hydrating base and helps subsequent products distribute evenly. Next, apply your main styling product, whether that’s a curl cream, wave-enhancing mousse, or gel. Focus this on mid-lengths to ends rather than roots to avoid weighing down your hair.

    If you’re using gel, apply it last with very wet hands using the praying hands method followed by gentle scrunching. With short hair, you might only need a nickel-sized amount. Remember that you can always add more product on day two if needed, but removing excess product requires washing, so err on the side of less initially.

    Second-Day Refresh Tricks

    One of short wavy hair’s biggest advantages is easy refreshing. On day two or three, lightly mist your hair with water (not soaking, just dampening), then apply a tiny amount of leave-in conditioner mixed with water in a spray bottle. Scrunch this mixture into your waves, focusing on any pieces that have gone flat or frizzy.

    For volume refresh, flip your head upside down and mist the roots, then massage your scalp with your fingertips to reactivate lift. If specific sections need more help, you can re-wet just those pieces and add a small amount of styling product, blending it into the existing product rather than applying fresh product to dry hair.

    Another effective refresh method for short waves is the “steam refresh,” where you dampen your hands and scrunch your hair in a steamy bathroom (during or after a shower). The steam helps rehydrate and reactivate products without fully wetting your hair. This works particularly well for maintaining definition through multiple days.

    Common Short Wavy Hair Challenges (And Solutions)

    Even with the right cut and products, short wavy hair presents specific challenges. Understanding why these issues occur and how to address them saves frustration and helps you get the most from your texture.

    Triangle Shape and How to Avoid It

    The dreaded triangle shape, where your hair is narrow at the top and wide at the bottom, plagues many people with short wavy hair, especially those with type 2C hair care needs. This happens when there’s too much weight at the perimeter and not enough volume at the roots, creating a pyramid silhouette.

    The solution is two-fold: proper layering and strategic root lifting. Your cut should include internal layers that remove bulk from the lower sections while maintaining enough length on top to create volume. When styling, focus on getting volume at the crown by using root clips while drying or applying a volumizing product directly at the roots.

    Another trick is to slightly overdirect your hair when diffusing or styling. Lift sections up and away from where you want them to fall, which creates lift at the base. Once dry, the hair will settle slightly but maintain some of that upward direction, preventing the bottom-heavy triangle effect.

    Managing Volume at the Crown

    While some wavy hair struggles with too much volume everywhere, many people with short waves specifically lack volume at the crown while having plenty of body everywhere else. This creates a flat-topped appearance that makes your face look wider and your cut less dynamic.

    To build crown volume, try applying products away from your roots entirely. Focus your styling products from ear level down, keeping the root area clean and light. When diffusing, start with the crown section, tilting your head to the side and diffusing with the diffuser pointing upward, which encourages roots to dry in a lifted position.

    You can also try changing your part occasionally. Hair gets used to falling in one direction and the roots become trained to lay flat along your regular part. Shifting your part by even an inch can create instant lift. For persistent flat-root issues, a light spritz of dry shampoo or volumizing spray at the roots provides texture and grip that helps hair stand away from the scalp.

    Dealing with Different Wave Patterns

    Many people have multiple wave patterns in different sections of their head. You might have straighter 2A waves underneath with tighter 2C waves on top, or vice versa. Short cuts actually make this easier to manage than long hair because you can style sections differently without it being obvious.

    For looser sections that need more definition, apply slightly more styling product and use more intensive scrunching. For tighter sections that tend to get too poufy or frizzy, use lighter products and minimal manipulation. You might even use different products on different sections. This targeted approach, which would be tedious with long hair, is quick and manageable when you’re only working with a few inches of hair.

    If your wave pattern variation is extreme, discuss it with your stylist. They can adjust the cut to work with rather than against these different textures, perhaps using longer lengths where your hair is straighter to encourage wave formation, and shorter, more layered sections where your texture is tighter to prevent excessive volume.

    Frizz Control in Humid Weather

    Short wavy hair actually handles humidity better than long wavy hair because there’s less surface area to absorb moisture from the air. Still, frizz happens, especially at the crown and around the hairline. The key to humidity protection is thorough product coverage and using products with humidity-resistant ingredients.

    Look for styling products containing film-forming humectants and polymers that create a barrier against environmental moisture. Gels typically offer better humidity resistance than creams alone. Apply products to soaking wet hair, which allows them to penetrate properly and form an even coating as your hair dries.

    For particularly humid climates, consider a two-product approach: a cream for definition and moisture, followed by a light gel for hold and humidity protection. The gel creates a cast around each wave, protecting it from moisture intrusion. Once dry, scrunch out the crunch for soft waves that maintain their definition through humidity. Some people also benefit from a light anti-humidity finishing spray once hair is completely dry and styled.

    When Waves Fall Flat

    Shorter wavy hair should naturally have more volume and spring than longer hair, so if your waves are falling flat, something in your routine needs adjustment. The most common culprit is product buildup. Short hair shows product accumulation quickly because the products concentrate in a smaller area.

    Clarify your hair every 2-4 weeks with a clarifying shampoo to remove buildup from styling products, hard water minerals, and natural oils. This reset allows your waves to bounce back to their natural pattern. You might be shocked at how much more volume and definition you have after a good clarifying session.

    Flat waves can also indicate you need a trim. As short cuts grow out, the weight distribution changes and waves can lose their shape. Regular trims every 6-8 weeks maintain the structure that supports your wave pattern. Finally, evaluate your product choices. Heavy creams and oils can weigh down short waves that would benefit from lighter mousses or gels instead. Sometimes the solution to flat waves is simply switching to products formulated for fine or medium hair rather than thick, coarse textures.

    Frequently Asked Questions

    Will cutting my wavy hair short make it curlier?

    Cutting your hair shorter won’t change the actual curl pattern of each strand, but it will allow your existing wave pattern to show more definition. The reduced weight means less gravitational pull on your waves, so they can form their natural S-pattern more completely. Many people find their hair appears one curl type tighter when cut short, though this is revealing rather than creating curl.

    How often do I need to trim short wavy hair?

    Most short wavy cuts need trimming every 6-8 weeks to maintain their shape. Pixies and precision cuts may need touch-ups every 4-6 weeks, especially around the edges and nape. More textured, shaggy styles can often stretch to 8-10 weeks between cuts. Your hair’s growth rate and how quickly your cut loses its shape will determine your ideal trim schedule.

    Can I still put short wavy hair in a ponytail?

    This depends on your definition of “short.” Lobs and longer bobs can typically be pulled into a small ponytail or half-up style. Chin-length bobs might manage a very short ponytail at the nape. True short cuts like pixies and cropped styles won’t have enough length for ponytails, though you can use clips and pins for various updos and off-the-face styles.

    What’s the best short haircut for fine wavy hair?

    Fine wavy hair looks excellent in blunt or slightly angled bobs with minimal layering, which maintains density at the perimeter. Longer pixie cuts with textured tops also work well, creating the illusion of thickness through strategic layering at the crown. Avoid heavily layered cuts that can make fine hair look wispy and thin.

    How do I sleep on short wavy hair without ruining it?

    For bobs and lobs, try a modified pineapple (a very loose, high ponytail) or sleep on a satin pillowcase to reduce friction. For shorter cuts, refresh is so quick in the morning that many people don’t protect overnight. If you want to preserve your waves, a silk or satin sleep cap works well on pixies and very short styles.

    Should I use the same products on short wavy hair as I did when it was long?

    You’ll likely need less product, but you may also benefit from switching to lighter formulations. Heavy creams that worked well on long hair can weigh down short waves. Many people find better results with lightweight mousses and gels on short hair. The fundamental ingredients you need don’t change, but the amount and weight of products should adjust for your shorter length.

    Conclusion

    Short wavy hair offers a unique combination of texture, manageability, and versatility that makes it worth considering whether you’re trying to enhance your natural wave pattern or simply want a lower-maintenance style. The reduced weight brings out definition that longer hair often hides, while the shorter length means faster drying times and less product needed. From classic bobs to edgy pixies and everything in between, there’s a short wavy style that can work for your specific wave type, face shape, and lifestyle.

    Start by finding a stylist who understands textured hair and can cut your waves in their natural, dried state. Invest time in learning which products and techniques work for your specific wave pattern rather than fighting against your hair’s natural tendencies. Your next step is simple: bring photos of short wavy styles you love to a consultation appointment, discuss your hair goals honestly with your stylist, and trust that your waves will show you exactly what they’re capable of once freed from excess weight. The confidence that comes from a haircut that truly works with your texture is worth every bit of the transition.
  • Curly Hair Astrology: Your Zodiac Sign’s Perfect Hair Match

    Curly Hair Astrology: Your Zodiac Sign’s Perfect Hair Match

    Whether you check your horoscope daily or just know your sun sign, there’s something undeniably fun about matching your curl routine to your cosmic personality. While astrology can’t scientifically predict your hair porosity or curl pattern, the characteristics associated with each zodiac sign often mirror the approach people take to their curly hair care. From fire signs who embrace bold volume to water signs who prioritize deep conditioning, your astrological profile might just explain why certain curl methods feel more natural to you than others.

    Fire Signs and Their Fearless Curls (Aries, Leo, Sagittarius)

    Fire signs approach their curls with the same confidence and spontaneity they bring to everything else. These signs tend to gravitate toward quick styling methods that deliver maximum impact without fussy routines. If you’re a fire sign, you probably don’t have time for twelve-step wash days, and you definitely won’t hide your curls under a hat when they’re not cooperating.

    Aries: The Wash-and-Go Warrior

    Aries energy is all about speed and efficiency, which makes wash-and-go styling a natural fit. As the zodiac’s initiator, Aries curlies tend to experiment fearlessly with new products but won’t stick around for complicated application techniques. You’re the person who can master a curl-enhancing mousse in one try and move on with your day.

    The Aries approach works best with streamlined routines: cleanse, condition, apply one or two styling products, and go. You’re not intimidated by frizz or imperfect definition because you know confidence matters more than perfection. When you find a product that works, you’ll become fiercely loyal to it, at least until something newer and more exciting catches your attention.

    Leo: Bold Volume and Statement Styles

    Leos don’t do anything halfway, and that includes their curls. If you’re a Leo with curly hair, you probably love big, voluminous styles that command attention when you walk into a room. You’re drawn to techniques that maximize body and bounce, whether that’s diffusing upside down, root clipping, or strategic layering.

    Leo curlies often become the celebrity curl inspiration within their friend groups, sharing tips and product recommendations with theatrical flair. You understand that your hair is part of your personal brand, and you’re willing to invest time and money in keeping it looking spectacular. When you nail a curl routine, everyone hears about it.

    Sagittarius: Adventure-Ready Low-Maintenance Curls

    Sagittarius needs a curl routine that can keep up with spontaneous plans and outdoor adventures. You’re the zodiac’s traveler, which means your hair care has to be portable, adaptable, and forgiving. Protective styles that last several days appeal to your practical side, as do multi-purpose products that work in different climates.

    You’re also the most likely fire sign to embrace your natural texture completely, skipping heat tools and complicated styling in favor of air-drying and simple scrunching. Your philosophy is that life’s too short to spend hours on your hair when there’s a world to explore. A good hydrating leave-in conditioner and a scrunchie for sleep protection might be all you need.

    Earth Signs: Grounded, Consistent Curl Routines (Taurus, Virgo, Capricorn)

    Earth signs bring patience, consistency, and practicality to their curl care. These signs understand that healthy curls are built over time through reliable routines, quality products, and attention to detail. If you’re an earth sign, you’ve probably researched your hair porosity, curl pattern, and protein-moisture balance, and you have a bathroom shelf organized accordingly.

    Taurus: The Luxury Product Lover

    Taurus appreciates the finer things in life, and that extends to curl care products. You’re willing to invest in high-quality formulas with luxurious textures and beautiful scents because you believe your hair deserves the best. The sensory experience of your hair routine matters just as much as the results.

    As a fixed sign, once you find products and techniques that work, you stick with them religiously. Your bathroom probably contains carefully curated favorites that you’ve repurchased multiple times. You’re not swayed by every new trend, but when something genuinely improves your curls, you’ll commit to it long-term. Deep conditioning treatments are your happy place, especially when they smell amazing and feel indulgent.

    Virgo: Precision Techniques and Perfect Definition

    Virgo curlies are the zodiac’s hair scientists. You’ve probably watched every curl styling tutorial, tested multiple application methods, and documented what works through detailed notes or photos. You understand that consistent results come from precise technique, whether that’s the exact amount of product you use or the specific way you scrunch out the crunch.

    You’re drawn to methods like finger coiling, shingling, or curl-by-curl styling because they give you control over the outcome. While other signs might find these techniques too time-consuming, you find the process meditative and satisfying. You also excel at troubleshooting curl problems because you’re analytical enough to identify exactly what’s going wrong and adjust accordingly. Understanding low porosity hair needs or protein-moisture balance comes naturally to your detail-oriented mind.

    Capricorn: Traditional Methods That Actually Work

    Capricorn doesn’t chase trends, they stick with proven methods that deliver consistent results. You’re likely drawn to time-tested techniques that generations of curly-haired people have relied on: protective styling, regular trims, and simple routines that prioritize hair health over temporary aesthetics.

    Your approach to curl care is strategic and goal-oriented. If you’re growing out your curls, you’ll follow a disciplined routine and track your progress. If you’re repairing damage, you’ll research the most effective treatments and commit to them without deviation. You understand that great curls are the result of sustained effort, not quick fixes, and you’re patient enough to see results over months rather than days.

    Air Signs: Experimental and Ever-Changing Styles (Gemini, Libra, Aquarius)

    Air signs keep their curl routines interesting by constantly experimenting with new styles, products, and techniques. These signs get bored with repetition and need variety to stay engaged with their hair care. If you’re an air sign, your bathroom probably contains half-used products from various experimental phases, and your curl pattern might look different from week to week.

    Gemini: The Style Switcher

    Gemini energy thrives on variety, which makes you the zodiac sign most likely to switch between curl styles multiple times per week. One day you’re perfecting your wash-and-go, the next you’re trying pin curls, and by the weekend you might be in a slicked-back bun. This versatility keeps you excited about your curls and prevents styling burnout.

    You’re also the sign most likely to have completely different routines for caring for 2C waves versus tighter curl patterns because you understand that different textures need different approaches. Your curiosity leads you to try every new product launch and viral styling hack, though you might move on before fully mastering any single technique. That’s okay, your strength is adaptability, not consistency.

    Libra: Balanced Beauty and Harmonious Curls

    Libra seeks balance in everything, including curl care. You’re drawn to routines that give your curls definition without crunch, moisture without greasiness, and volume without frizz. The aesthetic appeal of your curls matters deeply to you, but not at the expense of hair health. You want both, and you’re willing to experiment until you find that perfect equilibrium.

    You might be the sign most influenced by visual inspiration, whether that’s celebrity curly hair transformations or beautifully curated Instagram feeds. You appreciate symmetry and polish in your curl patterns, often spending time arranging your curls just so. Partnership matters to you, so you probably love sharing hair care tips with friends or finding a curl buddy to try new products with.

    Aquarius: Trend-Setting and Unconventional Approaches

    Aquarius doesn’t follow curl trends, they create them. You’re the zodiac’s innovator, which means you might be mixing your own product concoctions, trying unconventional styling methods, or completely rejecting mainstream curl advice in favor of what works for your unique hair. You’re not afraid to look different or try something nobody else has considered.

    Your curl philosophy tends to be progressive and inclusive. You understand that there’s no one right way to care for curly hair, and you’re likely to challenge outdated rules about what curly-haired people “should” do. You might embrace your frizz as texture, skip traditional curl patterns altogether, or combine techniques from completely different hair care philosophies to create something entirely new.

    Water Signs: Intuitive, Deep-Conditioning Devotees (Cancer, Scorpio, Pisces)

    Water signs approach their curls with emotional intelligence and intuition, tuning into what their hair needs rather than following rigid rules. These signs understand that curl care is deeply personal and that your hair’s needs change based on seasons, stress levels, and overall wellbeing. If you’re a water sign, you probably have an instinctive sense of when your curls need extra moisture or protein.

    Cancer: Comfort-First Care Routines

    Cancer prioritizes comfort and nurturing in all aspects of life, and curl care is no exception. Your routines probably feel like self-care rituals rather than chores. You’re drawn to products with soothing ingredients, comforting scents, and gentle formulas that feel good on your scalp and hair. Deep conditioning sessions are your form of meditation.

    You’re also deeply connected to your hair’s emotional significance. For you, caring for your curls is an act of self-love, and you might notice that your hair looks better when you’re emotionally grounded. You excel at creating cozy wash-day rituals complete with your favorite music, comfortable clothes, and plenty of time to pamper yourself. Protective styling appeals to you because it feels like wrapping your curls in a warm hug.

    Scorpio: Intense Transformation and Hair Rehab

    Scorpio energy is all about transformation, making you the zodiac sign most likely to successfully rehab damaged curls or completely change your hair care approach. When you commit to healing your curls, you go all in with intensive treatments, strict routines, and unwavering dedication. You’re not intimidated by the challenge of bringing severely damaged hair back to health.

    You’re also intensely private about your curl journey until you achieve the results you want. You might spend months perfecting your routine before sharing it with anyone, and when you do, your transformation is dramatic enough to inspire others. You understand that real change happens beneath the surface, so you focus on scalp health, internal nutrition, and deep conditioning rather than just surface-level styling. For 4A coily hair especially, your patient, intensive approach yields impressive results.

    Pisces: Go-With-the-Flow Curl Acceptance

    Pisces has the most accepting relationship with their curls of any zodiac sign. You understand that curls are naturally unpredictable, and rather than fighting that reality, you embrace it. Some days your curls are perfect, some days they’re wild, and you’re okay with both. This acceptance gives you a relaxed relationship with your hair that other signs might envy.

    Your intuitive nature helps you sense what your curls need without overthinking it. You might not follow a strict routine, instead adjusting based on how your hair feels on any given day. This flexibility works well for you because you’re not attached to having your curls look identical every time. You appreciate the artistic, ethereal quality of curly hair and you’re less concerned with “perfect” definition than with overall health and softness.

    Celebrity Curly Hair by Zodiac Sign

    Looking at famous curly-haired celebrities through an astrological lens can be surprisingly revealing. While their professional hairstylists certainly influence their looks, many celebrities’ curl choices seem to align with their zodiac archetypes in interesting ways.

    Fire Sign Curl Icons: Zendaya, Tracee Ellis Ross, and More

    Zendaya, a Virgo (not a fire sign, but worth noting for her bold curl choices), often styles her curls in ways that command attention, much like a Leo. Tracee Ellis Ross, a Scorpio with serious fire sign energy in her curl presentation, has become an icon for embracing bold, voluminous natural hair. These celebrities show that while sun signs matter, your rising sign and overall chart might influence your curl aesthetic even more.

    Fire sign energy in celebrity curls often manifests as fearless color choices, dramatic volume, and styles that make statements on red carpets. These are the celebrities who aren’t afraid to switch from sleek styles to full natural curls overnight, keeping fans and beauty editors on their toes.

    Earth, Air, and Water Sign Curl Inspiration

    Earth sign celebrities tend toward polished, consistent curl presentations that become part of their signature look. Think of how certain celebrities maintain the same general curl aesthetic for years, perfecting their approach rather than constantly changing it. These are the famous faces whose curl routines become beauty tutorials because they’re reliable and replicable.

    Air sign celebrities experiment more visibly, trying different curl patterns, colors, and styles as they evolve. Their curl journeys tend to be public and ever-changing, reflecting air signs’ need for variety and innovation. Water sign celebrities often have more intuitive, natural-looking curl presentations that appear effortless even when they’re carefully styled. There’s an emotional authenticity to how they wear their curls that resonates with fans.

    While astrology isn’t the only factor in how celebrities style their curls, exploring these patterns through a zodiacal lens offers a fun way to find inspiration that matches your own approach to curl care. Whether you’re drawn to bold fire sign volume or subtle water sign waves, there’s no shortage of famous curly-haired role models across all twelve signs.

    Frequently Asked Questions About Curly Hair and Astrology

    Does your zodiac sign actually affect your hair type?

    No, your zodiac sign has no scientific impact on your curl pattern, hair porosity, or texture. Your hair characteristics are determined by genetics, specifically the shape of your hair follicles and the structure of your hair proteins. However, your zodiac sign’s associated personality traits might influence how you approach hair care, which products you’re drawn to, and what styling methods feel most natural to you. The connection is behavioral and preferential, not biological.

    Can astrology help me find the right curly hair products?

    While astrology can’t predict which ingredients will work for your specific hair needs, thinking about your zodiac sign’s characteristics might help you identify your curl care priorities. For example, if you’re a Taurus who values luxury and sensory experiences, you might prioritize products with beautiful textures and scents. If you’re a Virgo who loves precision, you might excel with detailed styling techniques. Use astrology as a fun framework for self-reflection about your hair care preferences, but choose products based on your actual hair porosity, curl pattern, and ingredient sensitivities.

    Which zodiac sign has the best hair?

    There’s no zodiac sign with inherently “better” hair, as hair quality depends entirely on genetics, health, and care routines rather than astrological factors. Every sign can have gorgeous, healthy curls with the right approach. That said, certain signs might be more naturally inclined toward consistent hair care (earth signs), experimentation that leads to breakthroughs (air signs), bold styling confidence (fire signs), or intuitive understanding of their hair’s needs (water signs). The “best” hair comes from finding an approach that works for your individual texture and lifestyle.

    How do I match my curl routine to my zodiac sign?

    Start by considering your sign’s element and modality. Fire signs often thrive with quick, bold routines; earth signs prefer consistent, quality-focused approaches; air signs need variety and experimentation; water signs benefit from intuitive, nurturing care. Then think about your sign’s specific traits: Are you patient enough for detailed techniques? Do you need flexibility? Do you value luxury or efficiency? Use these insights to customize a routine that you’ll actually stick with, because consistency matters more than following any rigid astrological prescription.

    Conclusion

    While your birth chart won’t determine your curl pattern or porosity level, exploring curly hair care through an astrological lens reveals something valuable: there’s no single correct way to care for your curls. Whether you approach your routine with Virgoan precision, Sagittarian spontaneity, or Piscean intuition, what matters most is finding methods that resonate with your personality and lifestyle. Your curl journey should feel authentic to who you are, not just what generic tutorials prescribe.

    Start by identifying one aspect of your astrological profile that rings true, whether that’s a fire sign’s need for efficiency or a water sign’s love of deep conditioning, and adjust one element of your current routine to honor it. You might discover that aligning your curl care with your natural tendencies makes the whole process more enjoyable and sustainable. After all, the best curl routine isn’t the most complicated or trendy one, it’s the one you’ll actually do consistently because it feels right for your unique combination of hair texture, lifestyle, and yes, even cosmic personality.

  • Beeswax for Curly Hair: When to Use It & What to Watch For

    Beeswax for Curly Hair: When to Use It & What to Watch For

    Beeswax shows up in dozens of curly hair products, promising hold, shine, and flyaway control. But this heavy, occlusive ingredient isn’t right for everyone, and when used incorrectly, it can lead to stubborn buildup that dulls your curls and resists regular washing. Understanding when beeswax helps and when it hinders makes the difference between glossy, defined coils and lifeless, product-clogged hair.

    What Beeswax Does in Curly Hair Products

    Beeswax is a natural wax produced by honeybees, valued in hair care for its ability to create a protective film on the hair shaft. Unlike lightweight oils or water-based gels, beeswax delivers intense hold and a distinctive sheen that can last for days. It’s neither water-soluble nor easily absorbed, which explains both its benefits and its drawbacks for curly textures.

    How Beeswax Seals and Protects the Hair Shaft

    When applied to hair, beeswax creates an occlusive barrier that locks moisture inside the strand while shielding it from environmental humidity. This sealing action works especially well on low-porosity hair that already resists moisture absorption, because the primary goal becomes trapping whatever hydration you’ve already introduced through your leave-in conditioner or cream.

    Research on beeswax’s occlusive properties in cosmetics confirms that it forms a semi-permeable film that reduces transepidermal water loss. On hair, this translates to longer-lasting style retention and protection against frizz-inducing humidity. The wax physically smooths down the cuticle layer, creating a more uniform surface that reflects light and appears shinier.

    Hold, Shine, and Frizz Control Properties

    Beeswax delivers firm hold without the crunch that many gels create. It binds hair strands together through mechanical adhesion rather than chemical polymerization, which means your curls stay flexible rather than stiff. This makes it particularly useful for sleek edge control, twist-outs, and styles that need to hold their shape through multiple days without remolding.

    The shine beeswax provides is distinctly glossy, sometimes approaching an almost waxy sheen. For type 4A curls and coarser textures that naturally appear matte, this reflective quality can enhance the appearance of healthy hair. However, the same shine can look greasy or heavy on finer curl patterns that already have more natural luster.

    Why It Shows Up in Styling Balms and Pomades

    Manufacturers incorporate beeswax into edge controls, pomades, styling balms, and finishing sticks because it offers unmatched hold and water resistance. According to beeswax in hair care formulations, it also acts as an emulsifier and thickening agent, giving products their signature firm texture that softens when warmed between your palms.

    Unlike many synthetic hold ingredients, beeswax is shelf-stable and doesn’t require preservatives to maintain its effectiveness. This natural stability makes it popular in clean beauty formulations, though “natural” doesn’t automatically mean “appropriate for all hair types.”

    Which Curl Types Can Handle Beeswax (and Which Struggle)

    Not all curls respond to beeswax the same way. Your hair’s diameter, porosity, and natural texture pattern determine whether this ingredient will enhance your routine or create frustrating buildup.

    Compatibility with Coarse, Low-Porosity Hair (Types 4A–4C)

    Coarse, tightly coiled hair with low to normal porosity tolerates beeswax better than any other curl category. These hair types benefit from the intense moisture seal because their cuticle structure naturally resists hydration. The firm hold helps maintain intricate styles like bantu knots, two-strand twists, and protective updos that need to last several days.

    For 4C coils in particular, a small amount of beeswax on edges and ends can prevent the rapid moisture loss that leads to dryness and breakage. The key is using it as a final sealing step after applying water-based moisturizers, not as a primary styling product throughout your entire head. If you have hair with low porosity, you’ll want to ensure your hair is thoroughly moisturized before applying any wax-based product.

    Why Fine Wavy Hair (2A–2B) Often Gets Weighed Down

    Fine-textured wavy hair struggles with beeswax because the strand diameter can’t support the weight of the occlusive film. What creates beautiful definition on a thick coil becomes a limp, greasy coating on a delicate wave. Type 2A hair especially lacks the natural resilience to bounce back once coated with heavy wax.

    Beyond weight concerns, fine hair shows buildup faster. Since there are typically more individual strands per square inch on finer hair, you’re applying proportionally more product to cover the same area. This concentration of wax creates visible residue, dulls shine rather than enhancing it, and makes hair feel sticky or tacky to the touch.

    The Middle Ground: Types 2C–3C Considerations

    Medium-textured curls from 2C through 3C occupy a nuanced zone where beeswax works for some people and fails for others. Variables like individual strand thickness, density, and porosity matter more than curl pattern alone.

    If you fall into this range, your best approach is targeted application rather than all-over use. Reserve beeswax products for specific problem areas like frizzy ends, unruly baby hairs, or pieces that refuse to clump with the rest of your curl pattern. A rice-grain-sized amount warmed and smoothed over just the problem zones delivers control without the all-over heaviness that causes issues.

    Common Problems: Buildup, Dullness, and Clarifying Needs

    Even when beeswax works initially, cumulative use creates challenges that require specific solutions. Understanding the warning signs helps you adjust your routine before minor buildup becomes a major problem.

    Signs Your Hair Has Too Much Wax Residue

    Wax buildup announces itself through several telltale symptoms. Your hair feels coated or slick even when dry, as if there’s an invisible layer between your fingers and the actual strand. Curls lose their bounce and definition, hanging limply instead of springing back when stretched. Water beads up on the surface during washing rather than absorbing quickly, and your regular shampoo produces little to no lather.

    Another clear indicator is color change. Hair with significant wax accumulation often appears darker or duller than usual because the coating interferes with light reflection. If your curls look matte when they’re usually glossy, or if they seem perpetually dirty despite regular washing, accumulated wax is a likely culprit.

    How Beeswax Interacts with Other Product Layers

    Beeswax’s occlusive nature means it blocks absorption of any product applied after it. If you layer a wax-based pomade over your hair, then try to add a water-based gel or cream on top, those lighter products sit on the wax film rather than penetrating to the hair shaft. This creates a slippery, pilled texture that never fully dries.

    The interaction becomes especially problematic in multi-day styling routines. When you refresh curls on day two or three by adding more leave-in or curl cream, those products can’t reach your hair if yesterday’s wax is still coating it. Instead of revitalized curls, you get sticky buildup that attracts lint and loses all definition.

    Effective Clarifying Methods That Won’t Strip Moisture

    Removing beeswax requires more than your regular curly hair shampoo. The most effective approach is a two-step clarifying process: start with an oil-based cleanser or a pre-shampoo oil treatment that dissolves the wax, followed by a sulfate-containing clarifying shampoo that removes both the oil and wax together.

    For the oil phase, warm coconut oil, jojoba oil, or even a lightweight oil blend between your palms and work it through dry hair, concentrating on areas with the most buildup. Let it sit for 10 to 15 minutes to break down the wax. Then apply your clarifying shampoo directly to the oiled hair without wetting it first. The oil helps the surfactants in the shampoo grab onto the wax molecules. After emulsifying for a minute, add water and work into a lather. You’ll likely need a second shampoo to feel fully clean.

    Follow this intensive clarification with a deep conditioning treatment to replace any moisture lost during the process. Plan to clarify after every third or fourth use of wax-based products to prevent accumulation.

    How to Use Beeswax Products Without Overdoing It

    Strategic application makes the difference between beeswax enhancing your style and overwhelming your hair. Less is genuinely more with this concentrated ingredient.

    Application Techniques for Edges, Ends, and Flyaways

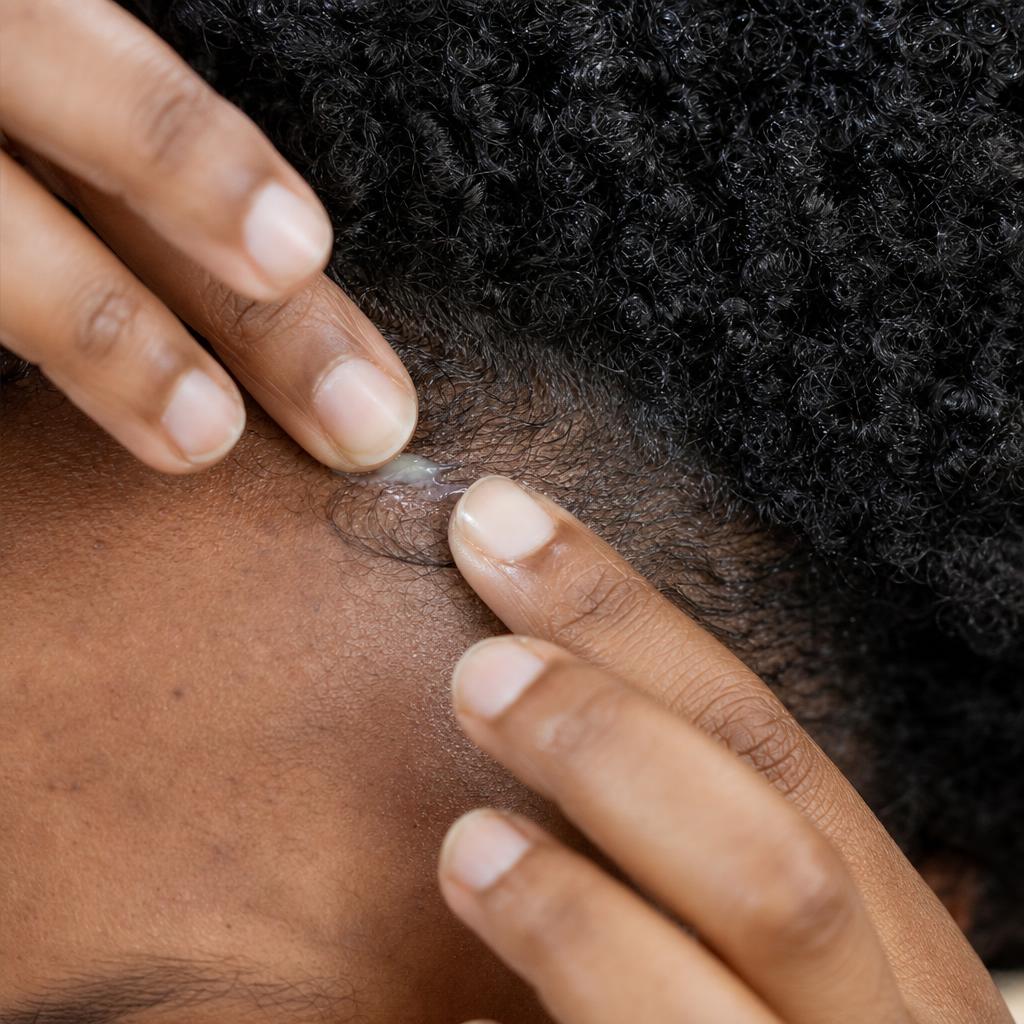
    For edge control, use the smallest amount possible. Scrape a thin layer from your container with your fingernail rather than scooping with a finger, which grabs too much product. Warm it between your index finger and thumb until it becomes pliable, then apply to edges using light, pressing motions rather than rubbing back and forth.

    When addressing flyaways or frizzy ends, the technique changes slightly. Take that same minimal amount, rub it thoroughly between all your palms until your hands feel barely tacky, then smooth over the problem areas. This distribution method ensures you’re applying a microscopic layer that controls without coating.

    Never start at your roots with wax-based products unless you’re deliberately slicking down edges. Begin at mid-length or lower, applying only to the surface of your curl clumps, not saturating through to the interior of your style.

    Diluting Heavy Wax Formulas with Lighter Products

    If you own a wax-based product that works well but feels too heavy, you can modify its consistency by mixing it with lighter formulas. Combine a small amount of your beeswax pomade with a water-based gel or curl mousse in your palm before applying. This creates a custom blend with less concentration of wax per application.

    Another dilution method involves mixing the wax product with aloe vera gel or even plain water. While beeswax itself isn’t water-soluble, most commercial products contain emulsifiers that allow them to blend temporarily with water-based ingredients. You’ll need to work quickly before the mixture separates, but this technique gives you more spreadable coverage with less product intensity.

    Frequency Guidelines and Wash-Day Timing

    Limit beeswax use to once or twice per week maximum, even if you’re only applying it to small sections. On multi-day styles, resist the urge to reapply more wax during refreshes. Instead, use water-based products for mid-week touch-ups and save the wax for fresh wash-and-go or twist-out starts.

    Timing matters within your wash day sequence as well. Beeswax should always be your absolute final step, applied only after all other styling products have been distributed and your curls are completely defined. Think of it as a finishing touch rather than a foundation product. If you’re following a standard routine with your leave-in product, curl cream, and gel, the wax comes after all three have been applied and your hair is beginning to dry.

    Alternatives to Pure Beeswax for Curly Hair

    If beeswax creates problems for your hair type or lifestyle, several alternatives deliver similar benefits with fewer drawbacks.

    Water-Soluble Wax Blends and Emulsified Formulas

    Modern formulations combine beeswax with emulsifiers that make the final product easier to wash out. These emulsified waxes give you the hold and shine of traditional wax with better removability during regular shampooing. Look for products listing beeswax as a secondary ingredient rather than the first or second component, which indicates a lighter wax concentration in a water-dispersible base.

    Some brands use synthetic waxes like PVP (polyvinylpyrrolidone) that dissolve in water while still providing firm hold. These alternatives work especially well for people who need strong edge control but struggle with buildup from natural waxes.

    Butter-Based and Oil-Based Sealants

    Shea butter, mango butter, and cocoa butter offer sealing properties without beeswax’s extreme occlusion. These plant-based alternatives feel richer and more emollient, making them better choices for dry hair that needs both hold and moisture. They’re softer at room temperature, spread more easily, and wash out with less aggressive clarifying.

    Oil-based serums and pomades made from castor oil, argan oil, or jojoba oil provide shine and light hold without creating the same film that waxes do. While they don’t offer the same level of extreme hold for edges or slicked styles, they work well for everyday frizz control and adding gloss to finished styles.

    When to Choose Gel or Mousse Instead

    For all-over styling rather than targeted smoothing, water-based gels and mousses provide hold without buildup concerns. Strong-hold gels deliver comparable definition and frizz control to wax-based products but rinse out completely with regular shampooing. Using mousse instead of wax gives you volume and bounce that heavy waxes can suppress.

    If you primarily use beeswax products for multi-day style longevity, consider that a well-formulated gel with film-forming polymers can offer the same lasting power. Modern curl gels create flexible cast that protects your curl pattern through several days of wear without the accumulation issues that come with wax.

    Frequently Asked Questions About Beeswax for Curly Hair

    Is beeswax bad for curly hair?

    Beeswax isn’t inherently bad, but it’s unsuitable for many curl types. Fine and medium-textured hair often gets weighed down and experiences stubborn buildup, while coarse, low-porosity hair typically handles it well. The ingredient itself isn’t harmful, but incorrect use for your specific hair type leads to dullness, reduced moisture absorption, and the need for frequent clarifying treatments.

    Can you use beeswax on wet curly hair?

    Applying beeswax to soaking-wet hair prevents proper product distribution and creates uneven coating. Your hair should be damp to barely dry when you apply wax-based products, and they should always be your final styling step. Water and beeswax don’t mix well, so wet application leads to pilling, white residue, and product that never fully sets into your style.

    How often should you wash out beeswax buildup?

    Most people need a clarifying wash after every three to four uses of beeswax products, even with minimal application. If you use wax-based pomades or edge controls daily, plan to clarify weekly. Between clarifying sessions, use a sulfate-free shampoo that contains some cleansing power rather than relying only on co-washing, which can’t break down wax accumulation.

    Does beeswax help with frizz control?

    Yes, beeswax controls frizz by creating a physical barrier that seals the cuticle and blocks humidity. It works particularly well on flyaways and baby hairs around the hairline. However, this frizz control comes at the cost of flexibility and easy removal. For everyday frizz management rather than special occasions or sleek styles, lighter alternatives like oil serums or anti-humidity gels provide similar benefits without buildup concerns.

    Can beeswax cause hair breakage?

    Beeswax itself doesn’t directly cause breakage, but the buildup it creates can lead to problems that result in damage. When wax accumulates on hair, it blocks moisture from penetrating the strand, eventually leading to dryness and brittleness. Additionally, the aggressive clarifying required to remove stubborn wax buildup can strip hair of natural oils if done too frequently or harshly, weakening strands over time.

    Conclusion

    Beeswax earns its place in curly hair care for specific applications, especially for coarse textures that need serious hold and moisture sealing. But treating it as an everyday staple rather than a targeted tool leads to the buildup, dullness, and frustration that give this ingredient its mixed reputation. Your curl type, porosity, and styling goals should determine whether beeswax helps or hinders your routine.

    Start by assessing your hair’s response to heavy products in general. If your curls bounce back after using thick creams and butters, a small amount of beeswax for edge control or twist-out definition might work beautifully. If your hair deflates under anything heavier than a light gel, skip the wax entirely and explore the water-soluble alternatives that deliver hold without the commitment. When you do use beeswax, apply it sparingly to specific zones rather than coating your entire head, and keep a clarifying routine in your back pocket for the inevitable moment when your hair needs a fresh start. Master these boundaries, and beeswax becomes a useful specialty ingredient rather than a source of constant product buildup.

  • Apple Cider Vinegar for Curly Hair: Complete Rinse Guide

    Apple Cider Vinegar for Curly Hair: Complete Rinse Guide

    Apple cider vinegar has become one of the most popular natural hair treatments in the curly community, and for good reason. When used correctly, an ACV rinse can restore shine, remove buildup, and reset your curls in ways that expensive salon treatments promise but don’t always deliver. The catch? Dilution ratios, application methods, and frequency matter enormously, and what works beautifully for loose waves can be disastrous for tight coils. This guide walks you through exactly how to use apple cider vinegar for every curl type, when it helps, and when to skip it entirely.

    Why Apple Cider Vinegar Works for Curly Hair

    Apple cider vinegar isn’t just a kitchen staple that got repurposed for hair care. Its effectiveness comes down to measurable chemistry that directly addresses the specific challenges curly hair faces: raised cuticles, stubborn buildup, and scalp pH imbalances that straight hair types rarely experience to the same degree.

    pH Balance and the Curl Cuticle

    Your hair’s natural pH sits around 4.5 to 5.5, which is slightly acidic. Most shampoos, especially clarifying shampoo formulas, push that pH higher (more alkaline), causing the hair cuticle to swell and open. For curly hair, which already has a naturally raised cuticle structure compared to straight hair, this creates frizz, dullness, and tangling.

    Apple cider vinegar has a pH of approximately 2.5 to 3.5. When diluted properly (we’ll get to ratios soon), it brings your hair back to its ideal acidic range. This causes the cuticle layers to lie flat again, which is why the immediate result after an ACV rinse is often smoother, shinier hair with better-defined curl clumps. The antimicrobial properties of acetic acid (the main component in vinegar) also contribute to scalp health, though the pH-balancing effect is what creates the visible transformation in your curls.

    Buildup Removal Without Stripping

    Curly hair routines often involve layering products: leave-in conditioners, curl creams, gels, oils. Even if you’re using high-quality products, residue accumulates on the hair shaft and scalp over time. Hard water minerals, silicones (even water-soluble ones), and waxy ingredients from stylers create a film that weighs curls down and blocks moisture from penetrating the hair shaft.

    ACV works as a gentle clarifier because its acidic nature helps dissolve these deposits without the harsh sulfates found in traditional clarifying shampoos. It’s particularly effective at breaking down mineral buildup from hard water, which is why people who struggle with oily scalp issues or limp curls despite regular washing often see dramatic improvements after introducing ACV rinses. Unlike sulfate shampoos that strip everything (including beneficial oils), ACV targets buildup while leaving your natural sebum relatively intact.

    Scalp Health Benefits

    The same acidity that smooths your cuticle also creates an environment on your scalp that discourages fungal overgrowth and bacterial imbalance. Many scalp issues that plague curly-haired people (itchiness, flaking, inflammation) stem from pH disruption or microbial imbalances, both of which ACV helps address.

    Apple cider vinegar also helps remove dead skin cells and product residue from the scalp itself, improving follicle health. Healthier follicles produce stronger hair, which is especially important for type 4A coils and other tightly curled patterns that are naturally more fragile at the root. However, dermatologists caution that ACV should supplement, not replace, proper scalp health and hair care tips from dermatologists, including regular cleansing and moisturizing practices.

    How to Make an ACV Rinse: Dilution Ratios by Hair Type

    This is where most people go wrong with apple cider vinegar. Used at full strength, ACV is far too acidic and will damage your hair and irritate your scalp. The right dilution makes all the difference between a transformative treatment and a hair disaster.

    Basic ACV Rinse Formula

    The standard dilution ratio is 1 tablespoon of apple cider vinegar to 1 cup (8 ounces) of water. This creates a solution mild enough for most curl types while still being effective at pH balancing and buildup removal. Mix the solution in an applicator bottle or a cup you can pour from, and always prepare it fresh rather than storing it for weeks.

    For your first ACV rinse, start with this conservative ratio regardless of your hair type. You can always increase the strength if you don’t see results, but you can’t undo damage from a too-strong mixture.

    Adjusting Strength for Waves (2a-2c)

    Wavy hair, particularly type 2A hair, tends to be finer in texture and more prone to looking greasy or weighed down by products. These hair types often benefit from slightly stronger ACV rinses because they accumulate buildup faster and can handle more frequent clarifying.

    For waves, you can increase to 2 tablespoons of ACV per cup of water once you’ve tested the basic ratio. Fine wavy hair also responds well to ACV when you’re dealing with limp, undefined waves that won’t hold a curl pattern. The cuticle-smoothing effect helps waves clump better and maintain definition throughout the day.

    Adjusting Strength for Coils (4a-4c)

    Coily hair types (4A, 4B, 4C) have different needs entirely. These curl patterns are naturally drier, more fragile, and more susceptible to protein overload. For coils, the standard 1 tablespoon per cup ratio is actually the maximum strength you should use, and many people with type 4 hair do better with an even gentler mixture: 1 to 2 teaspoons per cup of water.

    Coily hair benefits more from the pH-balancing properties of ACV than from aggressive buildup removal, since these hair types typically can’t tolerate heavy product layering anyway. The goal with coils is to smooth the cuticle and enhance shine without risking the dryness that overly acidic treatments can cause.

    What Kind of ACV to Buy

    Choose raw, unfiltered apple cider vinegar that contains “the mother” (those cloudy strands you see floating in the bottle). Brands like Bragg are widely available and work perfectly. The mother contains beneficial enzymes and proteins, though honestly, even filtered ACV will work for the pH-balancing effects.

    Avoid ACV rinse products that come pre-diluted in fancy bottles at premium prices. You’re paying for water and packaging. A $5 bottle of raw ACV will give you months of rinses when you dilute it yourself.

    How to Apply an Apple Cider Vinegar Rinse

    Application method matters as much as dilution ratio. Done correctly, an ACV rinse takes less than five minutes and slots easily into your existing wash routine.

    Step-by-Step Application Method

    Apply your ACV rinse after shampooing and conditioning, not before. This is crucial. Shampoo cleanses, conditioner adds moisture and slip, and then the ACV rinse comes in as a final pH-balancing step that seals everything in.

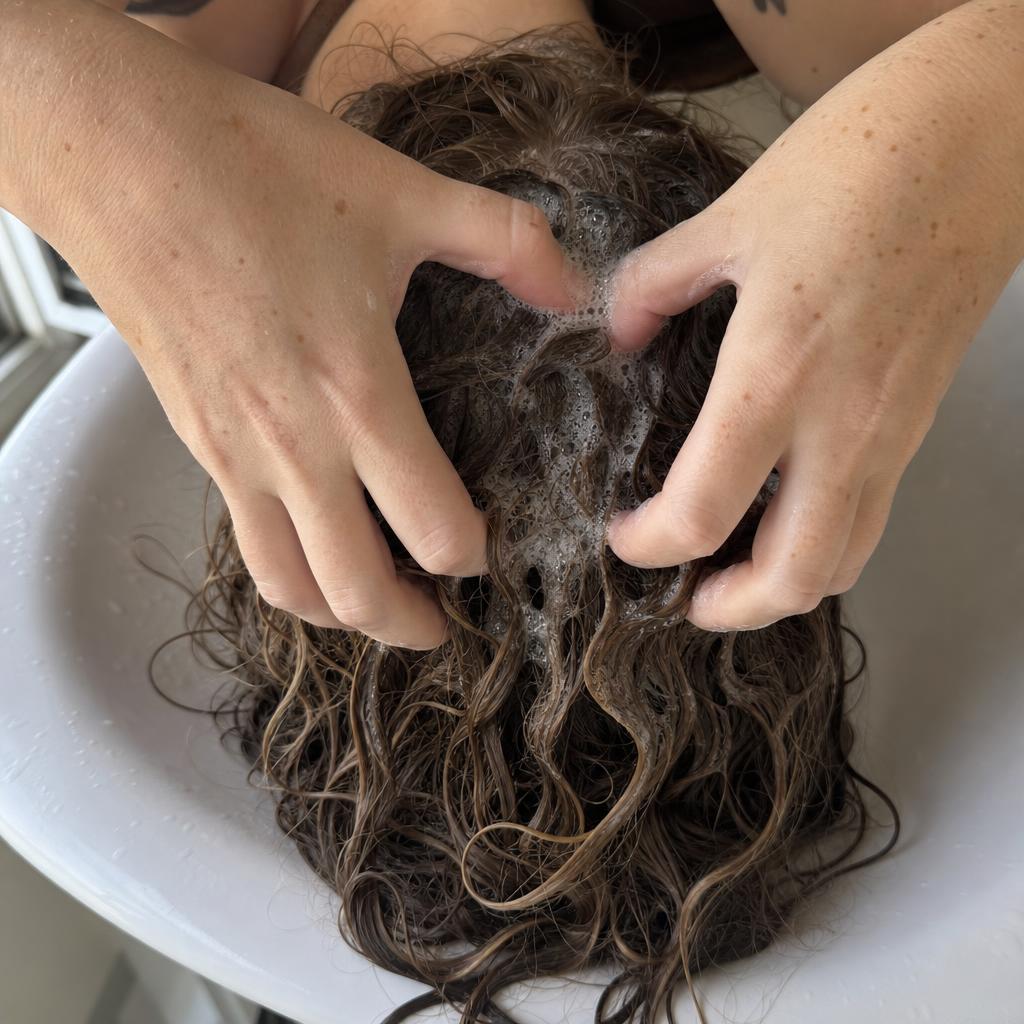
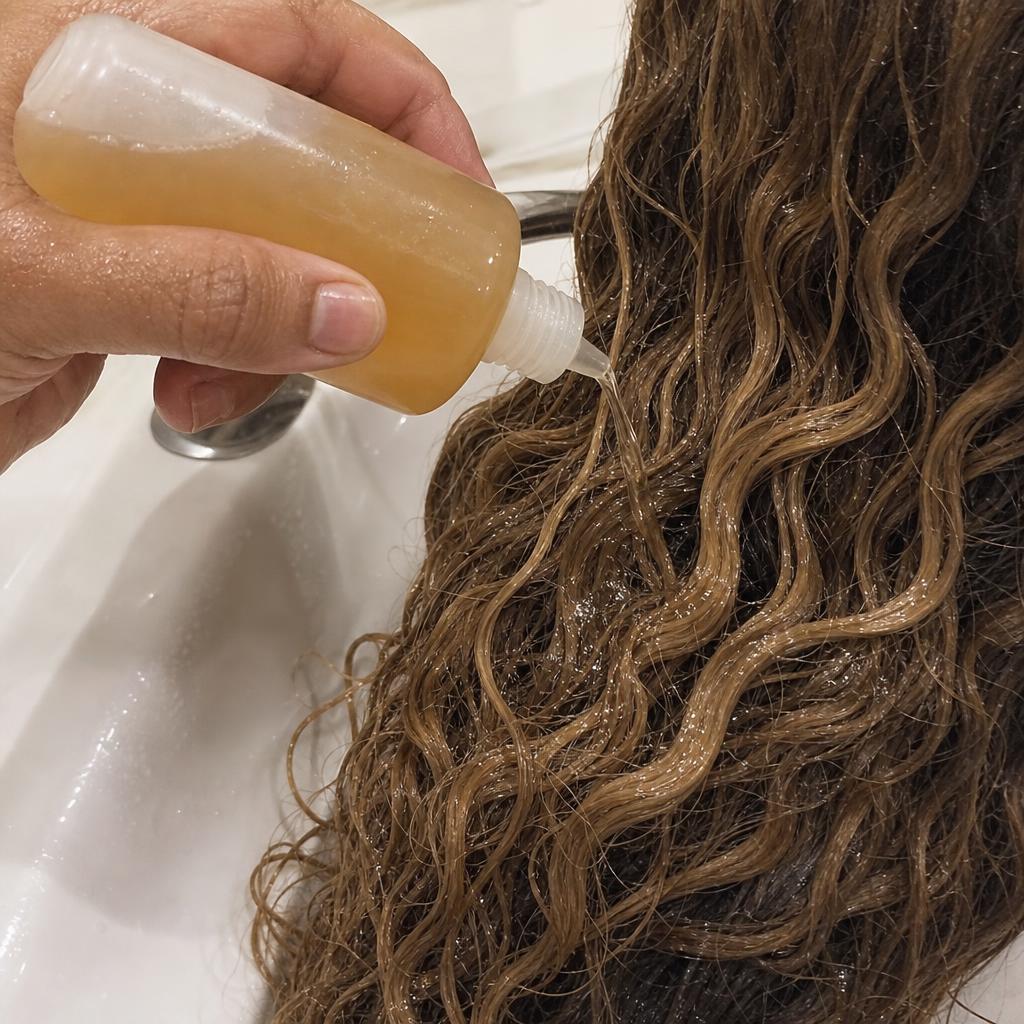
    After rinsing out your conditioner, pour the diluted ACV mixture slowly over your entire scalp, working in sections to ensure even coverage. Use your fingertips to gently massage the rinse into your scalp for 30 to 60 seconds. Then work the remaining liquid through your lengths by scrunching or smoothing, depending on your curl pattern.

    For low porosity hair, which resists both moisture and product penetration, focus the ACV rinse more on the scalp and roots rather than saturating your lengths. Low porosity curls can become overly acidic if you concentrate ACV on the hair shaft itself, leading to brittle, crunchy texture.

    How Long to Leave It On

    You don’t need to leave an ACV rinse on for extended periods. The pH-balancing effect happens almost immediately on contact. Thirty seconds to two minutes is plenty of time for the rinse to work. If you have a particularly itchy or flaky scalp, you can extend it to three or four minutes, but leaving ACV on longer than that doesn’t increase benefits and can actually start to irritate sensitive scalps.

    Some people experience a slight tingling sensation during application, which is normal if you have any minor scalp irritation or small scratches. If you feel burning or significant discomfort, rinse immediately. Your mixture is either too strong, or you have a sensitivity to vinegar.

    Rinsing (or Not): What Works Best

    This is the most debated aspect of ACV rinses. Some curl experts swear by rinsing the ACV out completely with cool water after the treatment period. Others advocate for leaving it in, claiming the residual acidity continues to benefit your hair as it dries.

    The reality is that it depends on your hair type and the strength of your mixture. For fine, wavy hair that gets greasy easily, rinsing out the ACV thoroughly prevents any potential residue or smell. For thick, coily hair that needs all the moisture retention it can get, leaving in a very dilute ACV rinse (the 1 teaspoon per cup ratio) can actually help seal the cuticle without causing dryness.

    Most people find a middle ground works best: rinse with cool water for 15 to 30 seconds rather than doing a full, thorough rinse. This removes excess ACV while leaving behind enough to maintain the pH benefit.

    How Often to Use ACV Rinses by Curl Type

    Frequency is where people most commonly overdo it with ACV. More is not better. Apple cider vinegar is a clarifying treatment, not a daily conditioner, and treating it like something you should do every wash day will backfire.

    Frequency for Fine Wavy Hair

    Wavy hair types (2A, 2B, 2C) can typically handle ACV rinses every one to two weeks. If you have very fine, easily-weighed-down waves and you live in an area with hard water, you might even benefit from weekly rinses. Pay attention to how your hair responds: if your waves are bouncy, shiny, and well-defined after an ACV rinse, you’ve found your rhythm.

    If you’re using a lot of styling products or you have an oily scalp that requires frequent washing, weekly ACV rinses can help prevent the buildup cycle that makes waves look stringy or limp.

    Frequency for Thick Curly Hair

    Medium to thick curly hair (types 3A through 3C) generally does best with ACV rinses every two to three weeks. These curl patterns don’t accumulate buildup as quickly as fine waves, and they need more moisture retention than frequent acidic treatments allow.

    Use buildup as your guide rather than sticking to a rigid schedule. When your curls start feeling coated, looking dull, or losing their usual definition despite proper styling, that’s when an ACV rinse will deliver the most noticeable reset.

    Frequency for Coily Hair

    Coily hair types should approach ACV with caution regarding frequency. Once every three to four weeks is plenty for most people with 4A, 4B, or 4C hair. Some people with very dry, protein-sensitive coils do better limiting ACV rinses to once every six to eight weeks, using them only when they notice significant buildup that regular shampooing won’t address.

    Coily hair is naturally more porous along the length (even if you have low porosity at the cuticle), which means acidic treatments penetrate more readily and can disrupt moisture balance if overused. When in doubt, do ACV rinses less often rather than more often.

    Signs You’re Using ACV Too Often

    Your hair will tell you when you’ve crossed the line with ACV frequency. Watch for these warning signs: dryness or straw-like texture even after deep conditioning, increased breakage or shedding, curls that look stringy or won’t clump properly, scalp irritation or increased flaking, and hair that feels rough or tangles more than usual.

    If you notice any of these issues after starting ACV rinses, cut back immediately. Skip your next planned rinse and focus on moisture-rich deep conditioning treatments to rebalance your hair.

    When ACV Doesn’t Work (and What to Try Instead)

    Apple cider vinegar isn’t a universal solution, despite its popularity. Some hair types and conditions respond poorly to ACV, and knowing when it’s not right for you saves you from weeks of frustration.

    Protein-Sensitive Hair and ACV

    If your hair reacts badly to protein treatments, becoming stiff, brittle, or straw-like, you might also struggle with ACV. While apple cider vinegar isn’t a protein treatment, the way it tightens and smooths the cuticle can create a similar effect in protein-sensitive hair. The hair becomes temporarily stronger but loses elasticity and moisture retention.

    People with protein sensitivity often notice their hair feels initially great after an ACV rinse but then becomes increasingly dry and prone to breakage over the following days. If this happens to you, ACV rinses simply aren’t compatible with your hair chemistry, regardless of your curl type.

    Low Porosity Hair Concerns

    The relationship between low porosity hair types and ACV is complicated. In theory, the cuticle-sealing properties of ACV should benefit low porosity hair by enhancing its naturally smooth cuticle structure. In practice, many people with low porosity curls find that ACV makes their hair even more resistant to moisture absorption.

    If you have low porosity curls, try limiting ACV to just your scalp and roots rather than saturating your lengths. Use the most dilute ratio (1 teaspoon per cup) and rinse thoroughly. If you still find your hair feels coated or moisture won’t penetrate even after deep conditioning, ACV isn’t helping you, and you should look at alternatives.

    Alternative Clarifying Rinses

    When ACV doesn’t work, you have other options for clarifying and pH-balancing your curls. A rice water rinse offers similar smoothing and shine benefits with less acidity, making it gentler for protein-sensitive or very dry hair. The starchy water left over from rinsing rice can be diluted and used as a final rinse.

    Aloe vera juice diluted with water (1:3 ratio) provides pH balancing without the protein-like effects of ACV. It’s particularly good for people who need buildup removal but have hair that becomes brittle easily.

    For stubborn buildup that gentle rinses won’t touch, a traditional clarifying shampoo used once a month is more effective than trying to make ACV work when your hair clearly doesn’t like it. Choose a the right shampoo for your curls and follow immediately with a deep conditioning treatment to restore moisture.

    Frequently Asked Questions

    Will my hair smell like vinegar after an ACV rinse?
    The vinegar smell dissipates almost completely as your hair dries, especially if you rinse the ACV out with water. By the time your hair is fully dry, any remaining scent is undetectable. If you’re concerned about smell, adding a few drops of essential oil (lavender or rosemary work well) to your diluted mixture can provide a pleasant scent during application.
    Can I use white vinegar instead of apple cider vinegar?
    White vinegar works for pH balancing since it has similar acidity, but it lacks the beneficial enzymes and nutrients found in raw apple cider vinegar. If ACV isn’t available, white vinegar diluted at the same ratios will still smooth your cuticle and remove buildup, but you won’t get the additional scalp health benefits.
    Should I use ACV before or after deep conditioning?
    After. Deep conditioning treatments work best on hair with a slightly raised cuticle, which allows the moisturizing ingredients to penetrate. If you use ACV first, you’ll seal the cuticle and reduce how much benefit you get from your deep conditioner. The proper order is: shampoo, condition or deep condition, then ACV rinse as the final step.
    Can ACV lighten my hair color?
    Apple cider vinegar is acidic but not a bleaching agent. It won’t significantly lighten dark hair. Some people with very light blonde or color-treated hair notice minimal lightening over time with frequent use, but this is more about the acidic environment gradually lifting color molecules rather than active bleaching. If you have color-treated hair, use ACV rinses less frequently and always follow with a color-protecting conditioner.
    Is it normal for my scalp to tingle during an ACV rinse?
    Mild tingling is normal, especially if you have any minor scalp irritation or sensitivity. It should feel like a slight cooling or tingling sensation, not burning. If you experience burning, stinging, or significant discomfort, your mixture is too strong or you have a sensitivity to vinegar. Rinse immediately and either dilute your mixture more next time or skip ACV rinses entirely.

    Conclusion

    Apple cider vinegar rinses work beautifully for curly hair when you match the dilution strength, application method, and frequency to your specific curl type and hair needs. The science behind ACV is solid: it rebalances pH, removes buildup, and creates the smooth cuticle structure that gives you defined, shiny curls. But it’s not a one-size-fits-all treatment, and recognizing when ACV isn’t working for your hair is just as important as knowing how to use it correctly.

    Start with a conservative dilution (1 tablespoon per cup of water), apply after conditioning, and use it no more than every two weeks while you learn how your hair responds. Your curls will show you whether they love the reset that ACV provides or whether gentler alternatives serve you better. The goal isn’t to follow trends but to give your specific curl pattern exactly what it needs to thrive.