If you have looked at Denman brushes on Amazon, you have probably felt the confusion: a dozen near-identical black brushes with names like D3, D4, D31 and D41, and no obvious way to tell which one is right for you. It is one of the most common questions in the curly-hair world, and the honest answer is simpler than the product pages make it look.
The whole Denman range really comes down to one thing: how many rows of pins the brush has, and how close together they sit. Once you understand that, picking the right one takes about two minutes. This guide breaks down the models that actually matter, explains which suits your hair, and helps you buy once rather than guessing.
Every product here is one we would happily recommend to a friend. We earn a small commission if you buy through our links, at no extra cost to you, and that never changes which products make the list.
The quick answer
Most curly and wavy people want the D3 (7-row), the classic that defines curls beautifully on short to medium hair. Choose the D4 (9-row) if your hair is longer, thicker or denser and you want more grip. Choose the 5-row if you have short hair, want something gentler, or need a compact brush for travel. Here they are side by side.
[[PRODUCTGRID:B00197623M,B003KQ946M,B000OUBC8A]]
How Denman brushes actually differ
Denman styling brushes all work the same way: rows of round-ended nylon pins set into a rubber cushion, spaced to grip your hair, distribute product, and clump curls together into defined pieces. This is the technique curlies call “denman-ing” or “brush styling,” and it is what gives you smooth, defined curls rather than frizz.
The models differ on two things: the number of rows (more rows means a bigger brush and more tension) and how close together the pins sit (closer pins give more definition, wider-spaced pins glide more gently and snag less). More rows and closer pins equals more definition and control. Fewer rows and wider pins equals gentler detangling and less pull. That is genuinely the whole system.
Denman D3 (7-row): the best all-rounder for most curly hair
The D3 is the original Denman styler and the one most curly-hair guides call the gold standard. Its 7 rows of close-set pins are the sweet spot for defining curls: enough grip to clump and shape your pattern, without so much tension that it drags or causes breakage. It is the multi-tool of the range, used for detangling, styling, smoothing and defining, and it works across most wavy and curly hair on short to medium lengths.
If you are new to brush styling and not sure where to start, this is the answer. It is the most forgiving, the most versatile, and the one the largest number of people end up happiest with. Only look elsewhere if your hair is very long and thick, or very short.
Best for: most wavy to curly hair, short to medium length, and anyone starting out. Skip if: your hair is very long and dense, or very short.
[[PRODUCT:B00197623M]]
Not sure what your curl type actually is? It changes which tools and products work best. Get your free personalised curl routine and we will send the exact steps for your hair.
Denman D4 (9-row): best for longer, thicker hair
The D4 is the D3’s bigger sibling. It adds two more rows of close-set pins, for nine in total, which means more surface area, more grip and more tension in each stroke. That extra tension is exactly what longer, thicker or denser hair needs to define properly, and it is also why the D4 is a favourite for smoothing and blow-dry styling.
The trade-off is that all that grip can feel like too much on fine or short hair, tugging rather than gliding. If your hair is on the longer side, or simply thick and dense, the D4 gives you the control the D3 sometimes cannot. If your hair is fine or short, the D3 or the 5-row will feel kinder.
Best for: longer, thicker, denser hair, and smoothing or blow-dry styling. Skip if: your hair is fine, short or easily tugged.
[[PRODUCT:B003KQ946M]]
Denman 5-row styler: best compact and gentle option
The 5-row Denman is the smallest of the styling brushes, and it fills a real gap. With fewer rows it is lighter, narrower and gentler, which makes it ideal for short hair, for getting into smaller sections, and for anyone who finds the 7-row D3 to be more brush than they want. It is also the natural travel pick, since it takes up less space in a bag.
You lose some of the clumping power of the bigger brushes, so it is not the choice if maximum definition on long hair is your goal. But for short styles, gentle everyday use, or a second brush to travel with, it is genuinely handy.
Best for: short hair, gentle everyday use, small sections and travel. Skip if: you have long, thick hair and want maximum definition.
[[PRODUCT:B000OUBC8A]]
Which Denman brush for your curl type?
If you would rather choose by your hair rather than the model number, here is the short version:
Wavy hair (type 2): your hair is finer and flattens easily, so you want closer pins for definition without weight. The D3 is the sweet spot; the 5-row works well for shorter waves.
Curly hair (type 3): the D3 is the classic pick for short to medium curls, and the D4 for longer or thicker curls that want more tension and grip.
Coily hair (type 4): tighter coils are more fragile, so detangle first with a wide-tooth comb, then use the D3 or D4 gently for definition. If any brush snags, a well-known trick is to remove every other row of pins so hair passes through more easily.
Frequently Asked Questions
What is a Denman brush and what does it do?
A Denman brush is a styling brush with rows of round-ended pins set in a rubber cushion. For curly hair, it grips and clumps your curls together as you brush product through soaking wet hair, creating smooth, defined curls with less frizz. The same brush also detangles, smooths and helps with blow-dry styling, which is why it is such a popular multi-purpose tool.
What is the difference between the Denman D3 and D4?
The main difference is size and tension. The D3 has 7 rows of pins and the D4 has 9, with both sets of pins spaced closely for definition. The extra two rows on the D4 give more grip and tension, which suits longer, thicker or denser hair, while the D3 is the more versatile all-rounder for short to medium hair. If you are unsure, most people are happiest starting with the D3.
Is a Denman brush good for curly hair?
Yes, a Denman is one of the most popular tools for defining curls. The pins are spaced to grip and clump curls together rather than separating them into frizz, which enhances your natural pattern. It works across wavy, curly and coily hair, though very tight or fragile coils should be detangled with a wide-tooth comb first and brushed gently.
How do you use a Denman brush on curly hair?
Apply your styling product to soaking wet hair, then take a section and brush from root to tip, letting the pins clump the curl together. Work in sections, re-shaping curls as you go, then air-dry or diffuse on low. Using it on wet hair with product is what creates definition; brushing dry hair will just cause frizz.
How many rows should my Denman brush have?
Choose fewer rows for shorter or finer hair and gentler use, and more rows for longer, thicker hair that needs extra grip. The 7-row D3 is the versatile middle ground that suits most people, the 9-row D4 adds tension for longer or denser hair, and the 5-row is the compact, gentle option for short hair and travel.
The bottom line
For most people the choice is simple: get the D3 (7-row). It is the classic, the most versatile, and the one the largest number of curly and wavy heads are happiest with. Reach for the D4 (9-row) instead if your hair is long, thick or dense and wants more grip, and pick the 5-row if you have short hair, want something gentler, or need a compact brush to travel with.
Whichever you choose, remember the technique matters as much as the brush: use it on soaking wet hair with product, work in sections, and let your curls dry undisturbed. Do that, and any of these three will help you get smoother, more defined curls.
The right curl gel is the difference between frizz-prone, undefined hair and a wash-and-go that holds all day. But the gel aisle is a minefield, because gels, creams and jellies sit side by side with very little to tell you which does what, or which suits your curls. This guide cuts through it.
Below are six of the best curl gels for every kind of texture, from budget strong-hold staples to light jellies for waves and firm gels built for coils and protective styles. Each pick includes who it is best for and who should skip it, so you can match a gel to your exact curl pattern and goal rather than guessing.
Some of the links in this article are affiliate links, which means we may earn a small commission if you buy through them, at no extra cost to you. We only recommend products we would genuinely suggest to someone with your curls.
The best curl gels at a glance
Here is the full lineup. Read on for who each one is best for. [[PRODUCTGRID:B001SB45L0,B00MKCMDMY,B07H38WW5C,B0081K2R2U,B09VNXSCQ2,B071L1SJLP]]
Eco Style Curl and Wave Gel: best budget pick
Eco Style is the gel a lot of curly folks reach for first, and for good reason. It is inexpensive, widely available, and gives firm, dependable hold that locks a wash-and-go in place through humidity. The pink Curl and Wave formula is aimed squarely at defining waves and curls without a long ingredient list.
The trade-off is the cast. This is a firm-hold gel, so expect a hard crunch once it dries. That is normal and it scrunches out to soft, defined curls, but if you prefer barely-there hold you may find it too strong. Layered over a leave-in or cream, it is one of the most reliable definers you can buy.
Best for: Anyone who wants strong hold and long-lasting definition on a budget. Skip if: You like soft, touchable hold with no cast. [[PRODUCT:B001SB45L0]]
Aunt Jackie’s Don’t Shrink Flaxseed Gel: best for shrinkage
Shrinkage is the constant battle for tighter textures, and this flaxseed-based gel is built to fight it. It aims to elongate and stretch curls and coils while still defining them, so your length reads closer to what it actually is once dry.
The flaxseed base tends to give softer, more flexible definition than a classic firm gel, with less of a brittle cast. It suits curls and coils that want definition and stretch rather than maximum hold. If your main frustration is losing length to shrinkage, this is the one to try first.
Best for: Coils and tight curls fighting shrinkage that want elongated, defined length. Skip if: You want the firmest possible hold for slicked styles. [[PRODUCT:B00MKCMDMY]]
Not sure which gel suits your curls? Take the guesswork out of it. Get your free personalised curl routine and we will help you match products to your exact curl type and goals.
Amika Curl Corps Enhancing Gel: best for pairing in a routine
If you already use, or are considering, the Amika Curl Corps cream, this gel is its natural partner. It is a medium-hold styler designed to layer over cream for bouncy, defined curls that do not feel stiff or coated.
On its own it gives clean, flexible definition that works across waves through to curls. The standard curly routine is a leave-in, then a cream for moisture, then a gel to seal and hold, and this one is formulated to sit in that last step without fighting what is underneath. See our guide to the best curl creams if you want to build the full routine.
Best for: Anyone building a full routine who wants flexible, non-stiff hold. Skip if: You need heavy-duty hold for high humidity or protective styles. [[PRODUCT:B07H38WW5C]]
Camille Rose Curl Maker: best natural wash-and-go
Curl Maker has a genuine cult following, and it is a flaxseed-forward gel that leans natural in its ingredient story. It is known for glossy, well-defined wash-and-go results with a lightweight feel rather than a heavy coating.
It defines curls and coils with shine and a soft, springy finish, and tends to play well layered over a leave-in. If you want definition that looks natural and healthy rather than gelled-down, this is a strong pick, though a little goes a long way so start small.
Best for: Curls and coils wanting a glossy, natural-looking wash-and-go. Skip if: You want a cheap everyday workhorse or the strongest hold available. [[PRODUCT:B0081K2R2U]]
Cake Beauty Curl Crush Jelly: best lightweight jelly for waves
Not every curl pattern wants a heavy gel, and this is where a jelly earns its place. Cake Beauty’s Curl Crush is a light, jelly-textured styler that adds definition and a soft hold without weighing hair down.
That makes it a good match for waves and looser curls that go limp or greasy under a firm gel. It defines and tames frizz while keeping movement, so if heavier products flatten your pattern, a jelly like this is worth trying.
Best for: Waves and loose curls that get weighed down by heavier gels. Skip if: You have tight curls or coils needing serious hold. [[PRODUCT:B09VNXSCQ2]]
Ampro Shine ‘n Jam: best strong hold for protective styles
Shine ‘n Jam is a workhorse in the protective-styling world. It is a strong-hold conditioning gel made for braids, twists, edges and laying down frizz, and it does that job with staying power.
Beyond braids and twists it is a solid pick for anyone who needs firm control and a sleek finish, particularly on coily hair. It is less about soft, bouncy wash-and-gos and more about hold that lasts, so match it to the style you are actually doing.
Best for: Braids, twists, edges and coily hair needing firm, lasting control. Skip if: You want soft, flexible hold for a natural wash-and-go. [[PRODUCT:B071L1SJLP]]
How to choose the right curl gel
Match the hold to your curl pattern. Waves and loose curls usually do best with a light jelly or medium gel, while tight curls and coils can carry a firmer, stronger-hold formula without going flat.
Layer gel over cream, not instead of it. The reliable routine is a leave-in, then a curl cream for moisture, then a gel to seal and hold. The gel is the last step, so it does not need to moisturise, it needs to lock in what is underneath. Our best curl creams guide covers that middle step.
Expect a cast, then break it. A hard, crunchy shell once the gel dries is normal and is what keeps frizz out while hair sets. Once your hair is fully dry, scrunch the cast out with clean hands or a drop of oil to reveal soft, defined curls. Do not judge the result before you break the cast.
Watch for flaking and dryness. Some strong-hold or protein-rich gels can flake or feel dry on certain hair, especially if layered too heavily or over the wrong products. Start with a small amount and patch a section before committing to a full application.
Frequently Asked Questions
Do you use curl gel on wet or dry hair?
Apply curl gel to soaking or very wet hair. Gels define best when the hair is fully saturated, because the water helps distribute the product evenly and lets your curls clump before they set. Applying to dry hair usually gives patchy definition and more flaking.
Can you use curl gel and curl cream together?
Yes, and for most curl types you should. Apply a leave-in first, then a curl cream for moisture and definition, then a gel on top to seal everything and hold the style. The cream feeds the curl and the gel makes it last. Our best curl creams guide covers the cream step in detail.
How do you get rid of the crunchy gel cast?
Wait until your hair is completely dry, then gently scrunch upward with clean hands to break the cast. A tiny amount of oil on your palms helps it soften faster. The crunch disappears and you are left with soft, defined curls, so the cast is a feature, not a fault.
Is curl gel bad for your hair?
No, curl gel is not inherently bad for your hair. The things to watch are drying alcohols high in the ingredient list and product buildup over time. Clarify your hair every so often to reset, and if a gel leaves your hair feeling dry, layer it over a moisturising cream or leave-in.
Which curl gel is best for frizz and humidity?
For frizz control in humid weather, reach for a firmer, strong-hold gel with good film-forming properties. Eco Style and Shine ‘n Jam both hold up well against humidity, while lighter jellies give less protection but more movement. Match the strength to how humid your climate actually is.
The bottom line
There is no single best curl gel, only the best gel for your curl type and the style you are doing. For strong hold on a budget, Eco Style is hard to beat. If shrinkage is your enemy, Aunt Jackie’s Don’t Shrink is built for elongation on coils and tight curls. Building a full routine? Amika Curl Corps layers cleanly for flexible, non-stiff definition. For a glossy, natural wash-and-go, Camille Rose Curl Maker earns its cult status. Waves and loose curls that hate heavy products will get on best with Cake Beauty’s light Curl Crush jelly. And for braids, twists, edges and serious coily-hair control, Ampro Shine ‘n Jam is the workhorse. Pick the one that matches your pattern and your goal, layer it over a cream, and remember to break the cast.
Halloween gives men with curly hair a natural advantage when it comes to costume styling. Your curls already provide volume, texture, and dramatic potential that straight-haired guys have to fake with wigs or products. Whether you’re working with loose waves, tight coils, or anything in between, your natural texture can become the foundation for memorable Halloween looks that actually stay in place through the night.
Why Curly Hair Is an Asset for Halloween Costumes
Natural Volume and Drama Without Wigs
Straight hair flattens under hats and helmets. Your curls bounce back. That inherent volume and lift mean you can skip uncomfortable wigs for many costume ideas. A 2C wave pattern already has enough body to channel rockstar energy, while 4C coils provide architectural structure that works perfectly for futuristic or historical characters.
Most Halloween wigs are designed for straight or generically “wavy” hair, which means they look cartoonish on top of textured hair and create uncomfortable bulk. Working with your natural pattern instead of fighting it saves money, feels better, and photographs more authentically. Your hair’s natural movement also reads better in photos and doesn’t shift or slide the way synthetic wigs do when you’re dancing or moving through a crowded party.
The texture itself tells a story. If you’re going for a warrior character, your coils already communicate strength. Playing a vampire? Defined curls add a romantic, period-appropriate drama that gel-slicked straight hair can’t match. For anyone building a everyday 4A styling routine, Halloween is just an exaggerated version of techniques you might already use for definition and height.
Texture That Holds Temporary Color Better
Curly and coily hair has more surface texture than straight hair, which gives temporary color something to grip. Hair chalk and spray-in colors coat the raised cuticle of textured hair more effectively, creating bolder, longer-lasting results without the patchy application straight-haired guys often deal with.
The porosity of curly hair (especially if you regularly use heat or have color-treated sections) means color deposits into the hair shaft more readily. This works in your favor for Halloween when you want intense reds, greens, or fantasy colors that show up vividly. Just know that higher porosity also means you’ll need a thorough wash-out routine afterward, which we’ll cover later.
Protection Tips Before Styling
Before you spray anything temporary or tease your curls into a new shape, prep your hair to minimize damage. Start with a moisture-locking leave-in on damp hair the morning of Halloween. This creates a barrier between your curl pattern and any drying products you’ll apply later, whether that’s hair spray, gel, or color.
If your costume requires slicking sections down or using heavy hold products, apply a light oil (argan, jojoba, or grapeseed) to those areas first. The oil prevents strong-hold gels from penetrating too deeply and drying out your hair shaft. For men with low porosity curl care needs, this pre-treatment step is especially important since your hair doesn’t absorb moisture easily once it’s been stripped away.
Avoid putting costume elements (hats, headbands, clips) on soaking-wet hair. Damp is fine, but fully wet curls are fragile and more prone to breakage when you’re tugging fabric or accessories into place. Let your hair air-dry to about 70% before you start manipulating it for your Halloween look.
Classic Halloween Looks for Wavy Hair (2A-2C)
The Vintage Vampire: Side-Parted Slick Wave
If you have type 2A hair care basics down, you already know your waves can go sleek or voluminous depending on product. For a classic Dracula or elegant vampire look, create a deep side part while your hair is still damp, then apply a medium-hold gel on one side and comb it flat against your head. Leave the other side with more natural wave.
The contrast between the slicked section and the textured section creates that old-Hollywood glamour vampires are known for. Use a fine-tooth comb to create crisp horizontal lines in the gel, mimicking vintage finger waves. Let it air-dry completely (or use a diffuser on cool) before touching it. One light mist of hairspray locks everything in place without crunching your waves into stiffness.
Mad Scientist: Controlled Chaos with Volume
Wavy hair in the 2B-2C range has enough texture to look intentionally wild without appearing messy. For a mad scientist or eccentric inventor character, flip your head upside down while applying a curl-holding mousse. Scrunch aggressively as your hair dries to encourage maximum frizz and volume.
The key is “controlled” chaos. You want your waves to stick out at interesting angles, not just look like you forgot to brush. Once your hair is 90% dry, use your fingers to pull specific sections away from your head and hit them with hairspray while they’re extended. This freezes the wild shape in place. Add temporary gray or white spray at the temples to age up the look.
1920s Gangster: Wet-Look Finger Waves
The wet-look gel trend of recent years makes this vintage costume easier than ever. Guys with 2C waves have the perfect texture for authentic 1920s finger waves. Apply a strong-hold gel to soaking-wet hair, then use a fine-tooth comb to create S-shaped curves along your scalp.
Pin each curve with a duckbill clip while it dries. This technique works best on hair that’s at least 3-4 inches long on top. The wave pattern will be exaggerated and shiny, perfect for a Prohibition-era gangster or Great Gatsby character. Pair it with a fedora (put the hat on after your hair is completely dry and you’ve removed the clips) for the full effect.
Halloween Styles for Curly Hair (3A-3C)
Rockstar/80s Icon: Big Teased Curls
Your 3B curls already have volume. For an 80s rockstar or glam metal look, you’re just amplifying what’s there. Start with completely dry curls (wet teasing causes breakage). Section your hair and backcomb at the roots with a fine-tooth comb, working in small sections from the mid-lengths toward your scalp.
The trick is to tease underneath while leaving the top layer of curls smooth. This creates height without destroying your curl definition on the surface. Once you’ve built volume, spray the roots with strong-hold hairspray and gently smooth the top layer over the teased foundation. For extra drama, wrap a bandana around your head or add temporary highlight streaks in blonde or bright colors.
Werewolf: Enhanced Natural Texture
Werewolf costumes usually involve facial prosthetics and fake fur, but your natural curls can do half the work. Skip washing your hair for 2-3 days before Halloween to build up natural oils (this adds to the “wild” texture). On Halloween day, apply a texturizing spray or sea salt spray to add grit and separation to your curls.
Use your fingers to rough up your curl pattern, breaking apart any clumps and encouraging frizz. This is one of the few times you want your curls to look less defined. Add temporary brown or gray color in random sections to create a multi-toned, fur-like effect. Tease the roots for extra volume. The goal is to look like you’ve been running through the woods, which your textured 3A-3C curls naturally suggest.
Pirate: Defined Curls with Bandana or Beads
Pirates had long hair out of necessity (limited grooming at sea), which makes this a historically accurate costume for guys with shoulder-length or longer curls. Maximize your curl definition with your regular styling routine, then add costume elements that work with your texture rather than hiding it.
Tie a bandana low at the nape of your neck, letting your curls flow over and around it. Or thread small beads onto individual curl clumps (this works best with 3C curls that have defined spirals). You can also create two small braids at your temples and leave the rest loose. The lived-in, textured look of natural curls is more authentic than the synthetic wigs most pirate costumes use.
Superhero: Sculptural Height and Definition
Many classic superheroes have voluminous hair that defies gravity. Your 3B or 3C curls can achieve this with the right products. Apply a firm-hold gel to damp hair, then diffuse while lifting sections upward and away from your scalp. The diffuser sets the curls in an elevated position.
Once dry, carefully break the gel cast by scrunching, which softens the curls while maintaining the lifted shape. Use a pick or your fingers to add height at the crown. A targeted spray of hairspray at the roots keeps everything in place. This technique works for Superman, comic book characters, or any hero known for dramatic hair.
Coily Hair Halloween Transformations (4A-4C)
Historical Figure: Twist-Out or Braid-Out Styling
For characters from African history, the Civil Rights era, or the Black Power movement, your natural coils are already historically accurate. A well-executed twist-out on 4A or 4B hair creates the defined, voluminous silhouette seen in photos from the 1960s and 70s. If you’re building 4C styling inspiration into your regular routine, you already know these techniques.
Do your twists or braids the night before Halloween on damp, product-laden hair. Unravel them an hour before you need to leave, then pick out the roots for maximum volume. The resulting texture has historical authenticity that works for everyone from Frederick Douglass to Jimi Hendrix, depending on your costume accessories.
Afrofuturism Character: Pick-Out Volume
Afrofuturism characters (think Black Panther, sci-fi heroes, or fantasy warriors) celebrate natural texture in exaggerated, sculptural shapes. Start with a wash-and-go or twist-out, then use a pick to lift your coils into a large, rounded shape. The goal is symmetrical volume that creates a halo effect around your head.
For more 4A hairstyle ideas in this vein, consider adding metallic temporary color (gold, silver, or bronze) to the tips of your coils. This catches light and emphasizes the architectural quality of your hair. Edge control can sleek down your hairline for a more finished, intentional look that reads as “styled” rather than “accidental volume.”
Warrior/Fantasy: Braids, Cornrows or Locs Styled
If you already wear locs, braids, or have the skills to cornrow your own hair, Halloween is your time to get creative with the styling. Warriors from various cultures (Vikings, Mongols, African kingdoms) wore protective styles that kept hair out of their faces during combat. Cornrow your hair into patterns that flow backward, or gather existing braids into a top knot.
Temporary color on locs or braids shows up vividly because each section is separated, giving color maximum surface area. Spray individual locs with burgundy, deep blue, or even metallic shades for a fantasy warrior effect. You can also wrap colored thread or thin ribbon around sections of braids to add visual interest without altering your hair texture.
Temporary Color and Product Tips for Curly Men’s Hair
Hair Chalk vs. Spray-In Color for Curl Types
Hair chalk works best on looser curl patterns (2A-3B) because you can stroke it down the length of visible curl clumps. The chalk deposits on the outside of your hair shaft and doesn’t require dampening, which means you can apply it after you’ve styled. Choose chalk for pastel shades or when you want precise color placement on specific sections.
Spray-in color covers more area quickly, making it ideal for 3C-4C hair when you want overall color rather than highlights. The spray can reach into densely packed coils that would be hard to chalk. According to dermatologist guidance on temporary hair color, spray formulas are generally safe for one-time use but should be tested on a small section first if you have sensitive skin.
For both methods, apply to completely dry hair and expect some transfer onto costumes, pillowcases, and anything your hair touches. Spray-in colors contain more alcohol, which can be drying, so use them sparingly and focus on sections that will be most visible in your costume.
Hold Products That Won’t Dry Out Curls
Strong-hold products are tempting for Halloween because you want your style to last, but many traditional hairsprays contain high alcohol content that turns curls crunchy and brittle. Look for holding sprays labeled “flexible hold” or “humidity-resistant” rather than “maximum hold.” These maintain shape without creating a hard shell that cracks when you move.
Gel remains the best option for curly and coily hair because it provides hold while you can still scrunch out the crunch after it dries. For styles that need to last 8-12 hours (from pre-party photos through the late-night costume contest), layer a curl cream first, then gel, then a light mist of hairspray only on the sections that need extra security. This three-product approach builds hold gradually without overloading any single product.
If your costume requires slicking sections down flat (for instance, maintaining 2C texture in a vintage style), choose a water-based pomade rather than petroleum-based. Water-based formulas wash out more easily and don’t coat your hair in a moisture-blocking layer that causes dryness in the days after Halloween.
Same-Night Removal Without Damage
Don’t sleep in temporary color or heavy-hold products. The longer these formulas sit on your hair, the more moisture they pull out. When you get home from Halloween festivities, remove as much product as possible even if you’re exhausted. At minimum, rinse your hair thoroughly with warm water to remove surface color and spray.
For a full removal (which you’ll need to do within 24 hours anyway), use a sulfate-free curly hair shampoo that still has some cleansing power. Lather twice if needed. The goal is to remove all color and product buildup without stripping your hair’s natural oils. Temporary colors are designed to wash out, but they wash out more completely if you don’t let them sit for days.
If you used chalk, it may take 2-3 washes to fully remove all the pigment from high-porosity curls. Don’t panic if you see faint color after the first wash. Just follow up with a clarifying treatment (covered in the next section) within the next few days.
Post-Halloween Hair Recovery for All Curl Types
Gentle Clarifying After Product Buildup
Within 48 hours of Halloween, do a clarifying wash to remove any lingering product, color, or oil buildup. Choose a gentle clarifying shampoo specifically formulated for curly hair, these remove buildup without the harsh sulfates that strip moisture. Focus the shampoo on your scalp and let the suds rinse through your lengths.
You’ll know you need clarifying if your hair feels coated, looks dull, or doesn’t absorb moisture like usual. Guys with low-porosity hair might notice their regular products sitting on top of their hair rather than absorbing. One clarifying session resets your hair and prepares it to receive moisture again.
Don’t clarify more than once in a week. Over-clarifying leads to dryness, especially on high-porosity curls that already lose moisture easily. One targeted clarifying session handles Halloween cleanup for most curl types.
Deep Conditioning to Restore Moisture
Immediately after clarifying, apply a deep conditioning treatment. Your hair cuticles are open from the clarifying wash, which means they’ll absorb conditioning ingredients more effectively. Choose a protein-free deep conditioner if you used a lot of gel or hairspray (those products often contain proteins), or a protein-rich treatment if your curls feel limp and stretched out.
Apply the deep conditioner to soaking-wet hair, coating every section from root to tip. Cover with a plastic cap and let it sit for at least 20 minutes. Heat (from a steamer, warm towel, or hooded dryer) helps the conditioner penetrate, but isn’t required. The goal is to replace the moisture that temporary color and hold products pulled out.
For 4C coils that may have been picked out or manipulated more than usual, focus extra conditioner on the ends and any sections that feel rough or tangly. This is also when you’d address any breakage from teasing or rough handling during costume application.
When to Return to Your Regular Routine
Most guys can return to their normal styling routine 2-3 days after Halloween, once they’ve clarified and deep conditioned. Your curls should feel back to normal, soft, defined, and responding to products the way they usually do. If your hair still feels off (dry, tangled, or lacking definition), give it another few days of gentle handling.
Stick to simple wash-and-go styles or protective options for the week after Halloween. Avoid heat styling, additional color, or any manipulation that adds stress. Think of it as a recovery period where your focus is moisture, gentle detangling, and letting your curl pattern restore itself.
If you notice persistent dryness or damage that doesn’t improve after a week of conditioning treatments, you may need to trim any compromised ends. But for most men following the protection and removal steps outlined here, one Halloween of temporary styling won’t cause lasting damage to your curl pattern.
Frequently Asked Questions
Can I use regular Halloween hair spray on curly hair?
Most Halloween-specific hair sprays (especially colored sprays) contain high alcohol levels that dry out curls. They’ll work for one night, but they’re not formulated with curly hair in mind. If you use them, apply a protective leave-in first and wash them out the same night. Regular curl-friendly holding sprays are a better choice if you just need hold without the color.
Will teasing my curls for a costume cause permanent damage?
Teasing on dry hair, done occasionally, doesn’t cause permanent damage to your curl pattern. The risk is breakage if you backcomb wet hair or tease the same sections repeatedly. For Halloween, tease gently, work on completely dry hair, and use a detangling conditioner when you wash it out. Your curls will return to their normal pattern after washing and conditioning.
How do I keep my Halloween hairstyle intact in humid weather?
Humidity is actually less of an issue for most Halloween styles than you’d think. If you’re enhancing your natural texture (like a werewolf or rockstar look), humidity adds to the effect. For slicked or structured styles, use a humidity-resistant gel and hairspray combo. The gel provides the primary hold while the spray creates a light barrier against moisture. Reapply spray mid-evening if needed.
What’s the best way to remove glitter or metallic spray from coily hair?
Glitter is notoriously difficult to remove from textured hair. Your best approach is to rinse thoroughly with warm water first, which removes loose glitter, then shampoo with a clarifying formula while gently finger-detangling. Don’t scrub aggressively as this pushes glitter deeper into your coils. A second wash 24 hours later usually catches any remaining particles. Consider using larger-particle glitter (craft glitter in a gel) instead of fine spray glitter, it’s much easier to remove.
Can I sleep in my Halloween hairstyle and touch it up the next day?
If your Halloween plans span multiple days, you can preserve most styles overnight with a satin or silk bonnet or pillowcase. Slicked styles and defined curls hold up better than teased or picked-out volume, which flattens with sleep. Touch-ups depend on your style: spray the roots again for volume, re-slick sections with water and gel, or pick out coils again. Just remember that the longer you leave product in, the drier your hair becomes.
Are there Halloween costume ideas that work best with short curly hair?
Short curly hair (1-3 inches) works great for characters with textured crops: military figures, athletes, superheroes with practical hairstyles, or modern characters. You can also enhance short curls with temporary color for fantasy or sci-fi looks. The key is choosing costumes where short, textured hair reads as intentional rather than trying to force your hair into a style that requires length. A well-defined short curly cut is actually more versatile for last-minute costume ideas than many longer styles.
Conclusion
Your curly hair gives you built-in costume potential that straight-haired guys have to create from scratch. Whether you’re working with loose waves that slick into vintage styles, springy curls that volumize into rockstar drama, or tight coils that create architectural shapes, your natural texture does most of the work. The key is protecting your hair before you style, using products that hold without excessive drying, and washing everything out before the temporary color and heavy products have time to cause real moisture loss.
Start planning your Halloween look by identifying which styles work with your specific curl pattern rather than against it. Test your temporary color and hold products a week before Halloween so you know exactly how they’ll perform and wash out. Most importantly, treat the post-Halloween recovery (clarifying and deep conditioning) as part of the costume process, not an afterthought. Your curls will bounce back completely, ready for whatever style you’re planning next.
If water seems to sit on top of your hair rather than sinking in, or if products leave a filmy residue no matter how little you use, you likely have low porosity hair. This structural characteristic affects how your strands absorb and retain moisture, and understanding it changes everything about how you should care for your curls, waves, or coils.
What Is Low Porosity Hair?
Low porosity hair is defined by tightly bound cuticle layers that lie flat against the hair shaft, creating a protective barrier that resists moisture penetration. Think of your hair strand like a shingled roof: when those shingles are tightly sealed with minimal gaps, water runs off instead of soaking through. This cuticle arrangement is a genetic characteristic that determines how easily water, conditioners, and styling products can enter and exit the hair shaft.
The Science Behind Cuticle Structure
The hair cuticle consists of overlapping protein scales that surround the inner cortex. According to hair structure and cuticle science research, low porosity hair has minimal cuticle lifting, meaning these protective scales remain tightly closed. This creates a smooth surface that reflects light beautifully but also blocks moisture from entering the cortex where it’s needed for elasticity and strength.
The cuticle’s impermeability isn’t a flaw but a protective mechanism. Hair with low porosity is often healthier structurally because those sealed cuticles prevent damage from environmental stressors, chemical treatments, and mechanical manipulation. However, this same protection creates unique care challenges when you’re trying to introduce beneficial moisture and nutrients. Understanding how to work with rather than against this structure is essential, and choosing lightweight leave-in conditioners that won’t sit on the surface becomes critical.
How Porosity Differs from Curl Type
Many people confuse porosity with curl pattern, but they’re completely separate characteristics. You can have type 2C hair care needs with low porosity, or 4A coily hair that’s also low porosity. Curl type describes the shape of your strand (wavy, curly, or coily), while porosity describes how the cuticle layer behaves regarding moisture absorption.
This distinction matters because a 3B curl and a 2B wave could both have low porosity and therefore need similar product formulations, even though their styling approaches differ dramatically. The tightness of your curl doesn’t predict your porosity level. In fact, some naturally coily hair is low porosity and requires completely different products than high porosity coily hair, despite identical curl patterns.
The Float Test and Other Identification Methods
The most common at-home test involves placing a clean strand of shed hair in a glass of room-temperature water. Low porosity hair typically floats on the surface or takes several minutes to sink because the tightly sealed cuticles resist water absorption. While not scientifically rigorous, this porosity identification method provides a useful starting point.
However, observation during your regular routine offers more reliable clues. Notice how your hair behaves when wet: does water bead up on the surface initially? Does your hair take hours to air dry? When you apply conditioner, does it seem to sit on top rather than absorbing? These real-world indicators often tell you more than a single float test.
Signs You Have Low Porosity Hair
Recognizing low porosity characteristics helps you adjust your routine before frustration sets in. These signs appear consistently across different curl types and textures, making them reliable indicators.
Water Beads Up Instead of Absorbing
When you spray water or wet your hair in the shower, low porosity strands initially repel moisture. You’ll see droplets forming on the surface, similar to water on a freshly waxed car. This happens because those tightly sealed cuticles don’t have openings for water molecules to slip through easily. Eventually, with enough saturation time and manipulation, the hair does get wet, but that initial resistance is your first major clue.
Products Sit on the Surface
If you apply a generous amount of conditioner or styling cream only to find a white, filmy residue coating your hair, you’re experiencing the hallmark frustration of low porosity hair. The product simply can’t penetrate the cuticle barrier, so it builds up externally. This happens even with high-quality products formulated for curly hair, and it’s not about the product being “bad” but rather incompatible with your porosity level.
You might notice this especially with heavier butters, thick creams, and oil-based products. What works beautifully for your friend with high porosity hair leaves your strands looking greasy and feeling coated within hours.
Slow Drying Time and Persistent Heaviness
Low porosity hair can take four to six hours (or longer) to air dry completely because moisture that does enter the hair shaft becomes trapped by those same tight cuticles. The water can’t escape efficiently, leaving your hair feeling heavy and damp long after washing. This extended drying period increases frizz risk as your cuticles eventually lift from prolonged wetness.
Buildup Happens Quickly
Because products don’t absorb well, they accumulate rapidly on the hair shaft. You might find that your hair looks dull or feels waxy after just a few days, even when you’re using minimal product. This buildup blocks further moisture absorption, creating a vicious cycle where your hair seems perpetually thirsty yet rejects hydration.
Common Challenges and Why They Happen
Understanding why low porosity hair behaves as it does helps you troubleshoot problems and adjust your approach strategically.
The Moisture Penetration Paradox
Here’s the frustrating reality: low porosity hair often appears dry and feels rough, yet it actively resists the moisture it desperately needs. This happens because the cortex (inner hair shaft) lacks adequate hydration, while the cuticle (outer layer) blocks moisture entry. Your hair is simultaneously moisture-starved and moisture-resistant, which explains why standard hydrating treatments often fail.
The solution isn’t more product or heavier conditioners, but rather creating temporary cuticle openings through heat or pH adjustment, then using lightweight, water-based formulations that can actually slip through those narrow gaps.
Product Buildup and Dullness
Silicones, heavy oils, and thick butters accumulate on low porosity hair because they can’t penetrate the cuticle layer. This coating reflects light poorly compared to clean, product-free hair, creating a dull appearance despite your best moisturizing efforts. The buildup also weighs down curl patterns, making waves look limp and coils lose definition.
Regular use of clarifying shampoos becomes non-negotiable for low porosity hair, not as an occasional reset but as a consistent maintenance step every 1-2 weeks.
Protein Sensitivity and Breakage
Many people with low porosity hair experience protein overload without realizing it. Because their cuticles are already tightly sealed and structurally strong, additional protein treatments create excessive rigidity. The hair becomes brittle, loses elasticity, and breaks with minimal manipulation. This differs from high porosity hair, which often benefits from regular protein because damaged, lifted cuticles need that structural support.
If your hair feels straw-like, snaps easily when stretched, or becomes unmanageably tangled after protein treatments, you’re likely protein-sensitive due to your low porosity structure.
Heat and Treatment Resistance
Deep conditioning treatments, hot oil applications, and even color processing work less effectively on low porosity hair because those beneficial ingredients can’t penetrate the sealed cuticle. You might sit under a heating cap for 30 minutes with a premium deep conditioner and see minimal improvement, not because the product is inadequate but because it never reached the cortex where repair happens.
How to Care for Low Porosity Hair
Effective low porosity care requires a complete routine overhaul, focusing on cuticle penetration rather than surface coating.
Choose Lightweight, Water-Based Products
Heavy creams, butters, and oils will sabotage your results. Instead, look for liquid leave-ins, lightweight gels, and water-based stylers that contain humectants (glycerin, aloe vera, honey) in the first few ingredients. These formulations have smaller molecular structures that can slip between tightly closed cuticle scales more easily than thick, oil-based products.
When selecting the right leave-in product, check the ingredient list: water should be first, and heavy oils like castor, coconut, or shea butter should appear toward the end or not at all. Your hair needs moisture (water), not oil coating.
Use Heat to Open the Cuticle
Heat temporarily lifts cuticle scales, creating openings for moisture and treatments to penetrate. Apply your deep conditioner, then sit under a hooded dryer, use a thermal heat cap, or steam your hair for 15-30 minutes. This step transforms mediocre conditioning sessions into genuinely effective treatments because you’re working with your hair’s structure rather than fighting it.
Even a simple warm water rinse before applying conditioner helps. The heat from your shower steam begins opening those cuticles, making your regular conditioner work better without requiring special equipment.
Clarify Regularly to Prevent Buildup
Low porosity hair needs clarifying shampoo every 1-2 weeks, not just when buildup becomes visible. This removes the surface accumulation that blocks moisture absorption, essentially resetting your hair to its cleanest state. Between clarifying sessions, use gentle cleansing shampoos that remove daily dirt without stripping.
Some people benefit from apple cider vinegar rinses as a gentler buildup prevention method. The acidic pH helps smooth cuticles while dissolving product residue, offering a middle ground between daily sulfate-free washing and intense clarifying.
Apply Products to Soaking Wet Hair
This technique maximizes moisture absorption while minimizing product use. When your hair is dripping wet, the water itself helps carry lightweight products into the hair shaft. The dilution also prevents heavy application that would otherwise sit on the surface.
Apply your leave-in or styler in the shower or immediately after, while your hair is still saturated. Use praying hands or raking motions to distribute products evenly, then scrunch gently. You’ll use less product and achieve better absorption than applying to damp or towel-dried hair.
The LOC vs LCO Method for Low Porosity
The traditional LOC method (Liquid, Oil, Cream) often fails for low porosity hair because applying oil second traps moisture out rather than in. The LCO method (Liquid, Cream, Oil) works better, but many low porosity individuals find that skipping heavy creams and oils entirely yields the best results.
Instead, try a simplified approach: lightweight liquid leave-in on soaking wet hair, followed by a water-based gel for hold. This “LC” method (Liquid, lightweight gel as “Cream”) provides moisture and definition without the coating that oils create on sealed cuticles.
Best Products and Ingredients for Low Porosity Hair
Ingredient knowledge matters more than brand names when you have low porosity hair. Understanding what to seek and what to avoid prevents expensive trial-and-error frustration.
Humectants That Actually Penetrate
Glycerin, aloe vera juice, honey, and panthenol (provitamin B5) are your best friends. These humectants attract moisture from the air and have smaller molecular weights that can slip between closed cuticle scales more effectively than larger molecules. Look for them in the top five ingredients of your leave-ins and stylers.
However, glycerin works best in moderate humidity (40-60%). In very dry climates, it may pull moisture from your hair into the air, and in very humid conditions, it can cause excessive frizz. Adjust your humectant use based on your local weather patterns.
Lightweight Oils and Butters to Avoid
Contrary to popular curly-girl wisdom, heavy oils like coconut, castor, and olive oil typically cause more problems than they solve for low porosity hair. These oils have large molecular structures that sit on the cuticle surface, creating a barrier that prevents water absorption. If you must use oil, choose lightweight options like grapeseed, argan, or sweet almond oil, and use them sparingly as the final step after all other products.
Similarly, avoid thick butters (shea, mango, cocoa) in your main styling products. Save these for protective styling or as sealants on already-moisturized hair, never as your primary source of hydration.
Recommended Shampoos and Conditioners
For regular washing, choose sulfate-free shampoos that still provide adequate cleansing without excessive gentleness (which can leave low porosity hair under-cleansed). For clarifying, a shampoo with sulfates once every 1-2 weeks effectively removes buildup without damaging healthy, sealed cuticles.
Select conditioners with a thin, liquid consistency rather than thick, creamy formulas. The texture often indicates the weight: runny conditioners with slip are more likely to rinse clean without leaving residue. Avoid conditioners listing heavy oils or silicones in the first five ingredients.
Styling Products That Won’t Weigh Down
Water-based gels and lightweight mousses work exceptionally well for low porosity hair. They provide hold and definition without the coating that creams create. Look for gels containing aloe vera juice or flaxseed as primary ingredients rather than oil-heavy formulations.
Avoid marketing terms like “moisture-rich,” “ultra-hydrating,” or “intensive repair” on styling products, as these usually indicate heavy formulations designed for high porosity hair. Instead, seek “lightweight,” “volumizing,” or “humidity-resistant” products that won’t overload your sealed cuticles.
Styling Techniques That Work
How you apply products and manipulate your hair matters as much as which products you choose when working with low porosity hair.
Steam Treatments and Warm Deep Conditioning
Investing in a hair steamer or thermal conditioning cap transforms deep conditioning from disappointing to genuinely restorative. The heat and moisture combination temporarily opens cuticles, allowing treatments to penetrate where they’re needed. Steam for 20-30 minutes with a lightweight, protein-free deep conditioner once weekly or biweekly.
If you don’t have specialized equipment, create a DIY steam treatment by applying conditioner, covering with a plastic cap, then wrapping a warm, damp towel around your head. Reheat the towel every 10 minutes to maintain temperature. This method isn’t as effective as a steamer but still provides significant cuticle-opening benefits.
Diffusing and Air-Drying Strategies
The extended drying time of low porosity hair makes diffusing on medium heat an attractive option. The warmth helps evaporate trapped moisture more quickly while maintaining curl definition. Use a low airflow setting to minimize frizz, and hover the diffuser rather than pressing it directly against your hair.
If you prefer air-drying, apply products to soaking wet hair, then gently scrunch out excess water with a microfiber towel or cotton t-shirt. Don’t touch your hair again until it’s completely dry (yes, this might take 6+ hours). Early manipulation causes frizz because low porosity cuticles lift and roughen when repeatedly disturbed while damp.
Managing Frizz Without Heavy Creams
Frizz in low porosity hair usually stems from one of three causes: product buildup preventing proper moisture absorption, extended drying time causing cuticle lifting, or humidity affecting improperly sealed styles. The solution isn’t adding more cream but rather addressing the root cause.
Use lightweight serums or diluted aloe vera gel to smooth frizz without adding weight. Apply to dry hair in small amounts, focusing on the outer layer rather than saturating all your hair. A little goes a long way when your cuticles are already sealed.
Refresh Methods That Don’t Build Up
Traditional refresh sprays containing leave-in conditioner add layers of product that low porosity hair can’t absorb, leading to rapid buildup. Instead, refresh with plain water or a heavily diluted leave-in mixture (1 part product to 3-4 parts water). Spray lightly, scrunch, and go.
Some low porosity individuals find that water-only refreshing works best, especially if they’re clarifying regularly. The water reactivates any gel cast remaining from wash day without introducing new products that will sit on the surface. Experiment with your refresh ratio to find the lightest effective mixture for your hair.
Frequently Asked Questions
Can low porosity hair change over time?
Yes, porosity can shift due to chemical treatments (color, relaxers), heat damage, or environmental factors. Healthy virgin hair maintains its genetic porosity level, but damage typically increases porosity by lifting and damaging cuticle scales. If your previously low porosity hair suddenly absorbs products easily or dries quickly, you may have transitioned to medium or high porosity due to damage.
Should I avoid protein completely if I have low porosity hair?
Not necessarily, but you need far less protein than high porosity hair. Use protein treatments sparingly (every 4-6 weeks or less) and choose hydrolyzed proteins that have smaller molecular weights for better penetration. Always follow protein with a moisture-focused deep conditioning session. If your hair feels stiff, breaks easily, or tangles excessively after protein, reduce frequency or eliminate it entirely.
Why does my low porosity hair get greasy so fast?
This happens because products sit on your cuticle surface rather than absorbing, creating a coating that looks and feels oily even when your hair lacks internal moisture. Switch to water-based, lightweight products and reduce application amounts. Many people with low porosity hair need surprisingly little product compared to what’s typically recommended for curly hair.
Will baking soda or ACV help with low porosity hair?
Apple cider vinegar rinses can help by removing buildup and temporarily opening cuticles through pH adjustment, making them beneficial for low porosity hair when used correctly (diluted, 1-2 tablespoons per cup of water, applied after shampooing). Baking soda is too alkaline and harsh for regular use, though some people use it occasionally as a clarifying treatment. Proceed cautiously, as excessive pH manipulation can damage even healthy, low porosity cuticles.
Can I use coconut oil on low porosity hair?
While coconut oil is popular in curly hair care, its large molecular structure makes it particularly problematic for low porosity hair. It sits on the cuticle surface, blocking moisture rather than providing it. If you love coconut oil, use it as a pre-shampoo treatment that you’ll wash out completely, never as a leave-in or styling product. Most people with low porosity hair see better results avoiding it entirely.
How often should I clarify low porosity hair?
Every 1-2 weeks for most people, though this depends on product usage and local water hardness. If you use minimal products or live in an area with soft water, you might extend to every 3 weeks. Pay attention to how your hair feels: if it seems coated, looks dull, or stops responding to your usual products, it’s time to clarify regardless of your schedule.
Conclusion
Low porosity hair isn’t difficult hair, it just requires a fundamentally different approach than the heavy creams and rich oils often recommended for curly textures. The key insight is this: your tightly sealed cuticles need moisture penetration strategies, not surface coating. Heat assistance, lightweight formulations, and regular clarifying work together to give your hair the hydration it needs while respecting its structural resistance to absorption.
Start with one simple change today: switch to applying your products on soaking wet hair instead of damp or towel-dried hair, and reduce your product amount by half. This single adjustment often produces immediate improvements in curl definition and reduces that frustrating coated feeling. Your low porosity hair can be beautifully hydrated, defined, and healthy once you work with its unique structure rather than against it.
Glycolic acid has become one of the buzziest ingredients in scalp care, promising to clear buildup and reset your hair routine. But for curly, coily, and textured hair types, this powerful chemical exfoliant requires a more careful approach than what you’ll find in mainstream skincare advice. Here’s exactly what glycolic acid does to your hair and scalp, when it helps, when it hurts, and how to use it without sabotaging your curl pattern or moisture balance.
What Glycolic Acid Is and How It Works on Hair
The Science Behind Alpha Hydroxy Acids
Glycolic acid belongs to the alpha hydroxy acid (AHA) family, a group of naturally derived acids known for their exfoliating properties. According to alpha hydroxy acids in dermatology research, these compounds work by loosening the bonds between dead cells on the skin’s surface, allowing them to shed more easily. On your scalp, glycolic acid performs a similar function by dissolving the “glue” that holds dead skin cells, sebum, and product residue together.
When applied to the scalp, glycolic acid breaks down the protein structures in this buildup without the mechanical friction of scrubbing. This chemical exfoliation reaches into follicle openings and between scalp scales in ways that physical scrubs simply cannot. The acid also has a mild humectant effect, meaning it can temporarily draw moisture to the surface layer of skin, though this benefit is less relevant when you’re rinsing the product out shortly after application.
For people dealing with excess oil and product residue, glycolic acid offers a reset that goes deeper than most clarifying shampoos. The exfoliation process removes not just surface grime but also the thin film of oxidized oils and mineral deposits that can make hair feel coated even after washing.
How Glycolic Acid Differs from Physical Scalp Scrubs
Physical scrubs use granules, sugar, salt, or silica beads to manually slough away buildup. These products work through friction and are generally easier to control in terms of where they touch your hair. The main limitation is that they only address surface-level buildup and can miss the follicle openings where sebum and dead cells accumulate.
Glycolic acid, by contrast, is a liquid solution that contacts everything it touches, including your hair shaft. This presents both an advantage and a risk. The advantage is thorough scalp exfoliation without scrubbing motions that can tangle curly hair. The risk is that if the solution runs down your lengths or you apply it beyond the scalp, it can disrupt the hair cuticle and potentially cause protein loss from the hair shaft itself.
Physical scrubs are generally gentler on the hair fiber but less effective for stubborn scalp conditions. Glycolic acid is more aggressive but potentially more transformative for scalps with chronic flaking, buildup, or clogged follicles.
Why Molecule Size Matters for Penetration
Glycolic acid has the smallest molecular weight of all the alpha hydroxy acids, which makes it the most penetrating. This characteristic is exactly why it’s so effective at breaking through layered buildup, but it’s also why it requires more caution with textured hair types. Smaller molecules penetrate deeper and faster, which means glycolic acid can affect the scalp tissue beneath the surface layer and potentially reach the hair cuticle structure more readily than larger AHAs like lactic acid.
For hair that resists product absorption, this penetration depth can be beneficial when used exclusively on the scalp, helping to clear the follicle environment. However, that same penetration becomes problematic when the acid contacts the hair shaft directly, particularly on chemically treated or high-porosity hair where the cuticle is already compromised.
Benefits of Glycolic Acid for Curly and Textured Hair
Removing Product Buildup and Hard Water Deposits
Curly hair routines often involve layering leave-in conditioners, gels, creams, and oils, and that buildup accumulates faster than most people realize. Glycolic acid excels at dissolving the film left by silicones, butters, and polyquats that resist regular shampooing. It’s particularly effective against the white or yellowish residue that develops when products oxidize on the scalp over time.
Hard water creates its own problems by depositing calcium and magnesium minerals onto the hair and scalp. These minerals bind with soap and product ingredients to form a stubborn coating that makes hair feel stiff, dull, or waxy. Glycolic acid’s chelating properties help break down these mineral deposits more effectively than many clarifying shampoos, especially at concentrations above 5%.
Unclogging Hair Follicles and Promoting Scalp Health
A healthy hair growth environment requires clean follicle openings. When sebum, dead cells, and product residue plug these openings, they can contribute to inflammation, itching, and potentially slower hair growth. The American Academy of Dermatology on scalp health emphasizes the importance of maintaining a clean scalp environment for optimal hair health.
Glycolic acid treatments can clear these blockages without the harsh detergents found in some clarifying formulas. This is especially valuable for people with dense, type 4a coils or tighter textures where it’s difficult to thoroughly cleanse the scalp through shampooing alone. Regular exfoliation can reduce the small bumps, tenderness, or inflammation that develop when follicles stay chronically clogged.
Improving Product Absorption After Clarification
One of the most immediate benefits users report after a glycolic acid treatment is how much better their regular products perform. When you remove the coating of old products and minerals, fresh conditioner, oils, and stylers can actually penetrate rather than sitting on top of existing buildup.
This improved absorption is particularly noticeable for people with low porosity hair who struggle to get moisture into their strands. While glycolic acid itself doesn’t change your hair’s porosity, clearing the buildup that blocks absorption creates a temporary window where products work more effectively. Many users find they can use lighter products or smaller amounts after a thorough glycolic acid reset.
Addressing Flaking and Scalp Irritation
Scalp flaking in curly-haired individuals often stems from a combination of product buildup, dead skin cell accumulation, and sensitivity rather than true dandruff. Glycolic acid addresses the first two factors directly by removing the layers where flakes originate. For buildup-related flaking, users often see improvement within one to two treatments.
The exfoliation also helps with the mild inflammation that can develop from managing oily scalp buildup. By clearing follicle-clogging debris and allowing the scalp to “breathe,” glycolic acid can reduce the tenderness, itching, and redness that sometimes accompany heavy product use. However, it’s not appropriate for active scalp conditions like seborrheic dermatitis or psoriasis without professional guidance.
Potential Risks and Why Curly Hair Needs Extra Care
Protein Loss and Cuticle Disruption Concerns
The most significant risk of glycolic acid for curly hair is unintended protein degradation. Hair is made of keratin protein, and while glycolic acid primarily targets the bonds between dead cells and buildup, it can also weaken the protein structure of the hair shaft itself when contact is prolonged or concentration is too high.
This protein loss manifests as increased porosity, weakened elasticity, and a rougher cuticle texture. You might notice your hair feels more fragile, stretches too easily when wet, or tangles more readily after using glycolic acid. These effects are cumulative, meaning occasional mishaps may not cause immediate disaster, but regular misuse can progressively damage your curl pattern.
Cuticle disruption is the other concern. Glycolic acid can lift the cuticle scales that protect the hair’s inner cortex. While very mild lifting can temporarily improve product penetration, excessive lifting leads to moisture loss, frizz, and breakage. Textured hair already tends toward dryness and cuticle fragility, so adding a chemical exfoliant without proper precautions compounds existing vulnerability.
Over-Exfoliation and Moisture Stripping
Your scalp needs some natural oil to maintain its protective barrier. Over-exfoliating with glycolic acid strips away not just buildup but also the sebum and natural moisturizing factors that keep the scalp healthy. This can trigger a rebound effect where your scalp overproduces oil to compensate, creating a cycle of excessive oiliness followed by harsh clarification.
Signs of over-exfoliation include scalp tightness, increased sensitivity to products that didn’t previously irritate you, and paradoxically worse flaking as your scalp sheds more cells in response to being stripped. For people with naturally dry scalps, even monthly glycolic acid use may be too frequent.
pH Levels and Curl Pattern Integrity
Glycolic acid formulations typically have a pH between 3.0 and 4.0, which is significantly more acidic than your scalp’s natural pH of around 4.5-5.5. While this acidity is necessary for the exfoliating action, it also means the product can temporarily disrupt your scalp’s acid mantle and your hair’s pH-dependent curl pattern.
Curly hair relies on optimal pH to maintain its hydrogen bond structure. When pH drops too low or the acid exposure is too prolonged, these bonds can rearrange, leading to temporarily altered curl definition or texture. Most people’s hair returns to normal after the next regular wash, but repeated pH disruption can cause lasting changes to curl pattern integrity, especially in finer or more fragile textures like type 2c waves.
Who Should Avoid Glycolic Acid Treatments
Glycolic acid isn’t appropriate for everyone. You should avoid it if you have open wounds, cuts, or active scalp conditions like psoriasis, eczema, or seborrheic dermatitis without consulting a dermatologist first. The acid can severely irritate compromised skin and worsen inflammation.
People with chemically treated hair (color, relaxers, keratin treatments) should also proceed with extreme caution or skip glycolic acid entirely. These treatments already compromise the hair’s protein structure, and adding a protein-dissolving acid increases the risk of significant damage. If you have very fine, fragile, or high-porosity hair, gentler alternatives like ACV rinses for buildup removal may serve you better.
How to Use Glycolic Acid Safely on Wavy to Coily Hair
Choosing the Right Concentration (2-10%)
For hair and scalp use, glycolic acid concentrations typically range from 2% to 10%, with most commercial scalp treatments sitting around 5-8%. If you’re new to glycolic acid, start at the lower end of this range (2-5%) to assess your tolerance. Even within this range, individual response varies dramatically based on scalp sensitivity and existing hair condition.
Products formulated specifically for the scalp are safer than repurposing facial peels or toners, which may contain concentrations up to 30% intended for brief skin contact only. Professional-strength treatments should only be used under guidance from a trichologist or dermatologist, as concentrations above 10% carry significant risk of chemical burns and permanent hair damage.
Application Techniques for Scalp vs. Hair Shaft
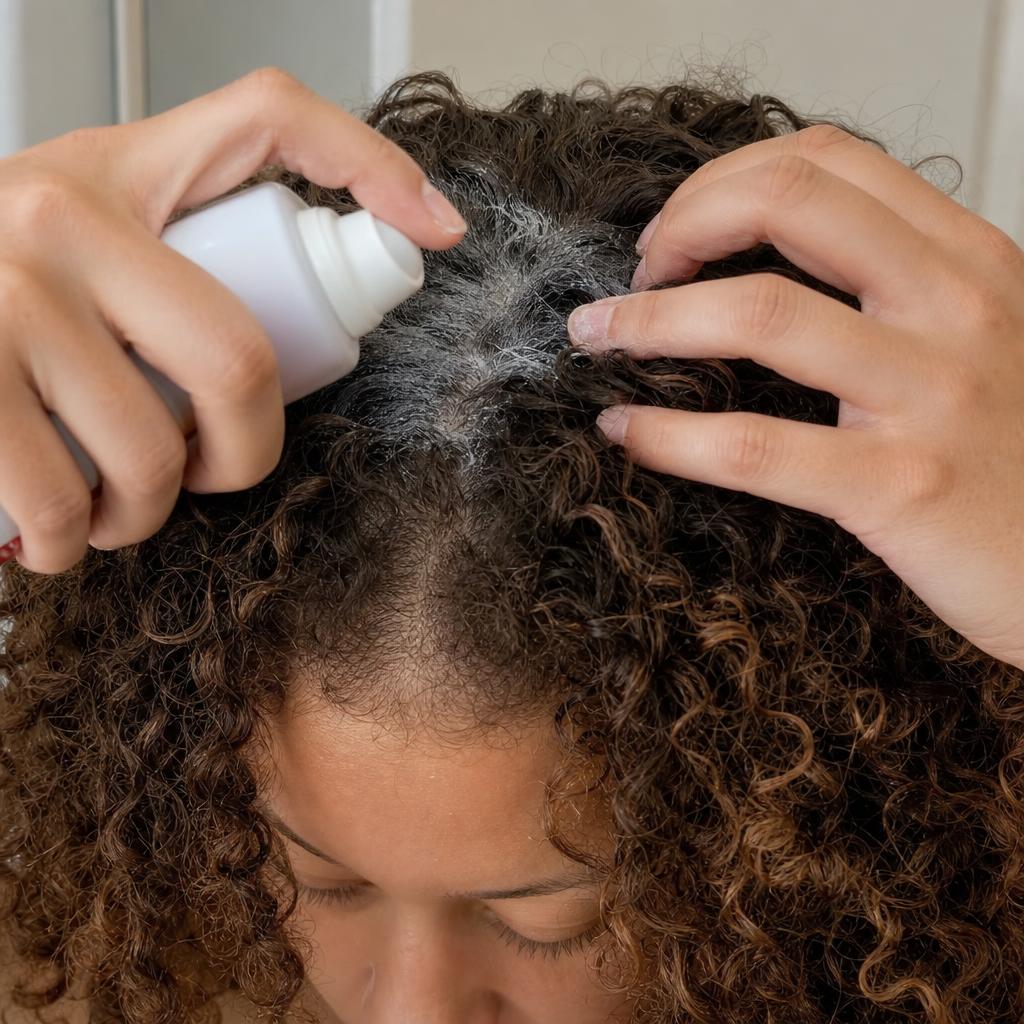
The cardinal rule of glycolic acid for curly hair is to keep it on your scalp only. Section your hair carefully, apply the product directly to the scalp using an applicator bottle with a narrow tip or a cotton pad, and avoid saturating the roots to the point where the solution runs down your hair lengths.
Work in small sections, parting the hair and applying to exposed scalp only. Some people find it helpful to apply to dry hair before showering so they can see exactly where the product goes. Others prefer damp hair because it’s easier to section, but this dilutes the concentration slightly. If you have very dense or thick hair, you may need to create more sections to reach all scalp areas without over-applying.
Never use glycolic acid as an all-over hair rinse or soak your lengths in it. If you’re using a pre-shampoo scalp treatment, consider clipping your lengths up and away from your scalp during the treatment period to prevent accidental contact. Rinse thoroughly with lukewarm water before proceeding with your regular sulfate-free cleansing options.
Recommended Frequency by Curl Type
Wavy and looser curl types (2a-3a) with more scalp oil production might tolerate glycolic acid every two to four weeks. These textures generally handle clarification better and recover moisture balance more quickly than tighter coils.
Tighter curl patterns (3b-4c) should be more conservative, starting with once every six to eight weeks. Tightly coiled hair patterns retain less scalp oil along the hair shaft and tend toward dryness, so aggressive scalp treatments can tip the balance toward brittleness and breakage. Some people with very dry scalps or minimal product use may only need glycolic acid quarterly or even less frequently.
Your buildup level matters more than your curl type in some ways. If you use heavy products daily, layer multiple stylers, or live in an area with very hard water, you might need more frequent treatments than someone with a minimal routine. Pay attention to how your scalp feels and looks rather than following a rigid schedule.
What to Do Before and After Treatment
Before applying glycolic acid, clarify your expectations. This is a reset treatment, not a regular maintenance step. In the days leading up to treatment, avoid other potentially irritating scalp products like tea tree oil, peppermint, or medicated shampoos. Don’t use glycolic acid on the same day as any other chemical treatment.
After applying the treatment to your scalp, follow the product’s recommended contact time strictly, which is typically 3-10 minutes. Longer is not better. Rinse thoroughly with cool to lukewarm water (hot water can increase scalp sensitivity), then proceed with a gentle, moisturizing shampoo and a rich conditioner.
In the week following treatment, focus on repairing and rehydrating. Use protein-free deep conditioners, incorporate extra moisture through leave-ins, and avoid heat styling if possible. Your scalp may be more sensitive to products that didn’t previously irritate you, so stick with your gentlest, most basic products during the recovery period. Many people notice that their scalp feels slightly tight or tingly for 24-48 hours after treatment, which is normal as long as there’s no burning, blistering, or severe redness.
Glycolic Acid vs. Other Scalp Exfoliants for Curly Hair
Salicylic Acid: Better for Oil Control
Salicylic acid, a beta hydroxy acid (BHA), is oil-soluble rather than water-soluble like glycolic acid. This makes it better suited for cutting through sebum and oily buildup. If your primary concern is an excessively oily scalp rather than product or mineral deposits, salicylic acid may be the more targeted choice.
Salicylic acid is also less penetrating than glycolic acid due to its larger molecular size, which means it’s generally gentler on the hair shaft when accidental contact occurs. It has anti-inflammatory properties that can benefit scalps prone to irritation. However, it’s not as effective at removing hard water deposits or heavy product buildup as glycolic acid, so your choice should match your specific scalp concern.
Apple Cider Vinegar Rinses: The Gentler Alternative
For many curly-haired people, gentler clarifying alternatives like apple cider vinegar provide sufficient buildup removal without the risks associated with glycolic acid. ACV rinses work through mild acidity (pH around 3.0 when diluted) to remove mineral deposits and product film while adding shine.
The advantage of ACV is that it’s far less likely to cause protein damage or over-exfoliation. The disadvantage is that it’s significantly weaker for stubborn buildup. If you’re dealing with months of accumulated silicones or severe hard water coating, ACV may not cut through effectively. Many people find ACV works well for maintenance between occasional glycolic acid resets.
Clarifying Shampoos: When They’re Enough
Traditional clarifying shampoos use stronger surfactants to strip buildup without chemical exfoliation. For most people with curly hair, choosing the right clarifying shampoo provides adequate reset without introducing the protein-disruption concerns of acid treatments.
Clarifying shampoos are generally safer for the hair shaft because they work through detergent action rather than breaking protein bonds. They’re appropriate for more frequent use (every 1-4 weeks depending on buildup level) and don’t require the careful scalp-only application technique that glycolic acid demands. The trade-off is that they may not address scalp-cell buildup or hard water deposits as thoroughly as glycolic acid.
Combining Treatments in Your Routine
You don’t have to choose one method exclusively. Many people successfully combine approaches: using a clarifying shampoo for regular buildup management every few weeks, incorporating diluted ACV rinses after particularly heavy product weeks, and reserving glycolic acid treatments for quarterly deep resets or periods of extreme buildup.
The key is not to layer harsh treatments too closely together. If you use glycolic acid, skip your regular clarifying shampoo that week and wait at least two weeks before using another strong treatment. Your scalp and hair need recovery time between aggressive clarification to rebuild their protective barriers and rebalance moisture levels.
Product Formats and What to Look For
Scalp Scrubs and Pre-Shampoo Treatments
Glycolic acid scalp scrubs combine chemical and physical exfoliation, with the acid working to dissolve buildup while granules provide gentle mechanical removal. These dual-action products can be very effective but require careful application to prevent the scrubbing motion from tangling curly hair.
Pre-shampoo treatments are typically liquid solutions or lightweight gels that you apply to the scalp 5-10 minutes before shampooing. These are often the purest form of glycolic acid treatment, with the acid as the primary active ingredient. They offer more control over where the product goes but require discipline to keep application restricted to the scalp.
Rinse-Out Treatments and Leave-On Toners
Rinse-out treatments are designed for brief scalp contact followed by thorough removal. These are generally safer for curly hair because the acid exposure is time-limited. Look for products that specify contact time on the label and set a timer rather than estimating.
Leave-on toners are common in skincare but rare in hair care for good reason. The prolonged exposure increases both effectiveness and risk. If you encounter a leave-on glycolic acid scalp product, check the concentration carefully (it should be very low, 2% or less) and consider whether the benefits outweigh the ongoing protein exposure for your hair type.
Reading Labels for Curl-Friendly Formulations
The best glycolic acid products for curly hair include supporting ingredients that offset the acid’s harshness. Look for formulations that also contain aloe vera, panthenol (provitamin B5), glycerin, or hyaluronic acid, which provide soothing and humectant benefits to the scalp.
Avoid products that combine glycolic acid with sulfates, high levels of alcohol denat, or other drying agents. The combination of chemical exfoliation and harsh surfactants is unnecessarily stripping for textured hair. Also be wary of products that list glycolic acid very far down the ingredient list; if it’s after the preservatives, the concentration may be too low to provide meaningful exfoliation.
pH and Supporting Ingredients That Matter
Effective glycolic acid products for scalp use typically have a pH between 3.0 and 4.0. Products much above 4.5 won’t provide adequate exfoliation, while those below 3.0 may be unnecessarily harsh. Unfortunately, most brands don’t list pH on their labels, so you may need to contact customer service or use pH test strips if this information matters to you.
Supporting ingredients like allantoin and bisabolol can reduce irritation potential. Niacinamide may help with post-treatment barrier repair. Some formulations include lower concentrations of other AHAs like lactic acid or malic acid alongside glycolic acid for a gentler exfoliating effect. Multi-acid formulas can be effective but also introduce more variables if you experience irritation.
Frequently Asked Questions
Can glycolic acid help with dandruff or dry scalp?
Glycolic acid can help with flaking caused by product buildup or dead skin cell accumulation, but it won’t treat true dandruff (which is fungal) or chronically dry scalp conditions. For fungal dandruff, you need antifungal ingredients like ketoconazole or zinc pyrithione. For dry scalp, glycolic acid may actually worsen the problem by removing protective oils. If your scalp is both dry and flaky, consider whether you’re dealing with buildup-related flaking (which glycolic acid can help) or dryness-related flaking (which needs moisturizing treatment instead).
Will glycolic acid strip my hair color?
Glycolic acid can fade semi-permanent and demi-permanent hair color faster than regular shampooing because it disrupts the cuticle layer where color molecules deposit. Permanent color is more resistant but can still experience some fading, particularly if you use glycolic acid frequently or at high concentrations. If you color your hair, space glycolic acid treatments at least two weeks after coloring and consider using a lower concentration (2-3%). Some color-treated hair may be too fragile for glycolic acid altogether.
How do I know if I’ve over-exfoliated my scalp?
Signs of scalp over-exfoliation include unusual tenderness or sensitivity, increased redness that lasts beyond 24 hours after treatment, worsening flaking (as your scalp overcompensates), burning or stinging from products that previously felt fine, and paradoxically increased oiliness as your scalp tries to protect itself. Your hair may also feel rougher, tangle more easily, or show decreased curl definition if the acid has contacted your lengths. If you experience these symptoms, stop all exfoliating treatments immediately and focus on gentle, moisturizing products until your scalp barrier recovers.
Can I use glycolic acid on my scalp if I have protective styles?
Using glycolic acid with protective styles like braids, twists, or weaves is tricky and generally not recommended. The acid can penetrate to your scalp but you can’t rinse it out thoroughly, which means prolonged exposure and increased risk of irritation or damage. The product may also contact your braided or twisted hair and cause protein damage you won’t notice until you take the style down. If buildup is a concern during protective styling, gentler maintenance methods like diluted witch hazel on a cotton pad or very diluted ACV sprays are safer options.
Is glycolic acid safe during pregnancy or while breastfeeding?
While topical glycolic acid is generally considered safe during pregnancy and breastfeeding when used in skincare concentrations, there’s limited research specifically on scalp treatments. The scalp has rich blood flow, which could theoretically lead to greater systemic absorption than facial application. Most dermatologists consider low-concentration (under 10%) topical glycolic acid acceptable, but you should consult your healthcare provider before adding any new active treatment during pregnancy or breastfeeding, especially if you’re using it over a larger surface area like the entire scalp.
Conclusion
Glycolic acid offers powerful scalp clarification that can genuinely transform how your products perform and how your scalp feels, but it demands respect and careful technique when you have curly or textured hair. The difference between a beneficial reset and damaged curls often comes down to concentration, contact time, and keeping the treatment strictly on your scalp rather than your hair shaft. For most people with wavy to coily hair, glycolic acid works best as an occasional deep-reset tool (every 4-8 weeks) rather than a regular maintenance step, with gentler clarifying methods filling the gaps between treatments.
Your next step is honestly assessing your buildup level and scalp needs. If you’re dealing with stubborn product residue, hard water coating, or clogged follicles that haven’t responded to regular clarifying shampoos, a glycolic acid treatment might be the reset you need. Start with a low concentration (2-5%), apply only to your scalp, and follow with intensive moisture and protein balance. Your curls will thank you for the clean slate, and you’ll finally understand why your conditioners and stylers aren’t performing the way they should.
If you have curly or wavy hair that feels greasy at the roots but parched at the ends, you’re dealing with one of the most frustrating paradoxes in textured hair care. While straight-haired friends might battle uniform oiliness, your curl pattern creates a unique challenge where oil pools near your scalp but never makes it down the strand. Understanding why this happens and how to address it without triggering even more oil production requires a different approach than conventional advice.
Why Curly Hair Gets Oily at the Roots (But Dry at the Ends)
The Sebum Distribution Problem in Textured Hair
Your scalp produces sebum at roughly the same rate regardless of whether your hair is straight or curly. The difference lies entirely in how that oil travels down the hair shaft. On straight hair, sebum glides easily from root to tip, coating the entire strand and creating that uniform “greasy” look people complain about. But when you have type 2C hair routines or tighter curl patterns, those bends, twists, and spirals act as roadblocks. Oil accumulates at the scalp while your mid-lengths and ends remain chronically dry.
This creates a confusing situation where you might feel like you need to wash more frequently because of oily roots, yet your ends are crying out for moisture. According to research on scalp sebum production, sebaceous gland activity varies based on hormones, genetics, and environmental factors, but the mechanical barrier of curls prevents natural distribution regardless of production levels.
Product Buildup vs. Natural Oil Overproduction
Before you blame your scalp’s oil glands, consider whether what you’re experiencing is actually buildup rather than excess sebum. Curly hair routines typically involve multiple styling products, many of which contain ingredients that don’t rinse out easily with water alone. Silicones, heavy butters, and certain gels can accumulate on the scalp over time, creating a greasy feeling that has nothing to do with your natural oil production.
The telltale difference: true excess sebum typically appears within 24 to 48 hours of washing and feels slick or wet to the touch. Product buildup develops more gradually over several washes and often has a waxy or sticky texture. You might also notice that your hair feels coated or heavy, and products stop performing the way they used to. If you can’t remember the last time you used a shampoo formulated for textured hair with actual cleansing power, buildup is likely your primary issue.
How Your Hair Type Affects Oil Visibility
Finer, looser wave patterns show oil much more readily than coarser, tighter curls. If you’re working with fine wavy hair, even a small amount of sebum or product residue will make your roots look flat and stringy. The individual strands are thinner and more easily weighed down, so oil becomes visible faster. This doesn’t necessarily mean you’re producing more oil than someone with thicker curls, it just shows more obviously.
People with low porosity hair face an additional challenge. Their tightly sealed cuticles resist moisture absorption, which also means products and oils tend to sit on the surface rather than penetrating the strand. This surface accumulation at the roots can make low porosity curls look greasy faster, even when using lightweight products.
Immediate Relief: Quick Fixes for Greasy Curls
Dry Shampoo Application for Wavy and Curly Hair
Dry shampoo can be a curly girl’s secret weapon, but you need to apply it differently than the standard spray-and-go method. First, choose a formula without heavy fragrances or white residue that will show in dark curls. Spray or dust it directly onto your scalp (not your lengths), focusing on the areas where oil concentrates most, typically your hairline, crown, and part lines.
The key is getting the product down to your actual scalp rather than coating your curls. Use your fingertips to massage it in thoroughly, breaking up any clumps. Then wait five to ten minutes before touching your hair again. This gives the starches time to absorb oil. If you have tighter curls, you might need to section your hair to reach the scalp properly. Avoid overusing dry shampoo more than two days in a row, as it can contribute to buildup.
Scalp-Only Cleansing Between Wash Days
Sometimes you need to wash your roots without disturbing your curl pattern or drying out your ends. Focus a small amount of diluted shampoo exclusively on your scalp, keeping your lengths pulled away. Use your fingertips (not nails) to massage in circular motions, lifting the hair at the roots to allow water and cleanser to reach the skin. Rinse thoroughly by directing the water flow at your scalp while keeping the showerhead angle above your head.
This targeted approach lets you extend the life of your styled curls while addressing oil where it actually accumulates. Your ends don’t need cleansing every time your scalp does. Just be careful not to create tangles by roughly handling your hair during this process.
Strategic Styling to Disguise Oily Roots
When you’re between washes and oil is visible, work with your hair’s natural texture rather than fighting it. For wavy hair, try pulling the front sections away from your face into small braids, twists, or clips. This lifts the hair off your scalp where oil is most visible and adds intentional texture that disguises any flatness. For curlier textures, fluff your roots with a pick or your fingers to create volume that makes oily roots less apparent.
Changing your part line can also provide instant relief. Oil often concentrates along your usual part because that’s where scalp and hair meet most directly. Shifting your part by even half an inch exposes fresh hair and hides the oiliest section underneath. Accessories like headbands, scarves, or claw clips strategically placed at the crown can camouflage problem areas while looking intentional.
Long-Term Solutions: Rebalancing Your Scalp
Clarifying Without Over-Stripping: Finding the Right Frequency
The paradox of oily hair is that washing too often can actually trigger increased oil production. Your scalp interprets the removal of all its natural oils as a signal to ramp up sebum production, creating a cycle where you feel greasier faster after each wash. The solution isn’t to stop cleansing, but to find a frequency that removes buildup without sending your scalp into panic mode.
For most people with oily curly hair, this sweet spot lands somewhere between twice a week and once every five days. Start by gradually extending the time between washes by one day. Yes, you’ll likely feel oilier during this adjustment period, which can last two to three weeks. Use the quick fixes above to get through it. Your scalp’s oil production should eventually recalibrate to this new schedule.
Incorporate a clarifying wash about once every two to four weeks, depending on how much product you use. Clarifying with apple cider vinegar can help remove buildup without the harsh sulfates found in some clarifying shampoos. This periodic deep clean prevents the accumulation that makes hair look perpetually greasy, even right after washing.
Adjusting Your Conditioning Routine (Keep It Off the Scalp)
One of the biggest contributors to greasy-looking curly hair is conditioner applied too close to the roots. Your scalp doesn’t need conditioning. It has its own oil production system. Conditioner belongs on your mid-lengths and ends, where moisture is actually lacking. Start your conditioner application at least two to three inches away from your scalp, or even lower if your roots tend toward oiliness.
When rinsing conditioner, make sure you’re thorough. Inadequate rinsing leaves a film on the hair that looks and feels like oil, especially near the roots where water flow is weakest. Flip your head in different directions while rinsing to ensure every section gets clear water flowing through it. This is particularly important for using leave-in conditioner, which should never touch your scalp area if you struggle with oiliness.
Scalp Treatments That Regulate Oil Production
Your scalp is skin, and like the skin on your face, it responds to regular treatment. A weekly scalp massage with your fingertips (before washing) helps exfoliate dead skin cells that can trap oil and create a greasy film. You’re not trying to increase blood flow or stimulate growth here; you’re simply lifting away debris that makes oil more visible and problematic.
Some people find that ACV for scalp balance helps regulate oil over time. A diluted rinse (one part vinegar to three parts water) once a week can help rebalance scalp pH, which may influence sebaceous gland activity. Tea tree oil, diluted in a carrier, has antimicrobial properties that can address any scalp issues contributing to excess oil production. Apply these treatments to your scalp only, never your lengths.
Diet, Hormones, and Scalp Health Connections
While topical solutions address the immediate problem, significant changes in scalp oil production often trace back to internal factors. Hormonal fluctuations during menstrual cycles, pregnancy, or hormonal birth control changes can dramatically affect sebaceous gland activity. If your oily scalp appeared suddenly or worsened at a specific time, consider whether any hormonal changes coincided with it.
According to American Academy of Dermatology hair care guidelines, diet can influence scalp health. Diets high in refined carbohydrates and dairy have been linked to increased sebum production in some people, though individual responses vary significantly. B vitamins, particularly B2 and B6, play roles in regulating skin oil production. If you’ve ruled out external factors and your oily scalp persists despite proper hair care, discussing it with a dermatologist or healthcare provider might reveal underlying causes.
The Right Products for Oily Curly Hair
Lightweight Shampoos and Clarifying Options
Skip the ultra-moisturizing, cream-based cleansers if you struggle with oily roots. These formulas are designed for people with dry scalps and will only add to your grease problem. Instead, look for curly hair shampoo options that describe themselves as volumizing, balancing, or clarifying. These typically have lighter textures and more effective cleansing action without being as harsh as sulfate shampoos.
Ingredients to seek out include tea tree oil, peppermint, rosemary, or citrus extracts, all of which help cut through oil. Low-poo shampoos (sulfate-free but still cleansing) work well for regular use, while a true clarifying shampoo should be reserved for periodic deep cleans. If you’re co-washing (conditioner-only washing), this method likely isn’t right for oily-scalp curly hair, as it simply doesn’t provide enough cleansing power.
Water-Based vs. Oil-Based Styling Products
Your styling products make a massive difference in how quickly your roots look greasy. Oil-based products, heavy butters, and thick creams will all migrate to your scalp over time or weigh down roots immediately if applied too high. Water-based gels, mousses, and light creams are better choices for oily-prone hair. Check ingredient lists: if oils or butters appear in the first five ingredients, the product is probably too heavy for your roots.
Gel formulas work particularly well because they provide hold without adding oils your scalp doesn’t need. Look for clear or translucent gels rather than creamy ones. Mousses create volume at the roots while adding minimal weight. If you love a certain cream but it makes your roots greasy, try applying it only from your ears down, using a lighter product or even nothing at all near your scalp.
When to Skip Leave-Ins at the Roots
Many curly hair routines treat leave-in conditioner application as non-negotiable, but if you have oily roots, you might be better off without it on your top layers. Apply leave-in only where you need moisture (mid-lengths to ends) and keep it several inches away from your scalp. Some people with oily roots do better skipping leave-in entirely on their top layer of hair, applying it only to the hair underneath where it won’t be visible if roots get greasy.
If you insist on using leave-in, choose the lightest formula possible and apply it to soaking wet hair, which helps it distribute through the length rather than concentrating near the scalp. Spray leave-ins tend to be lighter than cream formulas and give you more control over placement.
Common Mistakes That Make Oily Hair Worse
Over-Washing and the Rebound Effect
It’s tempting to wash your hair every time it feels even slightly oily, but this creates a vicious cycle. Your scalp produces a certain amount of sebum as protection. Strip it away too frequently, and your sebaceous glands work overtime to replace it, often overcompensating. The result is hair that gets oily faster and faster, requiring more frequent washing, which triggers even more oil production.
Breaking this cycle requires patience. You need to train your scalp to produce less oil by washing less often. The first week or two will be uncomfortable. Your hair will likely get oilier than you’d prefer. Push through using dry shampoo and strategic styling. Most people find their scalp adjusts within three to four weeks, producing less oil because it’s no longer being constantly stripped.
Touching and Scrunching Throughout the Day
Every time you touch your scalp or scrunch your roots, you’re transferring oils from your hands onto your hair and mechanically moving existing scalp oils through your curls. It’s a nearly unconscious habit for many people, constantly adjusting their hair, scrunching for volume, or running fingers through curls. Each touch makes the oil problem worse and makes your hair look greasier faster.
Train yourself to keep your hands away from your hair, especially the root area. If you must touch your hair, do it only at the ends. The same goes for hair accessories, hats, or headphones that rest directly against oily areas. These items can both absorb oil (making them need frequent washing) and redistribute oil through your hair when you remove them.
Heavy Products Applied Too Close to the Scalp
The closer to your scalp you apply styling products, the greasier your roots will look and the faster oil will become visible. This is especially true for oils, creams, and butters. Even if a product works beautifully on your ends, it can be disastrous near your roots. Always apply your heaviest products to your ends first, using whatever remains on your hands for your mid-lengths. Approach your roots only with the lightest products or none at all.
Pay attention to how you apply products when your hair is wet. If you’re raking product through from roots to ends, you’re depositing the highest concentration right at the scalp. Instead, apply products in sections starting at ear level or below, or use praying hands method that keeps products on the length of your hair rather than the root area.
Frequently Asked Questions
How often should I wash oily curly hair?
Most people with oily curly hair find balance washing every two to four days, though this varies based on your specific scalp, activity level, and product use. The goal is finding a frequency that keeps your scalp clean without triggering rebound oil production. If you’re currently washing daily, try extending to every other day, then gradually to every third day as your scalp adjusts.
Can drinking more water reduce scalp oiliness?
While staying hydrated supports overall scalp health, there’s no direct evidence that drinking more water reduces sebum production. Oily scalp is primarily influenced by genetics, hormones, and how you treat your hair externally. Focus on adjusting your washing routine and product choices rather than expecting hydration alone to solve the problem.
Why does my hair get oily faster in summer?
Heat and humidity increase sebaceous gland activity, causing your scalp to produce more oil in warmer months. Sweating also makes hair appear greasier. You may need to adjust your routine seasonally, washing slightly more often or using lighter products during summer, then scaling back in cooler, drier months when oil production naturally decreases.
Is it better to use hot or cold water when washing oily hair?
Lukewarm to cool water is best for oily scalp. Hot water stimulates sebaceous glands and can trigger increased oil production, while it also strips away too much natural oil, potentially causing rebound overproduction. Cooler water cleanses effectively without shocking your scalp into overdrive, and it’s also better for preserving your curl pattern.
Will cutting my hair help with oily roots?
Shorter hair won’t change how much oil your scalp produces, but it can make oily roots less noticeable since there’s less length to weigh down. The oil also has less distance to travel on shorter curls. However, cutting your hair is a drastic step for an issue that can usually be managed through proper washing and product techniques.
Conclusion
Managing oily roots while keeping your curls moisturized requires a fundamentally different approach than treating uniformly oily hair. The combination of scalp-focused cleansing, strategic product placement, and patience while your scalp adjusts to a new routine addresses the root cause rather than just treating symptoms. Your curl pattern isn’t working against you; it’s simply revealing where you need to concentrate your efforts, with lightweight products kept away from your scalp and heavier moisture reserved for where it’s actually needed.
Start with one change this week: either extend your time between washes by a single day or commit to keeping all conditioning products at least three inches from your roots. Track how your scalp responds over the next two weeks, noting whether you’re seeing true oil production or product buildup. This single observation will guide everything else, helping you build a routine that finally balances your oily roots with your dry ends instead of fighting your hair’s natural tendencies.
When your baby arrives with a head full of waves, curls, or coils, you might wonder how to care for that delicate texture without causing damage or discomfort. Baby hair requires an entirely different approach than adult hair, with gentler handling, simpler products, and styles that prioritize scalp health over appearance. This guide walks you through safe, age-appropriate styling techniques that honor your baby’s developing curl pattern while protecting those fragile follicles.
Understanding Baby Hair Texture & Development
How Curl Patterns Emerge from Birth to Age 3
The hair your baby is born with often bears little resemblance to their eventual texture. Many babies arrive with fine, straight strands that transform dramatically over the first few years. Some start with tight coils that loosen into looser curls, while others begin with barely-there waves that tighten into defined spirals by their second birthday.
This transformation happens because hair follicles are still maturing. During the first six months, most babies shed their newborn hair entirely, a normal process called telogen effluvium. The hair that grows back reflects their genetic blueprint more accurately, though even this may continue evolving. By 18 to 24 months, you’ll start seeing a more stable curl pattern, though the final texture typically doesn’t settle until age three or even later.
For babies with caring for wavy hair in their genetic background, you might notice S-shaped bends appearing at the roots as new growth comes in. Curly patterns (3a through 3c) usually become visible earlier, sometimes by six months, while coily textures (4a through 4c) may appear tightly coiled from birth or develop their distinctive zig-zag pattern gradually.
Scalp Sensitivity and pH Balance in Infant Hair
Baby skin has a higher pH than adult skin, typically ranging from 6.5 to 7.0 in newborns before gradually becoming more acidic over the first year. This elevated pH makes the scalp more vulnerable to irritation, dryness, and barrier disruption. The sebaceous glands that produce protective oils are also less active in infants, meaning baby hair naturally lacks the moisture shield that adult scalps provide.
Textured hair compounds this challenge. The natural curves and coils in wavy, curly, and coily hair make it harder for those limited scalp oils to travel down the hair shaft. This is why babies with type 2c hair needs or tighter textures often develop dry, brittle strands even with minimal manipulation. Their scalps require thoughtful hydration strategies rather than the harsh cleansing routines marketed for babies with straight hair.
When Permanent Texture Usually Appears
Most hair specialists and pediatric dermatologists agree that permanent texture becomes reliably predictable between ages two and three. Before then, you’re working with a moving target. A baby who appears to have loose waves at six months might develop tight corkscrews by 18 months, or vice versa.
This uncertainty means you should avoid committing to any intensive styling routine based on early observations. Instead, stay flexible and responsive to what you actually see on your baby’s head each month. The understanding porosity of your baby’s hair also develops over time, affecting how moisture penetrates and which products work best as they grow.
Essential Principles for Styling Baby’s Textured Hair
The Low-Manipulation Approach
The golden rule for baby hairstyles is simple: less is always more. Developing follicles sit shallower in the scalp than adult follicles, making them easier to damage through pulling, twisting, or frequent restyling. Every time you manipulate baby hair, you risk creating traction that can permanently damage those follicles or cause temporary hair loss.
Low manipulation means choosing styles that can last several days without redoing, using your fingers instead of tools whenever possible, and accepting that some frizz or looseness is perfectly fine. Your baby’s hair doesn’t need to look “done” or polished. It needs to be healthy, comfortable, and protected from excessive handling that serves adult aesthetic preferences rather than infant wellbeing.
Moisture Retention for Types 2a Through 4c
Moisture is the foundation of healthy baby hair across all curl patterns. For wavy textures (2a through 2c), this might mean a simple spray of water and a lightweight gentle leave-in conditioner applied once daily. Curly patterns (3a through 3c) typically need slightly richer moisturizers, applied to damp hair and sealed with a small amount of natural oil.
Coily hair (4a through 4c) requires the most intentional moisture strategy. These tight curl patterns benefit from the LOC method adapted for babies: a liquid (water or watery leave-in), a light oil (like jojoba or sweet almond), and a cream (fragrance-free baby-safe curl cream) applied in thin layers. The key is using tiny amounts of each product, since baby hair is fine and easily weighed down.
Avoiding Traction and Tension on Developing Follicles
Traction alopecia, a form of hair loss caused by repeated pulling, affects children far more than most parents realize. According to pediatric research on traction alopecia prevention, tight hairstyles in early childhood create damage that may not become visible until years later. The follicles experience chronic inflammation that eventually prevents healthy regrowth.
For babies, this means no tight ponytails, no braids pulled taut at the roots, no elastic bands wrapped multiple times, and no styles that pull the hairline backward. If you can see the scalp being tugged when you create a style, it’s too tight. If your baby fusses or pulls at their hair, the tension is causing discomfort. Even styles that look gentle can cause problems if left in too long or created with too much force.
How Often to Style or Restyle
Most baby hairstyles should last three to seven days, depending on the texture and the style. Wavy hair might need refreshing every two to three days with a water spray and light product reapplication. Curly and coily hair can often go four to seven days in protective styles like loose twists or sectioned puffs before needing a complete restyle.
Daily styling is almost never necessary and usually does more harm than good. Plan your styling sessions around bath time, when hair is already wet and more pliable. Between styling sessions, focus on maintaining moisture and protecting hair during sleep with a satin or silk pillowcase, or a soft cotton bonnet that doesn’t apply pressure to the scalp.
Safe Baby Hairstyles by Curl Type
Gentle Styles for Wavy Hair (2a-2c)
Wavy baby hair looks beautiful when left loose and natural, but if you need to keep it contained, simple side parts with soft clips work well. Look for seamless plastic clips or fabric-wrapped snap clips that don’t pull or snag. A very loose, low ponytail secured with a spiral hair tie (the telephone cord style) distributes tension more evenly than traditional elastics.
For babies with thicker wavy hair that tangles easily, try dividing the hair into two or four loose sections and securing each with a soft scrunchie. This keeps sections separated for easier maintenance without creating the tension of tight styles. You can also experiment with gentle finger coils on damp hair, twirling small sections around your finger and allowing them to air dry for defined waves without heat or products.
Protective Options for Curly Hair (3a-3c)
Curly baby hair thrives in simple protective styles that keep ends tucked away and minimize daily manipulation. Large, chunky twists (four to eight total) work beautifully and can be installed in less than ten minutes. Start with damp, moisturized hair, divide it into sections, and gently twist each section without pulling at the roots. Secure ends by wrapping them around your finger rather than using bands.
The classic puff is another excellent option: gather hair gently at the crown or toward the back of the head, securing it loosely with a soft elastic or fabric scrunchie. The key is sliding the elastic onto already-gathered hair rather than pulling hair through multiple times. You can create two puffs (one on each side) for variety, or a single low puff that places minimal stress on the hairline.
Low-Tension Styles for Coily Hair (4a-4c)
For babies with type 4a coily hair and tighter textures, protective styling becomes especially important because the tight curl pattern makes hair more prone to tangling and breakage. Mini twists (slightly smaller than those for type 3 hair) help maintain definition and reduce knots. Install them on freshly washed, conditioned, and moisturized hair, working in small sections but never pulling tightly.
Bantu knots (small, flat coils pinned against the scalp) work well for special occasions and can be installed loosely for comfort. Thread wrapping, where soft yarn or thread is wrapped around small sections of hair, provides protection without tension, though it requires patience and a gentle hand. The simplest approach is often sectioning hair into four to six parts with soft scrunchies or fabric-covered bands, then moisturizing and maintaining each section independently.
Simple Twists, Braids, and Puffs That Work
When executing any of these styles, remember that baby versions should always be looser, chunkier, and simpler than their adult counterparts. A two-strand twist on a baby should be fat and loose, not tight and narrow. Braids should be limited to two or three large plaits maximum, never small box braids or cornrows that require hours of tension on the scalp.
Start every style on clean, detangled, well-moisturized hair. Work quickly to minimize the time your baby needs to sit still. Have toys, songs, or screen time ready as distraction. If your baby becomes distressed, stop immediately and try again another day. No hairstyle is worth creating negative associations with hair care or causing genuine discomfort to achieve a certain look.
Detangling and Daily Care Techniques
Finger-Detangling vs. Wide-Tooth Combs
Your fingers are the best detangling tool for baby hair. They provide immediate feedback about resistance and allow you to feel knots before they become problematic. Start at the ends and work upward in small sections, gently separating strands with your fingertips. Apply a detangling spray or leave-in conditioner for slip, and never force through a knot by pulling harder.
Wide-tooth combs can be introduced around 12 to 18 months for thicker, longer hair, but they should supplement finger-detangling, not replace it. Choose combs with rounded, seamless teeth and plenty of space between each tooth. The Denman-style brushes and fine-tooth combs marketed for adult curls are far too aggressive for baby scalps. Even wide-tooth combs should be used sparingly, perhaps once or twice weekly rather than daily.
Best Times to Detangle (Wet vs. Dry)
For most textured baby hair, detangling works best on damp (not soaking wet) hair with product applied for slip. This is typically during or right after bath time. Wet hair is more elastic and less prone to breakage than completely dry hair, but it’s also more fragile than many parents realize, so gentleness remains critical.
Wavy hair (types 2a through 2c) can sometimes be detangled when dry using a spray bottle to add light moisture section by section. Curly and coily hair (types 3 and 4) should almost always be detangled wet with generous leave-in conditioner or a dedicated detangling product. Never attempt to detangle coily hair when dry unless it’s been recently moisturized and remains soft and pliable.
Managing Common Issues: Tangles, Dryness, Cradle Cap
Persistent tangles usually signal insufficient moisture or too much time between detangling sessions. Address this by increasing your moisturizing routine and detangling more frequently before knots have time to tighten. For stubborn knots, apply extra conditioner or oil directly to the tangle, let it sit for a few minutes, then work it apart slowly with your fingers.
Dryness in baby hair typically responds to a better moisture routine rather than heavier products. Focus on water-based leave-ins, seal with lightweight oils, and protect hair during sleep. Avoid products with drying alcohols (like denatured alcohol or SD alcohol) and limit cleansing to once weekly or even less frequently unless the scalp becomes dirty.
Cradle cap (infantile seborrheic dermatitis) appears as yellowish, scaly patches on the scalp and affects babies across all hair textures. Treat it by applying a small amount of natural oil (coconut, olive, or jojoba) to affected areas, letting it sit for 10 to 15 minutes, then gently massaging with a soft brush or washcloth before shampooing. According to AAP infant skin and hair care recommendations, most cases resolve within the first year, but persistent cases should be evaluated by a pediatrician.
Choosing Safe Products for Baby’s Hair
Hypoallergenic and pH-Balanced Ingredients
Baby hair products should maintain a pH between 4.5 and 6.0 to support the developing scalp barrier. Look for products explicitly labeled pH-balanced for infants, or test products yourself using pH strips if you’re using curl-specific products not marketed for babies. Ingredients should be minimal and recognizable, avoiding long lists of unpronounceable chemicals.
Hypoallergenic formulas reduce the risk of allergic reactions, but they’re not guaranteed safe for every baby. Watch for signs of sensitivity including redness, excessive scratching, rashes, or changes in hair texture after introducing new products. Patch-test new products on a small area of scalp for 24 to 48 hours before full application.
Sulfate-Free, Fragrance-Free Formulas
Sulfates (like sodium lauryl sulfate and sodium laureth sulfate) strip natural oils aggressively, leaving baby hair and scalp dry and vulnerable. Choose sulfate-free cleansers or even just water washing for the first several months. Fragrance, whether synthetic or natural, is a leading cause of skin irritation in babies. Opt for fragrance-free or unscented formulas, understanding that “unscented” sometimes means fragrance has been added to mask natural smells, while “fragrance-free” truly contains no fragrance ingredients.
Essential oils, though natural, can be irritating or allergenic for babies. Avoid products with lavender, tea tree, eucalyptus, or peppermint oils, especially for babies under six months. When fragrance is present in baby-specific curl products, it should appear near the end of the ingredient list, indicating minimal concentration.
Simple Moisturizers and Natural Oils
The best moisturizers for baby hair are straightforward: water-based leave-in conditioners with minimal ingredients, simple aloe vera gel, or pure vegetable glycerin diluted with water. For sealing moisture, stick with single-ingredient natural oils like jojoba (which closely mimics scalp sebum), sweet almond oil, avocado oil, or fractionated coconut oil. These absorb well without leaving heavy buildup on fine baby hair.
Shea butter and coconut oil (solid, non-fractionated) work well for many babies with coily hair, but they can be too heavy for finer textures. Start with tiny amounts and observe how your baby’s hair responds. If hair looks greasy or limp, the product is too heavy. If it stays dry and frizzy despite application, you may need a different oil or need to apply to wetter hair for better absorption.
When to Introduce Styling Products
Most babies don’t need styling products beyond moisturizer and oil until at least their first birthday, and many do fine without them until age two or three. When you do introduce light styling products (like curl creams or gels), choose formulas specifically designed for children, free from harsh hold agents, and easy to wash out with water alone or gentle cleanser.
Avoid products containing parabens, phthalates, mineral oil, petrolatum, or dimethicone in the first two years. These ingredients either pose potential health concerns or create buildup that’s difficult to remove from delicate hair. Watch for products containing proteins (like hydrolyzed wheat protein or keratin), which can cause stiffness or dryness in some babies. Introduce one new product at a time so you can identify the source if problems develop.
Frequently Asked Questions
How often should I wash my baby’s curly hair?
Most babies with textured hair need washing only once per week or even every 10 to 14 days. Overwashing strips the limited natural oils their scalps produce, leading to dryness. Between washes, refresh hair with water sprays and moisturizing leave-in products as needed. If your baby has cradle cap, active scalp issues, or gets genuinely dirty, you may need to wash more frequently, but daily washing is rarely necessary for curl health.
Can I use adult curl products on my baby?
Some adult curl products are safe for babies if they’re free from harsh ingredients, but many contain proteins, strong hold agents, or essential oils unsuitable for infant scalps. Check every ingredient carefully and prioritize products specifically formulated for children. Adult products designed for mature, color-treated, or damaged hair often contain ingredients too intense for developing hair and sensitive baby skin.
When can I start putting my baby’s hair in braids?
You can begin very loose, chunky braids around 12 to 18 months if your baby’s hair is long enough and they can tolerate sitting for the process. Never attempt tight braiding, cornrows, or intricate patterns on babies or toddlers. Their follicles are too vulnerable to traction damage, and the time required creates unnecessary stress. Large, loose plaits that can be installed in under five minutes are the only appropriate braiding for this age group.
Is it normal for my baby’s curl pattern to change?
Completely normal. Most babies experience at least one significant texture change between birth and age three, with some seeing multiple shifts. Hair may start straight and become curly, begin curly and loosen to wavy, or change density and thickness without altering curl pattern. These changes reflect ongoing follicle maturation and hormonal shifts that are part of normal infant development.
What should I do if my baby hates having their hair touched?
Respect their boundaries and work in very short sessions, even if it means leaving hair loose and simple for months. Make hair time positive with songs, special toys that only come out during hair care, or favorite videos. Never force a child to sit through a lengthy styling session. Choose wash-and-go approaches or extremely simple styles that require minimal manipulation. As they mature and gain more body control, tolerance typically improves.
How can I prevent my baby from pulling out their hair?
Hair pulling in babies can signal discomfort from too-tight styles, scalp irritation, or developmental exploration. First, eliminate any styles creating tension. Check for scalp issues like dryness, eczema, or product reactions. For babies who pull hair as a self-soothing behavior (like thumb-sucking), gently redirect to another comfort object and keep styles smooth and flat against the head so there’s less to grab. Persistent hair-pulling that creates bald patches should be discussed with your pediatrician.
Conclusion
Caring for your baby’s textured hair comes down to patience, gentleness, and accepting that simplicity serves them better than elaborate styling. The curl pattern you see today will likely shift and change, so building flexible habits around moisture, low manipulation, and scalp health creates a foundation that adapts as your baby grows. Focus on keeping hair clean, hydrated, and free from tension rather than achieving any particular look, and you’ll support healthy follicle development that serves them for life.
Start with one small improvement this week: perhaps switching to a gentler detangling method, introducing a simple moisture routine, or loosening a style you realize pulls too tightly. Your baby’s hair doesn’t need perfection; it needs protection, and you’re already providing that by seeking out information and approaching their care thoughtfully. Trust your instincts, watch how your baby’s unique texture responds, and remember that healthy hair at this age looks like happy, comfortable babies, not salon-perfect styles.
If you have tiny, springy coils that form a distinctive S-pattern when properly moisturized, you likely have type 4A hair. This beautiful coily texture offers incredible versatility, but it also comes with specific care requirements that differ significantly from looser curl patterns. Understanding how to work with your 4A coils rather than against them transforms frustrating hair days into a consistent, manageable routine that celebrates your natural texture.
What Is 4A Hair? Understanding the Coily Curl Pattern
The 4A S-Pattern: Structure and Appearance
Type 4A hair features tightly coiled curls that form a visible S-pattern when stretched or properly moisturized. Unlike wavy or looser curly patterns, these coils are densely packed and spring back dramatically when pulled. The individual curl circumference typically measures around the width of a crochet needle or slightly larger, creating a texture that’s both delicate and resilient.
When healthy and hydrated, type 4A hair displays a clear curl definition with noticeable separation between coils. The hair naturally grows outward and upward from the scalp rather than hanging down, creating volume and shape. Many people with this texture notice their curls appear more defined when wet and slightly less distinct when completely dry, which is perfectly normal given the hair’s structure.
The defining characteristic is that you can see individual coils without stretching the hair. This sets 4A apart as the most loosely coiled of the type 4 category, though it’s still considerably tighter than understanding your hair’s porosity and curl pattern helps explain why certain products work while others fall flat.
How 4A Differs from 4B and 4C Hair Types
The primary distinction between 4A and its coilier counterparts lies in curl definition and pattern visibility. While 4A forms clear S-shaped coils, 4B hair creates a sharper Z-pattern with less curl definition and more of a cottony texture. The coils in 4B hair bend at more severe angles, creating a denser appearance overall.
Type 4C hair takes density and tightness even further, with minimal visible curl pattern and maximum shrinkage. Where 4A might shrink to 50-75% of its actual length, 4C can shrink up to 75% or more. The curl circumference in 4C is also significantly smaller, sometimes as fine as a pen spring or even tighter.
These differences matter for product selection and styling approaches. While 4A hair often responds well to lightweight mousses and can achieve wash-and-go styles with relative ease, type 4C styling typically requires heavier products and different manipulation techniques. Understanding where your hair falls on this spectrum prevents frustration from following advice meant for different textures.
Natural Shrinkage: Why 4A Hair Appears Shorter Than It Is
Shrinkage is one of the most misunderstood aspects of 4A coily texture. Your hair might measure 10 inches when straightened but appear only 4-5 inches in its natural state. This dramatic difference occurs because each tiny coil acts like a spring, compressing the hair’s true length into a compact formation.
Rather than viewing shrinkage as a problem to solve, it’s actually a sign of healthy hair with good elasticity. Hair that has lost its ability to shrink often indicates damage or protein overload that has compromised the curl structure. The coils contract because they’re functioning exactly as they should.
That said, you can temporarily reduce shrinkage for styling purposes through stretching techniques like banding, African threading, or blow-drying on cool settings with a diffuser attachment. These methods showcase length while still honoring your natural texture, unlike heat-based straightening that can permanently alter curl patterns with repeated use.
The Science Behind 4A Hair Characteristics
Hair Shaft Structure and Porosity in Coily Hair
The structure of 4A hair creates unique care challenges rooted in biology. According to research on hair shaft structure and ethnic variations, coily hair types typically have more cuticle layers that lift more easily, creating higher porosity and increased vulnerability to moisture loss.
Each hair strand consists of the medulla (inner core), cortex (middle layer containing proteins and pigments), and cuticle (protective outer layer of overlapping scales). In 4A hair, the tight coiling pattern means the cuticle scales don’t lie as flat as they do in straighter hair types. This creates more gaps where moisture can escape and where physical damage can occur during manipulation.
Porosity plays a crucial role in how your 4A hair behaves. High porosity hair absorbs moisture quickly but also loses it rapidly, while low porosity hair struggles to absorb moisture initially but retains it better once hydrated. Most 4A hair leans toward higher porosity due to the structural factors mentioned, though genetics and damage history also influence this characteristic.
Why 4A Hair Struggles with Moisture Retention
The geometry of coily hair creates a moisture retention problem that straight hair simply doesn’t face. Sebum, the natural oil produced by your scalp, travels down straight hair shafts easily due to gravity and the smooth pathway. In 4A hair, those tight coils create a obstacle course that sebum struggles to navigate, leaving the hair shaft under-moisturized even when your scalp produces adequate oil.
Additionally, the frequent bends and turns in each coil create weak points where the hair is more susceptible to breaking. When hair is dry and brittle, these vulnerable spots break more easily during manipulation, leading to the breakage that many people with 4A coils experience at the crown, nape, or around the hairline.
Environmental factors compound this challenge. Low humidity pulls moisture from hair, while high humidity can cause the cuticle to swell and lift further. This explains why your hair might behave differently across seasons or when traveling to different climates. Building moisture into your routine through multiple methods addresses this biological reality rather than fighting against it.
Density, Strand Thickness, and Natural Sebum Distribution
Hair density (how many individual strands grow per square inch) and strand thickness (the diameter of each strand) vary independently of curl type. You can have fine 4A hair with high density, or thick 4A strands with low density. These factors determine how much product you need and which styling techniques work best.
Fine, high-density 4A hair often benefits from lighter products applied in thin layers to avoid weighing down the curls. Thick, lower-density 4A hair typically needs richer formulations and more product to achieve adequate coverage and moisture. Misjudging your density and thickness combination leads to either product buildup or insufficient hydration.
The sebum distribution challenge affects density perception too. Because natural oils don’t coat the strands effectively, 4A hair can appear duller and less voluminous than it actually is when dry. Proper moisturizing techniques reveal the hair’s true body and shine by compensating for what the scalp cannot deliver on its own.
Essential Care Routine for Healthy 4A Hair
Cleansing Without Stripping: Shampoo Frequency and Technique
How often you wash 4A hair depends on your lifestyle, product buildup, and scalp condition. Most people with this texture thrive with washing every 7-14 days, though those who exercise heavily or use heavy styling products might need more frequent cleansing. The key is choosing sulfate-free shampoos that clean without stripping essential moisture.
When shampooing, focus primarily on the scalp rather than the length of your hair. Work the product in using gentle circular motions with your fingertips (never nails), allowing the suds to cleanse the hair shaft as you rinse rather than scrubbing the coils vigorously. This approach prevents unnecessary tangling and maintains the integrity of your curl pattern.
Consider pre-poo treatments before shampooing to add an extra moisture buffer. Applying coconut oil, olive oil, or a commercial pre-poo product to dry hair 30 minutes before washing helps prevent the hygral fatigue that occurs when hair swells and contracts too rapidly during the washing process. This simple step significantly reduces breakage for many people with 4A texture.
Deep Conditioning Protocol: Timing and Product Selection
Deep conditioning isn’t optional for 4A hair; it’s foundational maintenance. Plan to deep condition for at least 30 minutes with heat (from a hooded dryer, steamer, or heated cap) every single wash day. The combination of conditioning ingredients and heat allows moisture and proteins to penetrate the hair shaft more effectively than products left to work at room temperature.
Choose deep conditioners based on your hair’s current needs. If your hair feels mushy, stretches excessively, or lacks definition, you need a protein treatment to rebuild structure. If it feels brittle, breaks easily, or appears dull, reach for a moisture-focused deep conditioner with humectants and emollients. Alternating between protein and moisture treatments every other wash often works well for maintaining balance.
The American Academy of Dermatology hair care guidelines emphasize the importance of proper conditioning for textured hair. After rinsing your deep conditioner with cool water to help seal the cuticle, don’t skip the leave-in step that follows.
Daily Moisture Maintenance: Leave-Ins and Refreshing Methods
Between wash days, 4A hair needs consistent moisture replenishment. This is where leave-in conditioners become your most valuable tool. Apply a creamy leave-in to damp (not soaking wet) hair after every wash, using a praying-hands method or raking through in sections to ensure even distribution.
For daily refreshing, create a simple spray using water, a few drops of your leave-in conditioner, and a light oil like jojoba or grapeseed in a spray bottle. Spritz sections as needed, scrunch gently to reactivate your styling products, and allow to air dry or use a diffuser on low heat. This maintains definition without requiring a full wash.
Some people prefer the LOC method (liquid, oil, cream) or LCO variation (liquid, cream, oil) for maximum moisture retention. Experiment with layering sequences to discover what your specific 4A coils prefer. The “liquid” can be water or a water-based leave-in, the “oil” seals moisture inside the shaft, and the “cream” provides additional hydration and hold.
Detangling Strategies to Minimize Breakage
Never detangle 4A hair when dry. The friction and stress cause significant breakage that accumulates over time. Instead, work on soaking wet hair with plenty of conditioner or a dedicated detangling product providing slip. This allows the comb or brush to glide through rather than catching and snapping the delicate coils.
Start from the ends and work upward in small sections, holding the hair above where you’re working to prevent pulling on the roots. Wide-tooth combs work well for initial detangling, while some people achieve excellent results detangling with a Denman brush for curl definition after removing major tangles. Your fingers are also valuable tools for gently separating stubborn knots.
Plan your detangling sessions strategically rather than touching your hair constantly throughout the week. Many people with 4A texture detangle thoroughly on wash day, then leave their hair alone in protective styles until the next wash. This low-manipulation approach preserves length and reduces the mechanical damage that comes from repeated combing.
Styling Techniques That Work for 4A Coils
Wash-and-Go Application: Layering Products for Definition
The wash-and-go is a signature style for 4A hair when executed properly. The key is applying products to soaking wet hair in thin, controlled layers rather than dumping a handful of cream on partially dry coils. This technique, called “wet styling,” allows products to distribute evenly and coat each strand from root to tip.
Start with a leave-in conditioner on dripping wet hair, then follow with a curl cream or curl-defining mousse for hold. Some people add a gel as a final layer to combat frizz and lock in the style. Use the shingling method (smoothing products down small sections with your fingers) or the rake-and-shake technique (raking product through, then shaking the section to encourage clumping) for defined, separated coils.
The drying process matters as much as application. Air-drying takes hours but minimizes heat damage. Diffusing on low heat speeds things up while still protecting your curl pattern. Avoid touching your hair as it dries to prevent frizz, and don’t panic if it looks questionable in the intermediate stages. Final results appear once the hair is completely dry.
Twist-Outs and Braid-Outs for Stretched Styles
When you want to showcase length or change your look, twist-outs and braid-outs offer versatile options that work beautifully on 4A texture. These styles stretch the hair while creating a defined, elongated curl pattern different from your natural wash-and-go formation. For more inspiration, explore styling ideas for 4A hair that demonstrate various twist and braid techniques.
Apply your styling products to stretched, damp hair (not soaking wet for these styles), then divide into medium-sized sections. Two-strand twists are the most popular option for 4A hair because they’re relatively quick and create beautiful definition. Smaller twists yield tighter curl patterns, while larger sections produce looser waves. Allow to dry completely before unraveling, ideally overnight or for at least 8 hours.
When taking down your twists or braids, work carefully to separate the coils without creating frizz. Use a light oil on your fingertips and gently pull apart each twist, then fluff at the roots for volume. These styles typically last 3-5 days with proper nighttime maintenance using a satin bonnet or pillowcase.
Protective Styling: Benefits and Best Practices
Protective styles tuck away your ends and minimize daily manipulation, giving your hair a break from styling stress. Box braids, Marley twists, faux locs, and updos all qualify when done correctly. The goal is protecting fragile points from breakage while maintaining scalp health and preventing tension damage.
Before installing any protective style, ensure your hair is clean, deep-conditioned, and properly moisturized. Don’t assume the style itself provides hydration. During wear, continue moisturizing your scalp and any exposed hair using lightweight sprays or oils that won’t cause buildup. Never leave protective styles in beyond their recommended timeframe, typically 6-8 weeks maximum depending on the style.
Watch for signs that a protective style is too tight: bumps along the hairline, tenderness, or headaches within the first 48 hours. These indicate tension that can lead to traction alopecia with repeated wear. A proper protective style should feel comfortable from day one. Don’t hesitate to have overly tight styles redone or removed early to preserve your edges and overall hair health.
Heat Styling Considerations and Safe Temperatures
Heat styling 4A hair requires extra caution due to the texture’s inherent fragility. If you choose to straighten or use hot tools, always apply a heat protectant to every section before applying heat. These products create a barrier that reduces direct heat damage, though they don’t eliminate risk entirely.
Keep temperatures at 350°F (177°C) or below for 4A hair. Higher temperatures might seem necessary for stubborn coils, but they cause cumulative damage that permanently alters your curl pattern. Use a blow dryer with a concentrator attachment on medium heat, keeping it moving constantly rather than focusing heat on one spot. When flat ironing, a single pass per section on properly dried hair is safer than multiple passes.
Space heat styling sessions at least several weeks apart to allow your hair to recover. The more frequently you apply heat, the more you compromise your hair’s ability to revert to its natural pattern and retain moisture. Many people reserve heat for special occasions while relying on heatless stretch methods for everyday styling.
Product Selection Guide for 4A Hair
Ingredients That Support Moisture Retention
Understanding ingredient labels transforms product shopping from guesswork into informed decision-making. For 4A hair, look for humectants like glycerin, honey, aloe vera juice, and panthenol in your leave-ins and styling products. These ingredients attract moisture from the environment into your hair shaft, though they can backfire in extremely dry climates where they may pull moisture out instead.
Emollients smooth the hair cuticle and add slip, making detangling easier while reducing friction damage. Shea butter, mango butter, avocado oil, and jojoba oil all function as excellent emollients for 4A coils. They create a protective coating that helps seal in the moisture provided by humectants.
Proteins strengthen the hair structure but require careful balance. Hydrolyzed wheat protein, silk amino acids, and keratin help rebuild damaged areas and add structure to fine 4A hair. However, too much protein causes brittleness and breakage. If your hair feels hard or straw-like after using a product, it likely contains more protein than your hair currently needs.
Styling Products: Creams, Gels, and Mousses
Creams provide moisture and definition with varying levels of hold depending on their formulation. They work well as the middle layer in a styling routine, offering conditioning benefits along with some curl enhancement. Look for creams with a balance of moisturizing ingredients and light hold agents like polyquaternium compounds.
Gels deliver maximum hold and frizz control, creating the cast or crunch that many people with 4A hair use to preserve their wash-and-go styles for multiple days. Once the gel fully dries, you scrunch out the crunch to reveal soft, defined coils underneath. Flaxseed gel offers a natural option, while commercial gels with aloe and glycerin provide strong hold with added moisture benefits.
Mousses combine lightweight application with decent hold, making them ideal for fine or easily-weighed-down 4A hair. They distribute evenly without heavy buildup and often dry faster than cream-gel combinations. The key is finding a mousse formulated for textured hair rather than straight hair, as the ingredient profiles differ significantly.
What to Avoid: Drying Alcohols and Harsh Sulfates
Not all alcohols damage hair, but short-chain drying alcohols like SD alcohol, denatured alcohol, and isopropyl alcohol can strip moisture from already-dry 4A coils. These often appear in gels and hairsprays for quick-drying properties. Fatty alcohols like cetearyl alcohol and stearyl alcohol are beneficial, providing slip and conditioning, so don’t avoid a product simply because “alcohol” appears on the label.
Sulfates like sodium lauryl sulfate and sodium laureth sulfate cleanse powerfully but too harshly for most 4A hair. They strip natural oils along with dirt and buildup, leaving hair squeaky clean but desperately dry. Gentler alternatives include cocamidopropyl betaine, decyl glucoside, and coco betaine, which clean effectively without the harsh stripping effect.
Mineral oil and petrolatum create debate in the natural hair community. While they seal moisture effectively, they can also block additional moisture from entering if applied to dry hair or used too heavily. If you use these ingredients, apply them as the final step on already-moisturized hair, and clarify regularly to prevent buildup that dulls your coils.
Troubleshooting Common 4A Hair Challenges
Combating Dryness and Brittleness
Persistent dryness despite regular moisturizing often indicates porosity issues or product selection problems. High porosity 4A hair loses moisture as quickly as you add it, requiring sealants like heavy butters or oils to trap hydration inside the shaft. Try the LOC method with an emphasis on the oil layer to create a more effective moisture barrier.
Low porosity 4A hair struggles to absorb moisture initially, leading to product sitting on top of the hair rather than penetrating. Heat helps by temporarily lifting the cuticle, so use a heated cap during deep conditioning sessions and focus on lighter, water-based products that won’t build up. Clarifying monthly removes the barrier that prevents moisture absorption.
Brittleness specifically signals protein overload or severe moisture depletion. If your hair breaks with minimal tension and feels hard or straw-like, eliminate protein-containing products temporarily and focus exclusively on moisture for 2-3 weeks. If brittleness persists, the damage may require a trim to remove irreparably damaged ends that can’t be saved with products alone.
Managing Tangles and Single-Strand Knots
Single-strand knots, affectionately called fairy knots, plague 4A hair because the coils literally tie themselves into knots. While you can’t completely prevent them, you can minimize their formation by keeping hair stretched in protective styles, maintaining excellent moisture levels (dry hair tangles more easily), and trimming regularly to remove damaged ends that knot more readily.
For existing tangles, patience prevents breakage better than force. Saturate the tangled section with conditioner or a dedicated detangler, then gently work from the very ends upward using your fingers or a wide-tooth comb. If a knot resists, add more product and let it sit for a few minutes before trying again. Sometimes strategic trimming of a stubborn knot preserves more length than aggressive detangling that breaks multiple strands.
Nighttime maintenance drastically impacts tangling. Sleeping on cotton pillowcases creates friction that roughs up the cuticle and encourages knots. Switch to satin or silk pillowcases, or protect your hair in a satin bonnet or scarf. Pineappling (gathering hair loosely at the crown) or loose braiding before bed keeps coils organized and separated overnight.
Dealing with Uneven Curl Definition
Different curl patterns across your head are completely normal. Your nape might have a looser pattern than your crown, or one side might coil tighter than the other due to differences in density, porosity, or even how you sleep. Rather than fighting these variations, adjust your product application to meet each section’s needs.
Sections with less definition often need more product, different application techniques, or additional manipulation to encourage clumping. Try the shingling method in stubborn areas while using faster techniques like rake-and-shake in sections that define easily. Some people find that finger-coiling loose sections while leaving tighter coils alone creates more uniform overall appearance.
Heat damage causes uneven definition that won’t respond to product adjustments. If certain sections won’t curl no matter what you try, particularly around the areas where heat is typically applied first (front, crown), you may be dealing with heat-altered hair. These sections require protein treatments, intensive moisture, and time to gradually improve, though severely damaged hair may need trimming as it grows out.
Breakage Prevention at Fragile Points
The hairline, nape, and crown are breakage hotspots for 4A hair due to increased manipulation, tension, and environmental exposure. Edges thin from tight hairstyles, constant smoothing for sleek looks, or harsh edge control products containing drying alcohols. Give your edges regular breaks from tension and switch to conditioning edge products rather than gels.
Crown breakage often results from mechanical damage during detangling or from rubbing against headrests and pillows. This area typically has finer, more fragile hair that requires gentler handling. When detangling, work this section last after your products have had maximum time to provide slip, and use extra caution with your manipulation techniques.
Nape breakage stems from friction against collars, scarves, and hooded jackets, plus this area’s tendency toward dryness. Keep the nape moisturized even when wearing protective styles, and tuck it into satin-lined caps during winter rather than leaving it exposed to rough fabrics. Regular protein treatments specifically on fragile points rebuild strength without overloading the entire head with protein.
Frequently Asked Questions About 4A Hair
How often should I wash my 4A hair?
Most people with 4A hair thrive washing every 7-14 days, though individual factors like exercise frequency, product buildup, and scalp condition influence the ideal schedule. Weekly washing works well if you use heavy products or exercise daily, while biweekly washing suits those who use lighter products and don’t experience scalp issues. Listen to your hair and scalp rather than following a rigid schedule.
Can 4A hair grow long?
Absolutely. 4A hair grows at the same rate as other textures (approximately half an inch per month on average), but retention is the challenge. The coily structure creates natural weak points where breakage occurs more easily than in straighter hair. With proper moisture, gentle handling, protective styling, and regular trims to remove damaged ends, 4A hair can grow to impressive lengths. The key is retaining the length you grow rather than breaking it off through poor care practices.
Why does my 4A hair feel crunchy after styling?
Crunchiness typically comes from gel or mousse creating a protective cast around your curls. This is intentional and beneficial for preserving definition. Once your hair is completely dry (which can take 6-12 hours depending on density and drying method), scrunch your hair with a light oil on your hands to “scrunch out the crunch.” This breaks the gel cast, revealing soft, defined coils underneath while maintaining the hold and frizz control the product provided.
Is it better to detangle 4A hair wet or dry?
Always detangle 4A hair when wet and coated with a conditioner or detangling product that provides slip. Dry detangling causes significant breakage because the hair lacks the elasticity and smoothness needed to safely separate tangled coils. The only exception is if you’re carefully finger-detangling very gently before washing, but even then, most hair professionals recommend saving thorough detangling for when hair is saturated with product.
Do I need to use different products in summer versus winter?
Seasonal adjustments often improve results with 4A hair. In humid summer months, you might need stronger-hold gels and less glycerin to combat frizz, while dry winter air typically requires heavier moisturizers and more frequent deep conditioning to prevent brittleness. Some people switch from lighter lotions to heavier creams and butters in winter, then reverse in summer when those products might feel too heavy in the heat.
How can I reduce shrinkage without using heat?
Several heatless methods stretch 4A hair to showcase length. Banding involves wrapping small elastic bands down the length of sections to gently stretch as hair dries. African threading uses thread wound around sections for similar results. Twist-outs and braid-outs naturally elongate the hair while creating definition. Stretching on damp rather than soaking wet hair also reduces shrinkage. These methods maintain hair health while providing the stretched look many people prefer.
Conclusion
Caring for type 4A curls successfully comes down to understanding and working with your hair’s natural structure rather than fighting against it. The moisture retention challenges, shrinkage, and delicate coil formation aren’t flaws to fix but characteristics to embrace through targeted techniques. When you build a routine around consistent hydration, gentle manipulation, and strategic product selection, your 4A coils transform from frustratingly unpredictable to reliably beautiful.
Start with one immediate change: if you’re not deep conditioning weekly with heat, make that your priority this week. This single adjustment addresses the moisture deficit at the root of most 4A hair struggles and creates the foundation for everything else to work better. Your coils are capable of incredible definition, versatility, and growth when you give them the specific care they need to thrive.